Noitom PN Link Setup Guide
Preparation
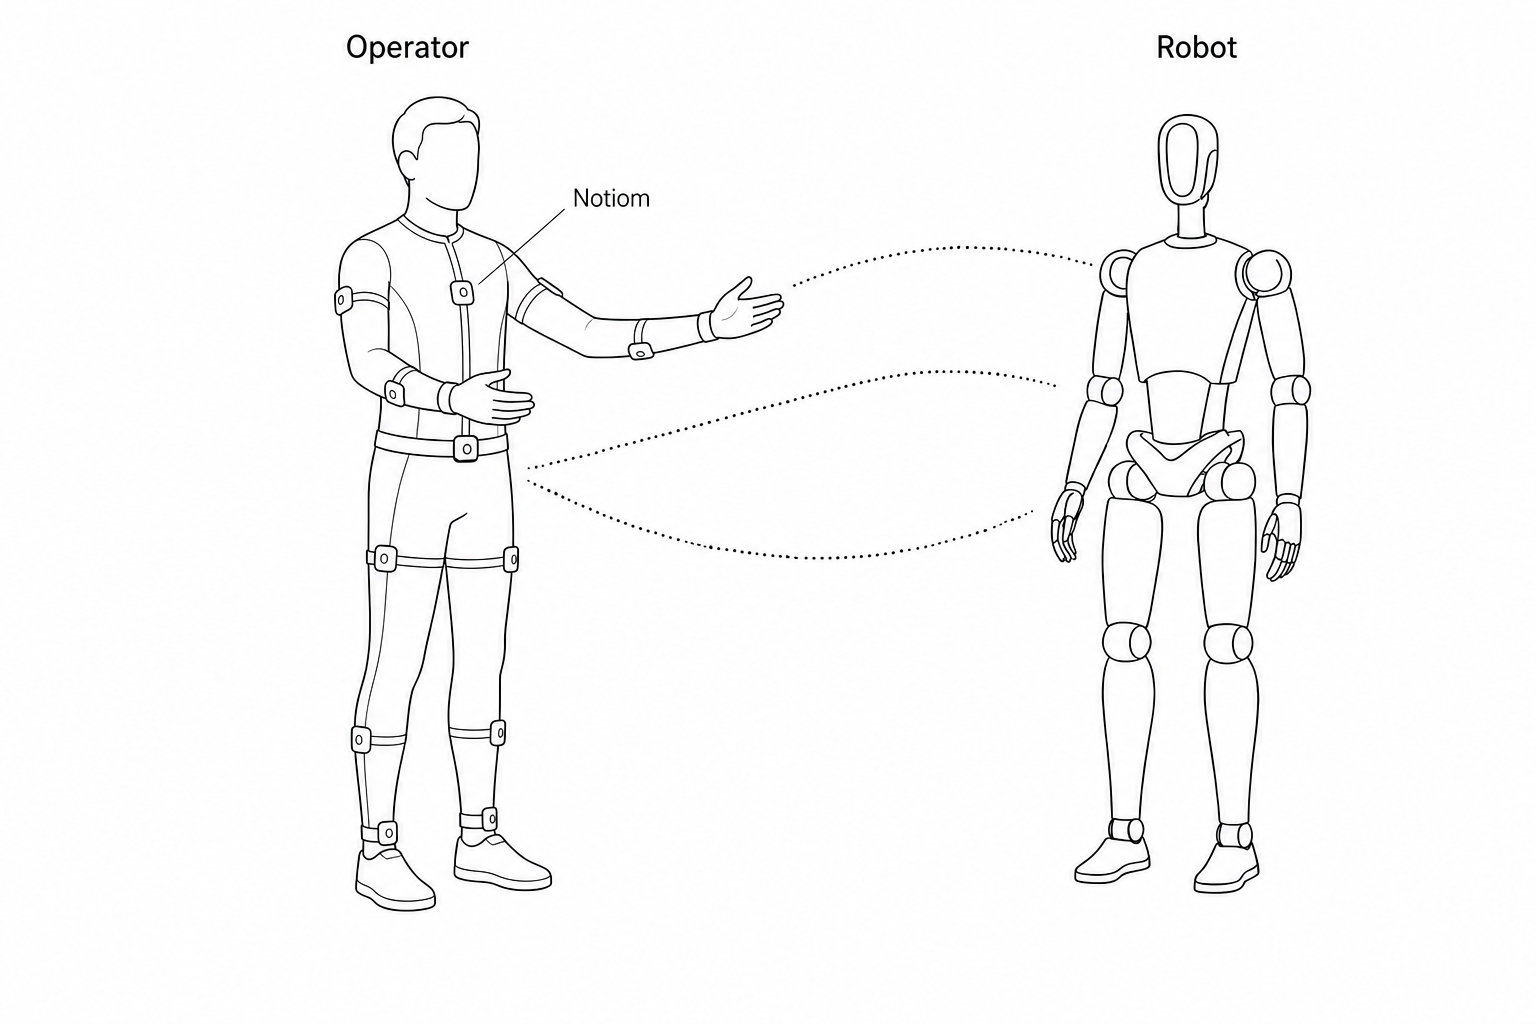
Teleoperation device side
| Device | Quantity | Description | Notes |
|---|---|---|---|
| PND robot | 1 | Adam series robot | Configure teleoperation program |
| User Computer | 1 | Windows recommended | Install the official Noitom mocap software Axis Studio 3, connect the suit, and calibrate |
| Noitom PN Link | 1 | Half-body or full-body configuration depending on robot model | Follow the official Quick Start Guide and Noitom tutorial video to wear the suit correctly |
The official guide describes wireless connection between the suit and PC. You can also use wired connection:
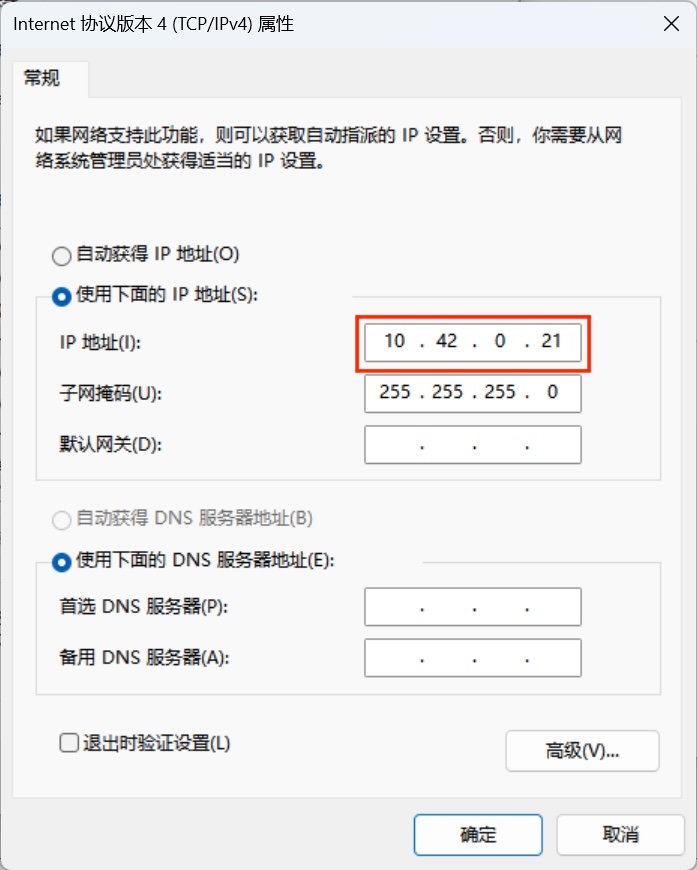
Wired connection to the mocap suit
Connect your PC and the mocap suit with an Ethernet cable. Set the PC network interface to the same subnet as the suit: 10.42.0.xxx, subnet mask 255.255.255.0.
Open Axis Studio 3 → click Settings:
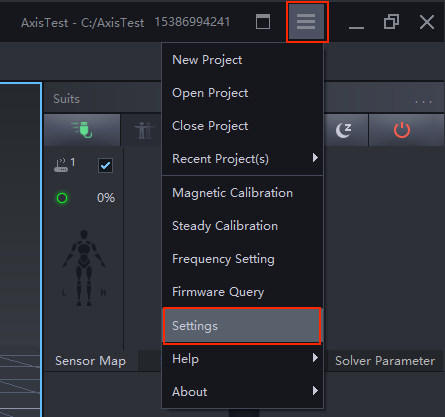
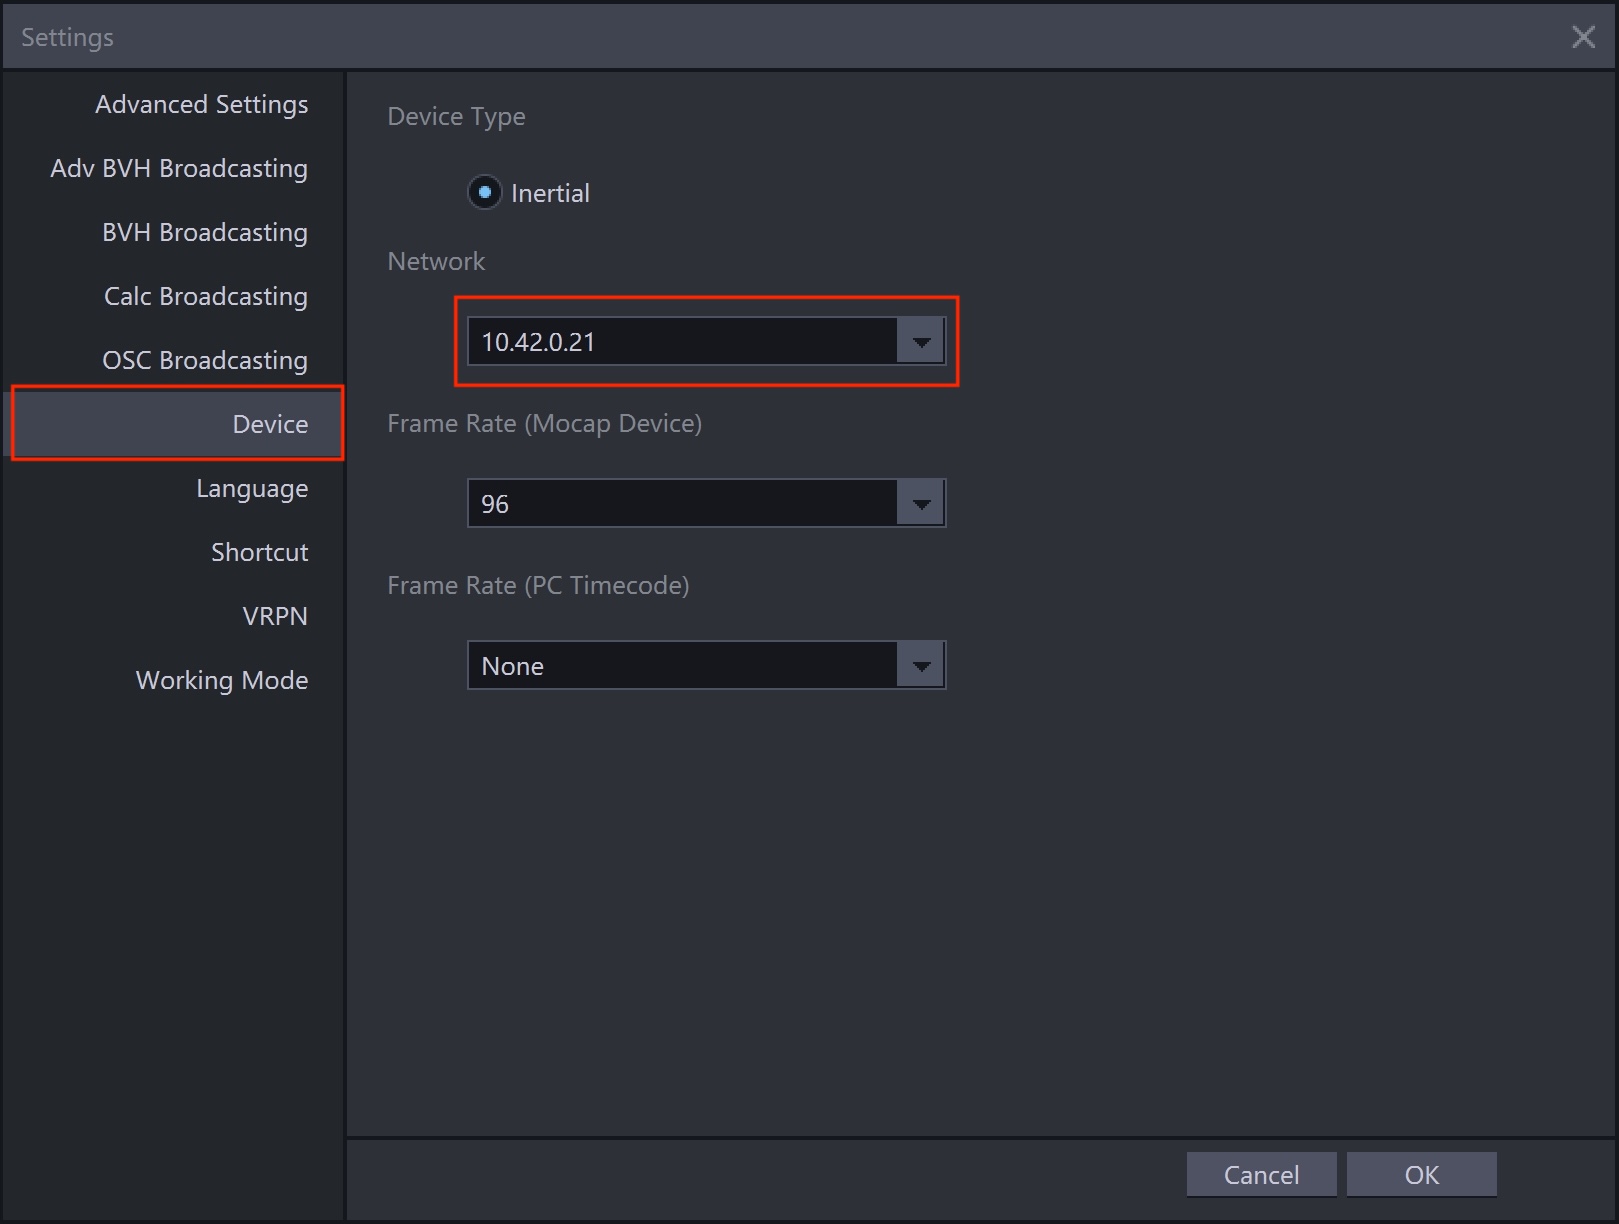
Under Device → Network, select an IP in the same subnet as the suit: 10.42.0.XXX:
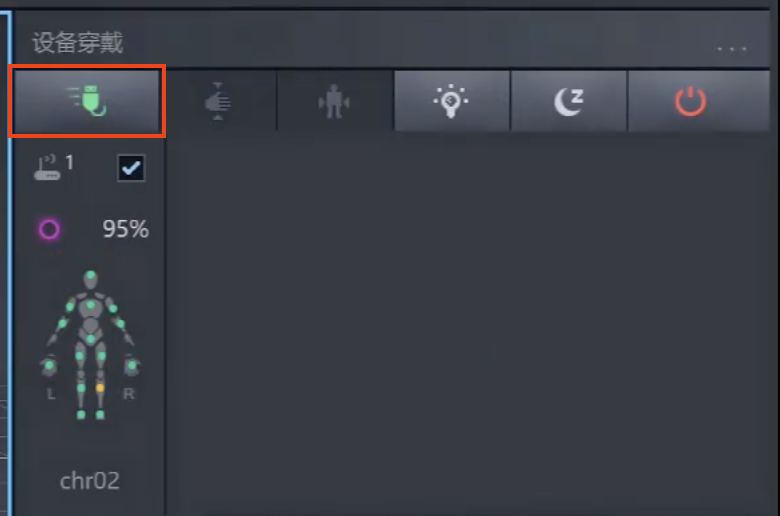
Click the green icon to connect sensors:
Robot side
Follow the standard boot process to start the robot. Ensure your PC and the robot are on the same network segment. See network connection.
-
On your PC, open a terminal and connect to the robot.
-
Install the teleoperation program (requires internet; skip if already installed).
Operation
Run the teleoperation program
ssh pnd-humanoid@192.168.XX.XX # Replace XX.XX with the actual IP (on the back of the remote control handle); default password: pndxyz
source /opt/pnd/pnd_teleop/setup_cli.bash
# Choose the command for your model:
# Adam U
spteleop teleop adam_u noitom pinocchio
# Adam Pro
spteleop teleop adam_pro noitom pinocchio
# Adam SP
spteleop teleop adam_sp noitom pinocchio
Axis Studio 3 settings
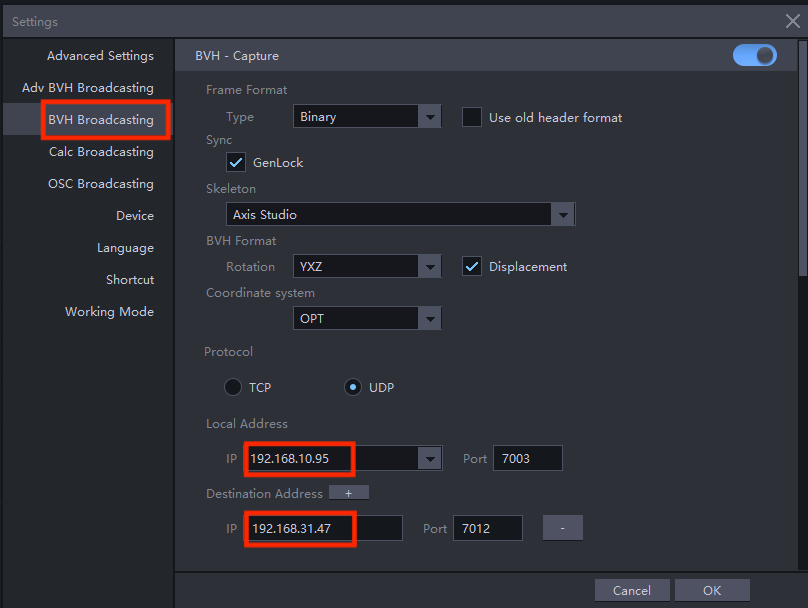
Open Axis Studio 3 → click Settings:
Enable BVH data broadcast and send motion data to the robot IP via UDP:
- Local address: PC Wi‑Fi IP
192.168.XX.XX - Target address: robot IP
192.168.XX.XX, port7012
Visualization preview
- Install and launch Foxglove Studio on your PC.
- Sign in and click Open Connection.

- Connect via WebSocket:
ws://localhost:8765(replacelocalhostwith the robot IP).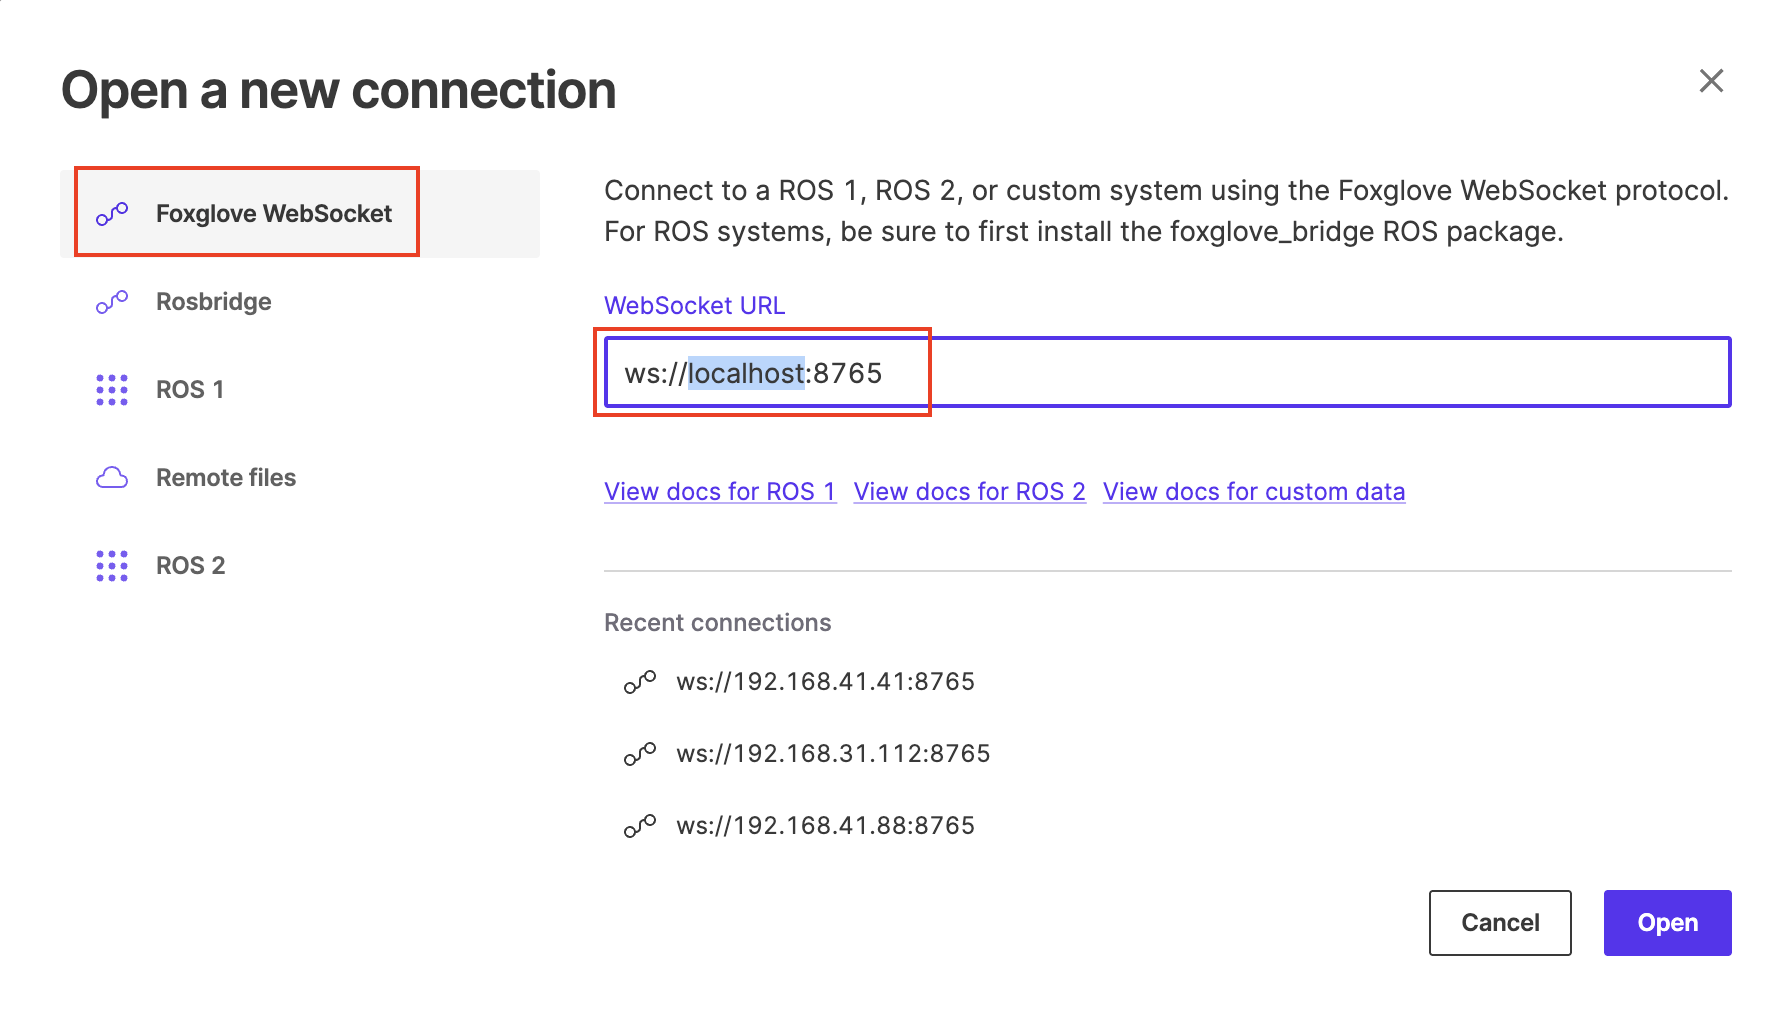
- Open the 3D panel settings.
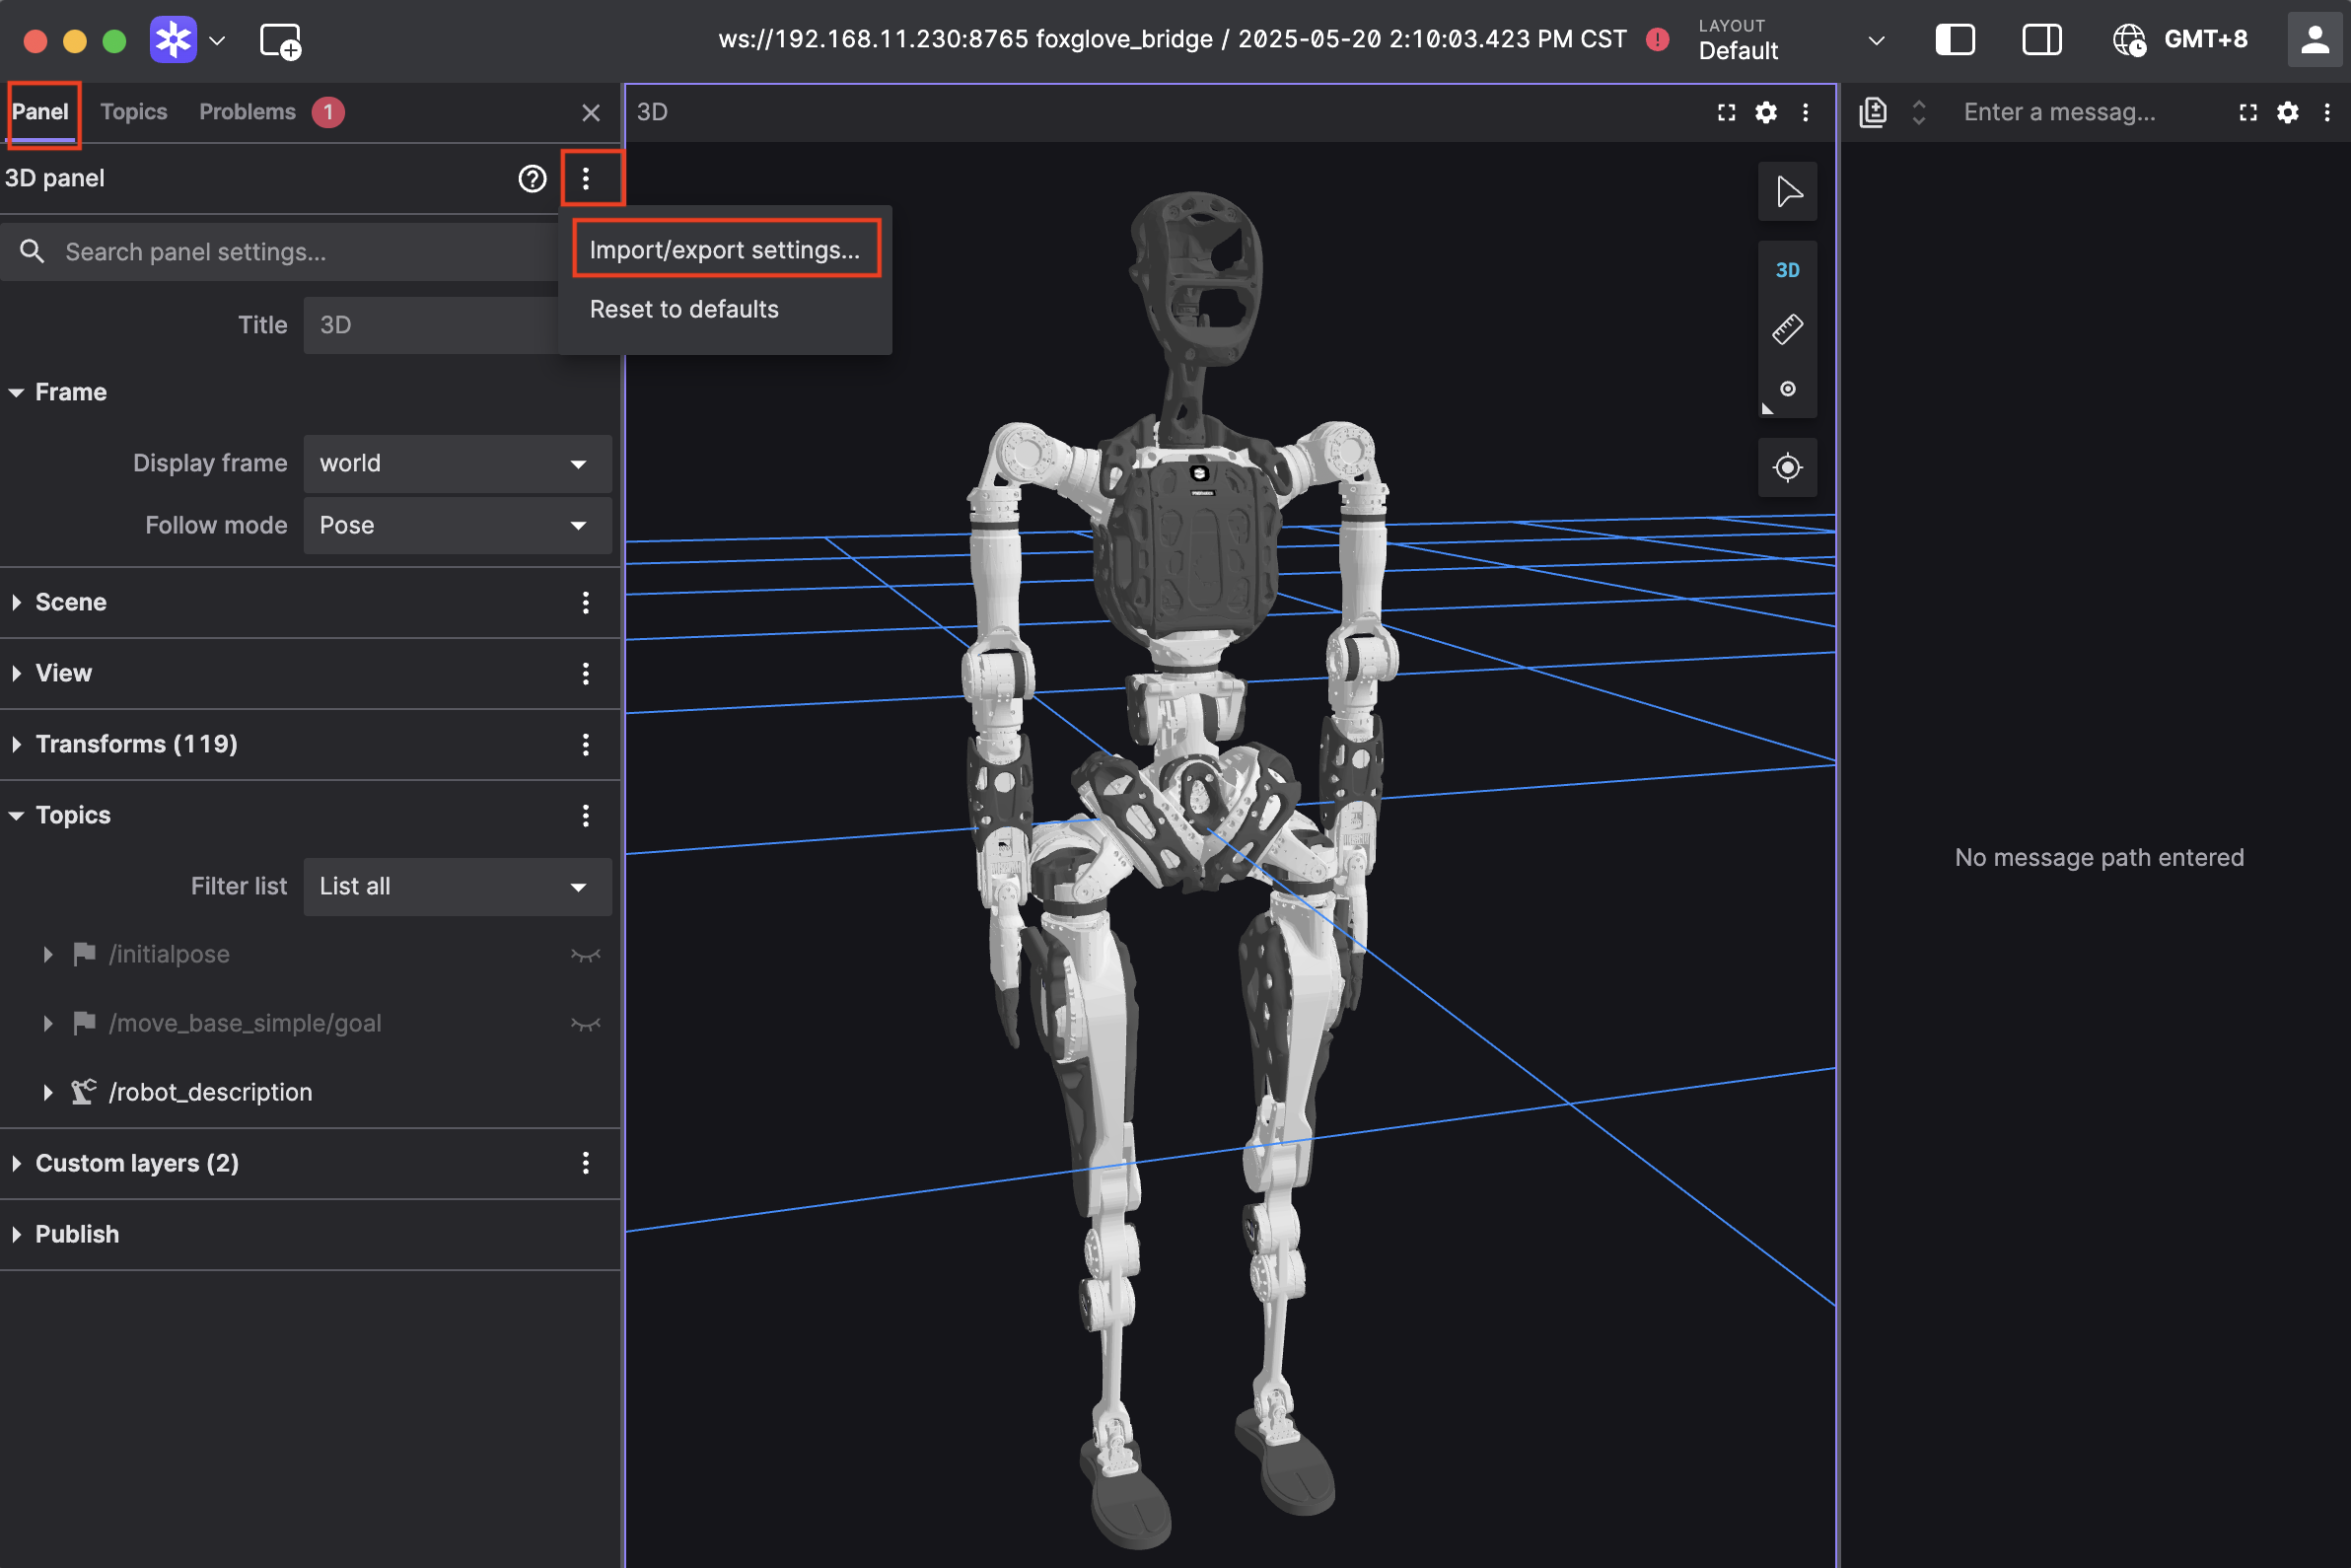
- Paste the configuration below and click Apply to preview motion mapping in real time.
Click to expand configuration code
{
  "layers": {
    "845139cb-26bc-40b3-8161-8ab60af4baf5": {
      "visible": true,
      "frameLocked": true,
      "label": "Grid",
      "instanceId": "845139cb-26bc-40b3-8161-8ab60af4baf5",
      "layerId": "foxglove.Grid",
      "size": 10,
      "divisions": 10,
      "lineWidth": 1,
      "color": "#248eff",
      "position": [
        0,
        0,
        0
      ],
      "rotation": [
        0,
        0,
        0
      ],
      "order": 1
    }
  },
  "cameraState": {
    "perspective": true,
    "distance": 8.362406704377788,
    "phi": 74.10829292531537,
    "thetaOffset": 13.624928863620116,
    "targetOffset": [
      1.3462285617160472,
      3.872395794634993,
      -4.022926534191149e-17
    ],
    "target": [
      0,
      0,
      0
    ],
    "targetOrientation": [
      0,
      0,
      0,
      1
    ],
    "fovy": 45,
    "near": 0.5,
    "far": 5000
  },
  "followMode": "follow-pose",
  "followTf": "world",
  "scene": {
    "meshUpAxis": "z_up",
    "transforms": {
      "showLabel": false,
      "enablePreloading": true,
      "axisSize": 0
    },
    "ignoreColladaUpAxis": true
  },
  "transforms": {},
  "topics": {
    "/robot_description": {
      "visible": true
    }
  },
  "publish": {
    "type": "point",
    "poseTopic": "/move_base_simple/goal",
    "pointTopic": "/clicked_point",
    "poseEstimateTopic": "/initialpose",
    "poseEstimateXDeviation": 0.5,
    "poseEstimateYDeviation": 0.5,
    "poseEstimateThetaDeviation": 0.26179939
  },
  "imageMode": {}
}
Real robot operation
Warning
- Real robot operation involves risk. Keep a 3‑meter clear area around the robot.
- Connect to the real robot only after the teleoperation program runs normally and the preview looks correct.
- Confirm preview joint positions match the robot pose before enabling control.
- Do not switch to other modes (walking, running demos, etc.) during teleoperation.
- In an emergency:
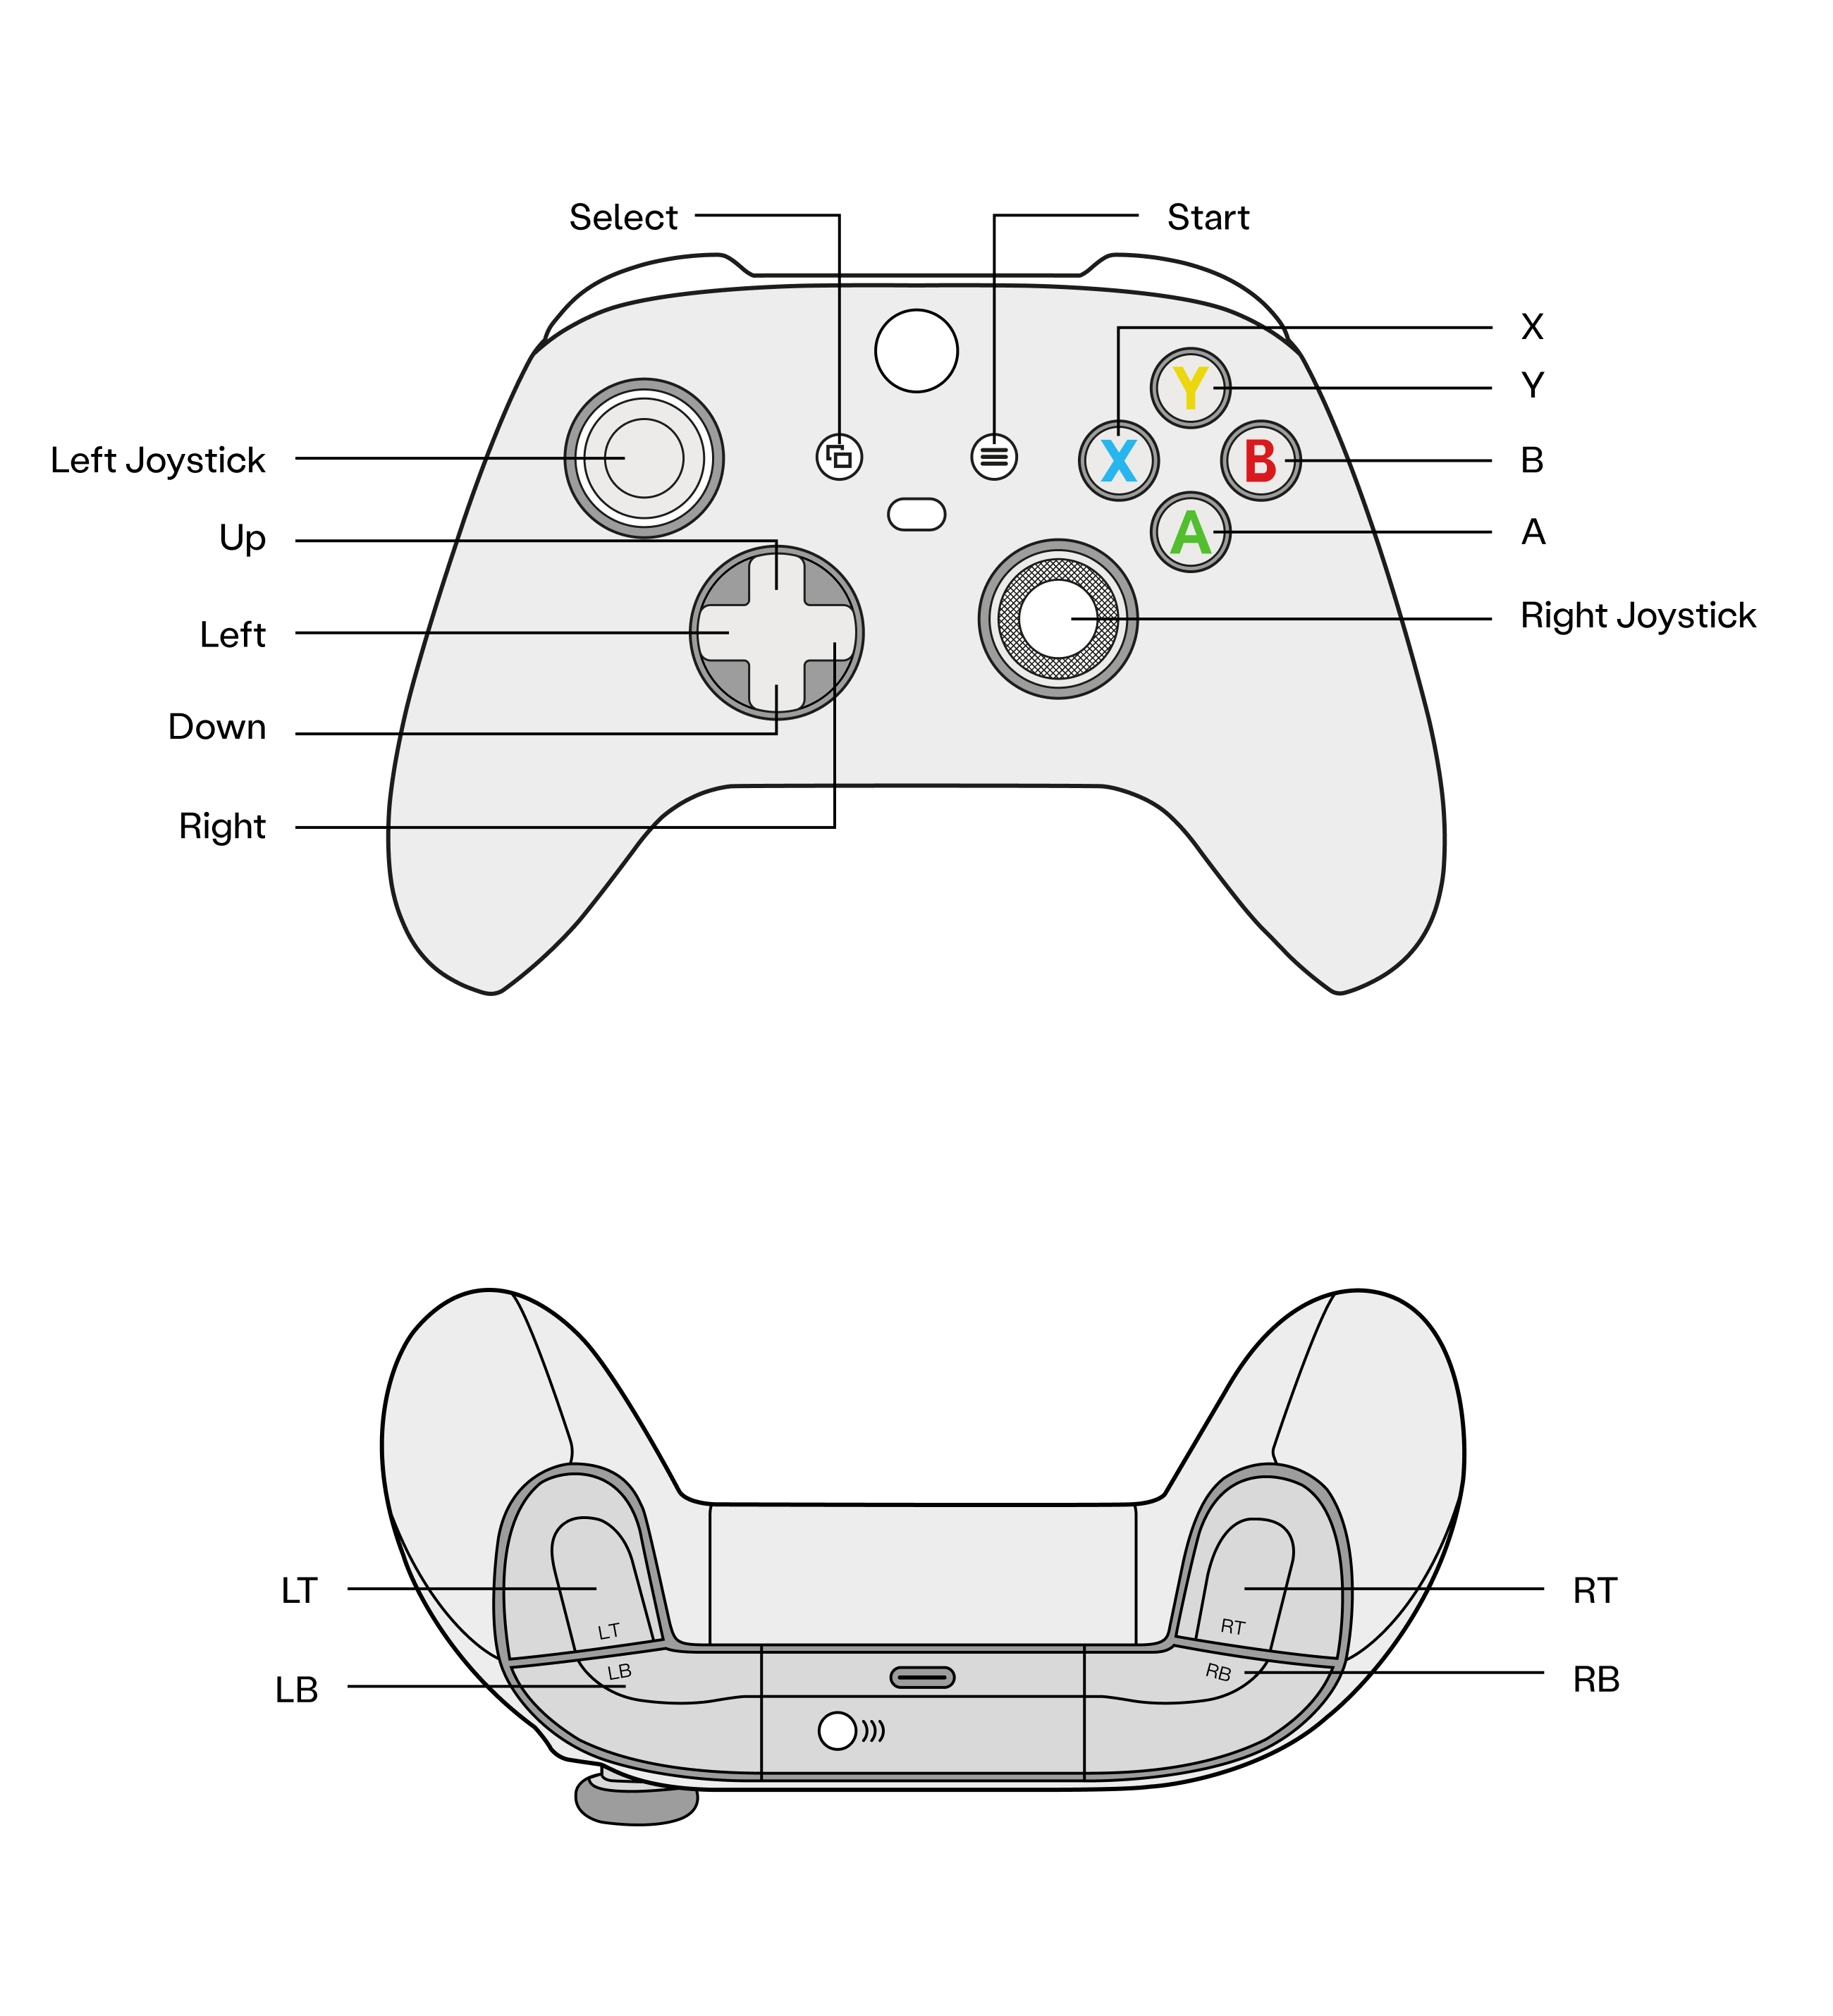
- LT + B: enter damping mode
- LB + RB: power off actuators
Real robot operation by model
Follow the standard boot process to start the robot.
- Zero position mode (Press A)
- Standing mode (Press X)
- In Standing Mode, press D‑pad Right to connect teleoperation
- In Standing Mode, press D‑pad Left to disconnect teleoperation
Follow the standard boot process to start the robot.
- Zero position mode (Press A)
- Motion mode (Press X)
- In Motion Mode, press D‑pad Right to connect teleoperation
- In Motion Mode, press D‑pad Left to disconnect teleoperation
Last updated: 2026-05-20