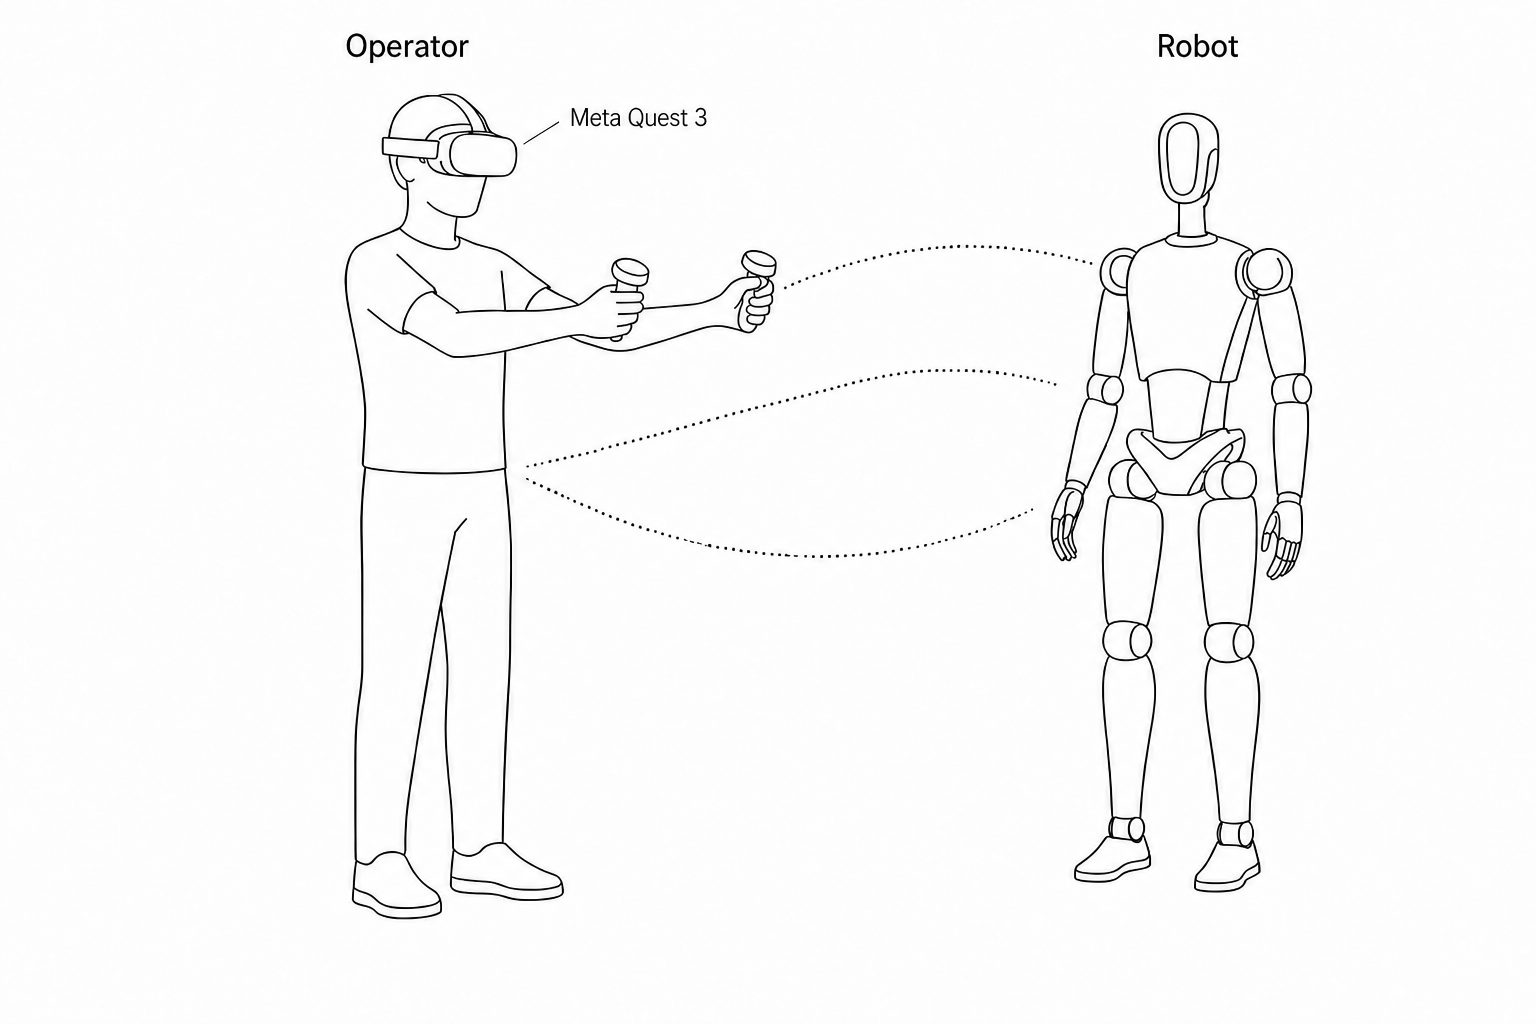
Meta Quest 3 / 3S Setup Guide
Preparation
Teleoperation device side
| Device | Quantity | Description | Notes |
|---|---|---|---|
| PND robot | 1 | Adam series robot | Configure teleoperation program |
| User Computer | 1 | / | Install Foxglove Studio |
| Meta Quest 3 / 3S | 1 | VR headset + left/right controllers | Follow the official Set up Meta Quest 3S guide to wear the device correctly |
First-time setup
- Press and hold the power button on the right side of the headset for 3 seconds to power on.
- Complete unboxing and fit adjustment per the official guide.
- Download Meta Horizon on your mobile device (Mainland China accounts are not supported—switch to an overseas account), pair the headset with Meta Horizon, and complete initial setup such as account creation.
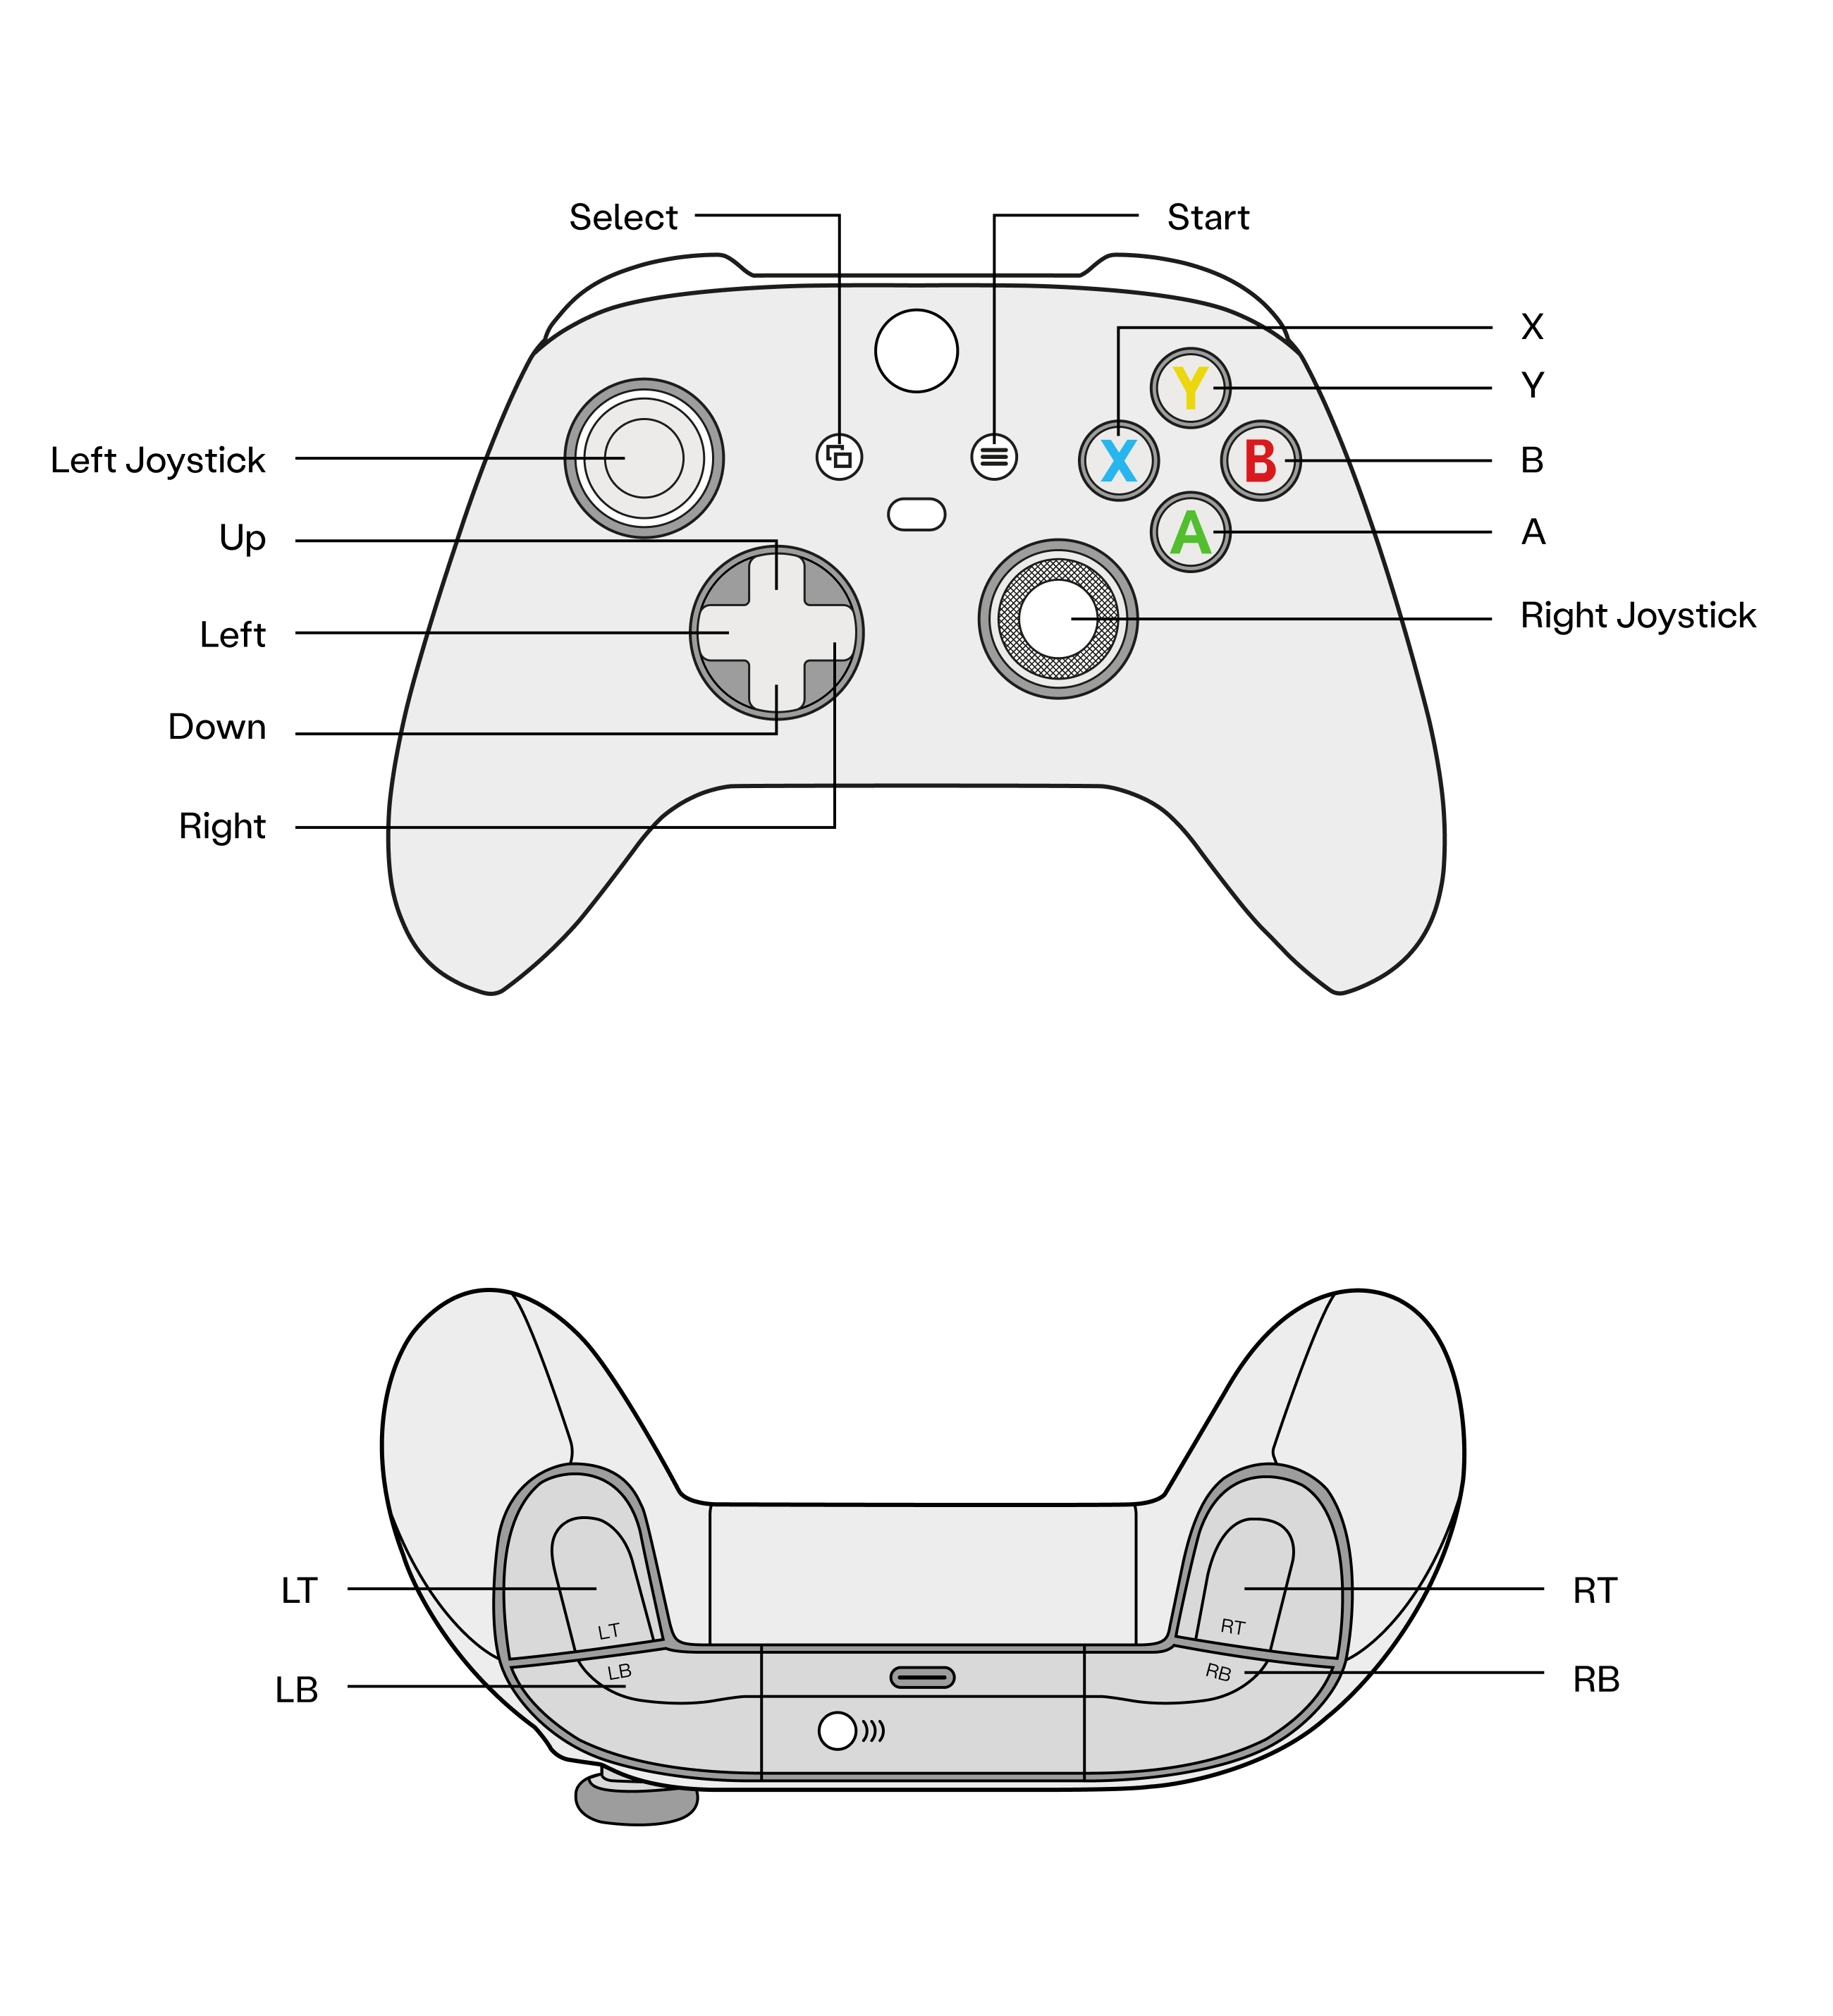
Meta controller reference
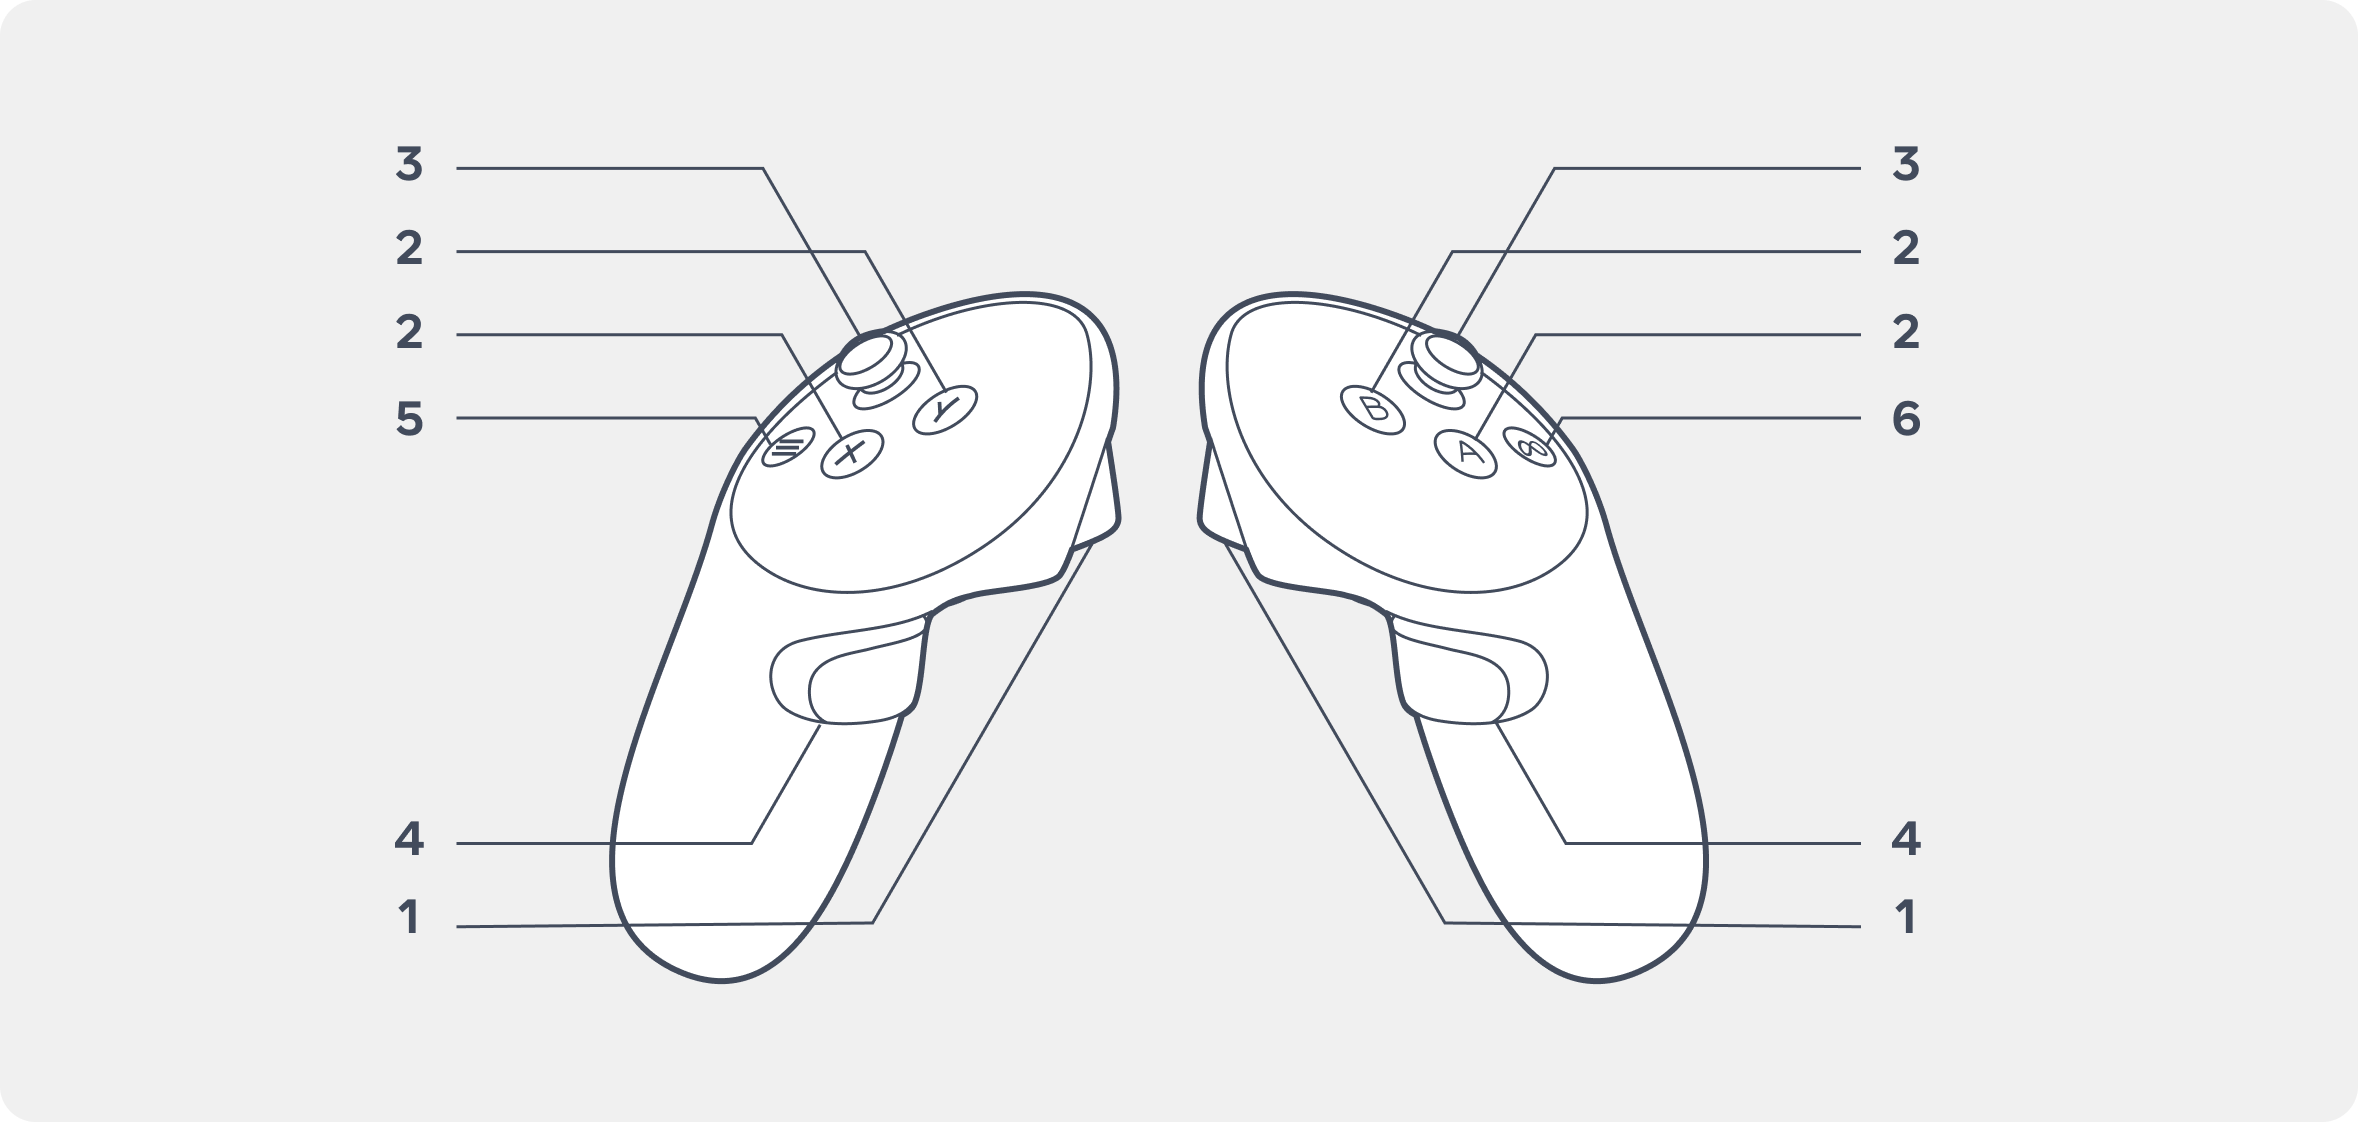
- Trigger buttons
- Y, X, A, B buttons
- Thumbstick
- Grip buttons
- Menu buttons
- Meta buttons
Robot side
Follow the standard boot process to start the robot. Ensure your PC and the robot are on the same network segment. See network connection.
-
On your PC, open a terminal and connect to the robot.
-
Install the teleoperation program (requires internet; skip if already installed).
Operation
Run the teleoperation program
ssh pnd-humanoid@192.168.XX.XX # Replace XX.XX with the actual IP (on the back of the remote control handle); default password: pndxyz
source /opt/pnd/pnd_teleop/setup_cli.bash
# Same command for all models:
spteleop teleop adam_u webvr mink
Meta headset setup
- Wear the device per the official Set up Meta Quest 3S guide.
- In Settings, connect to the same Wi‑Fi network as the robot.
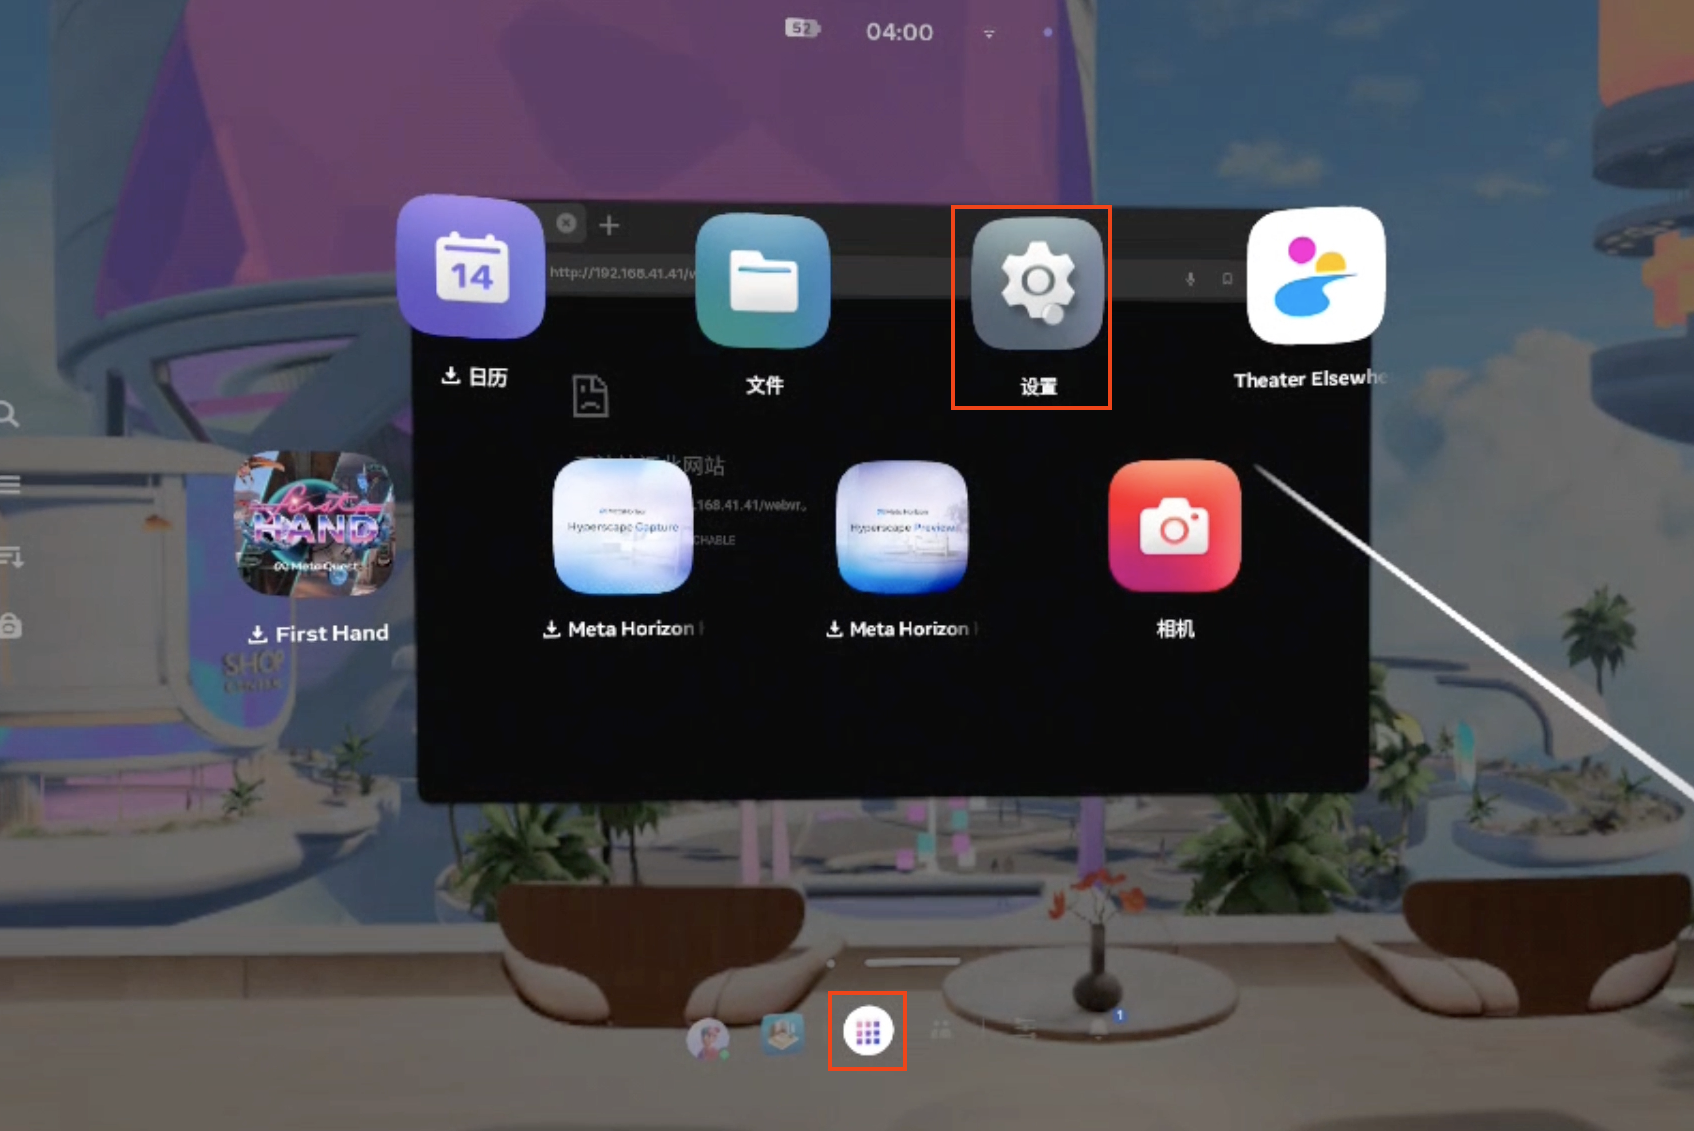
- Open the browser and enter
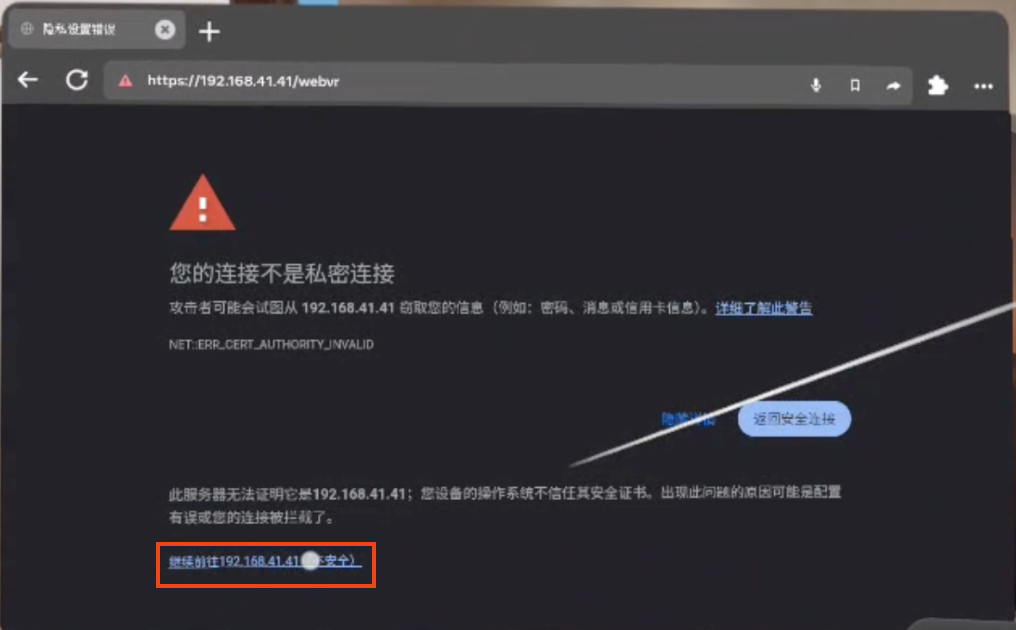
https://192.168.XX.XX/webvr(replace with the robot IP).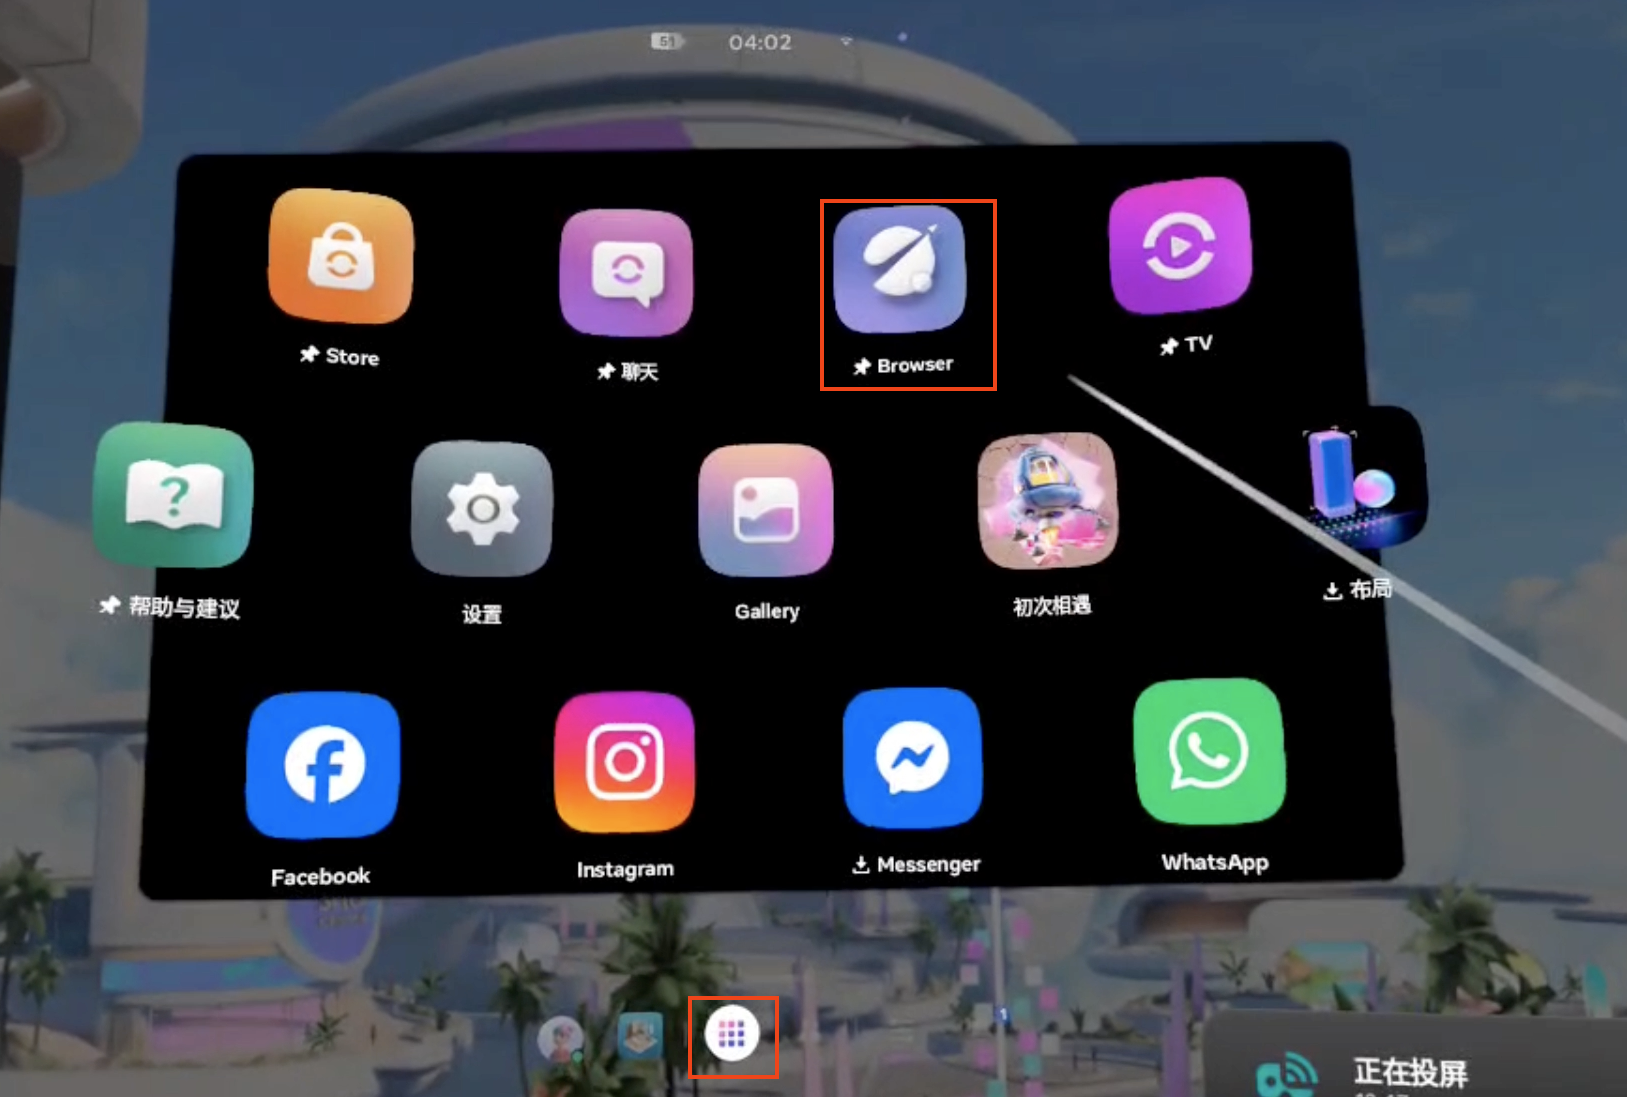
- Click Advanced → Proceed to 192.168.XX.XX.

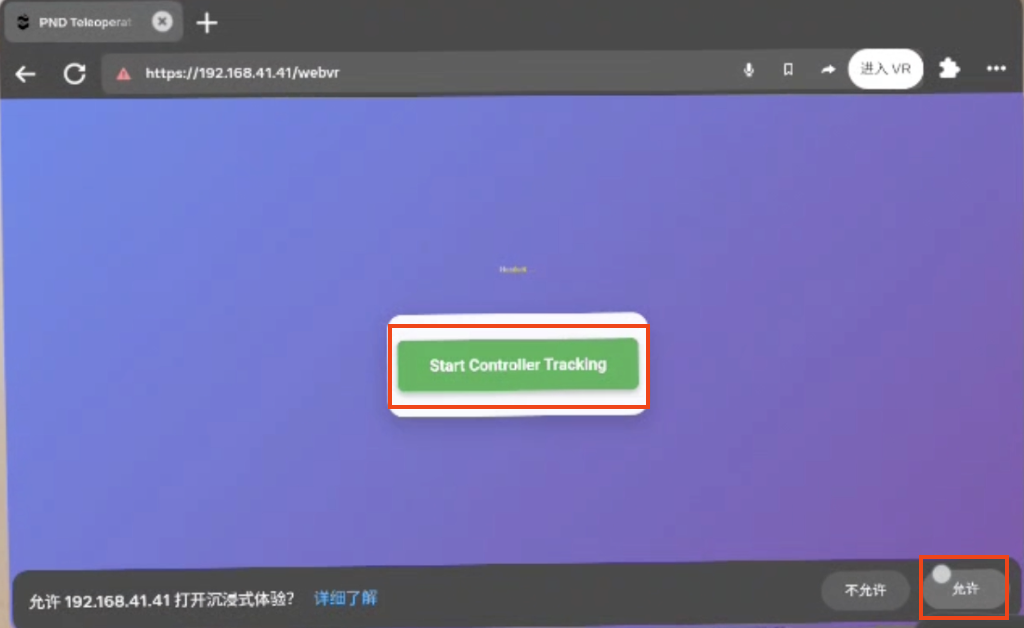
- Click Start Controller Tracking → Allow to start tracking.
Visualization preview
- Install and launch Foxglove Studio on your PC.
- Sign in and click Open Connection.

- Connect via WebSocket:
ws://localhost:8765(replacelocalhostwith the robot IP).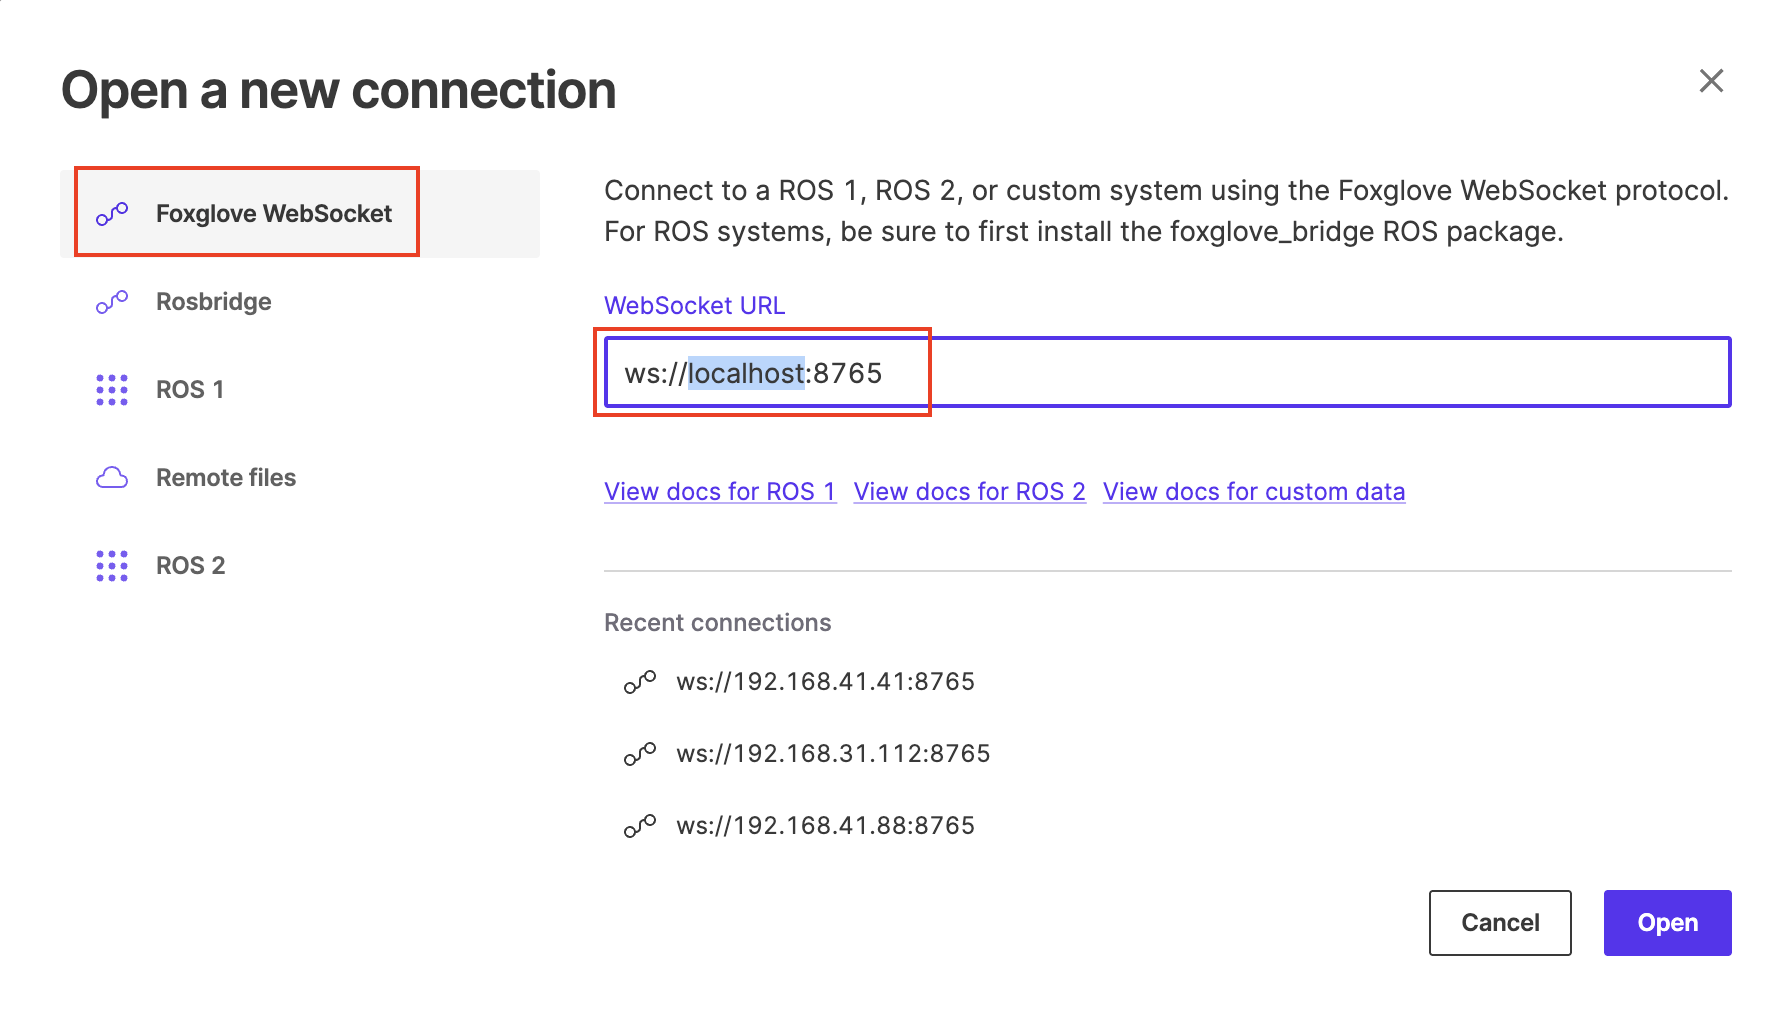
- Open the 3D panel settings.
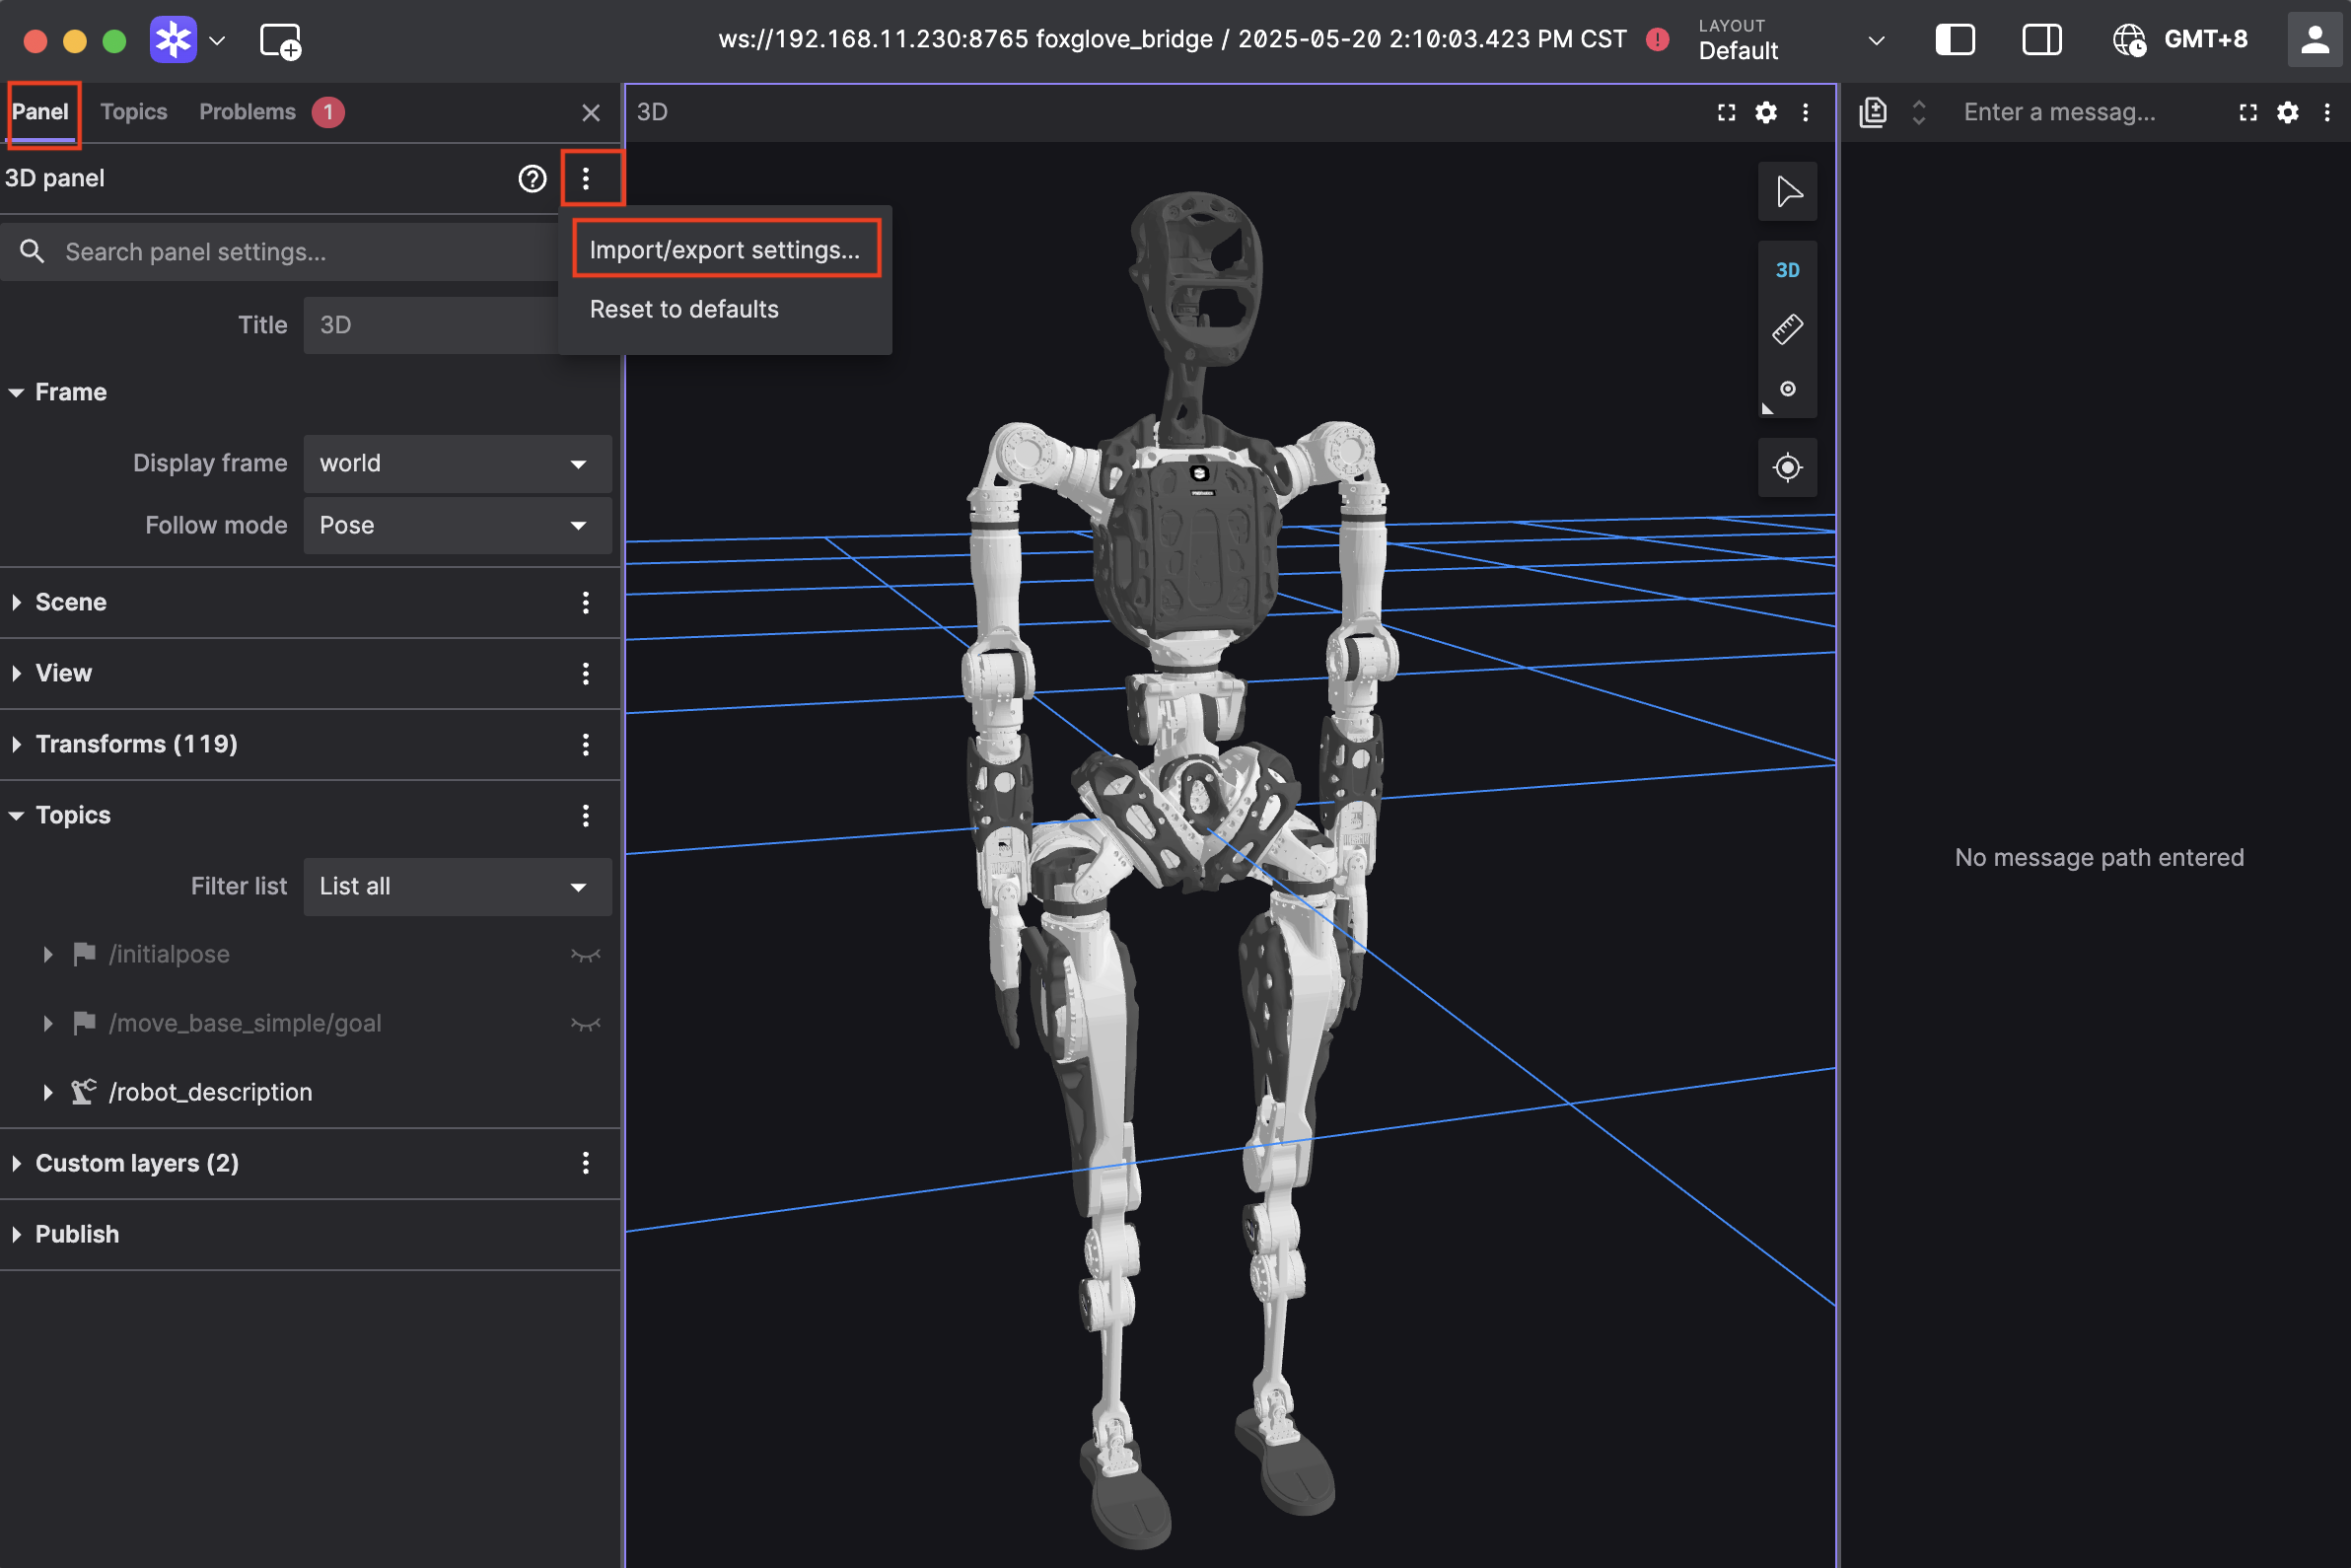
- Paste the configuration below and click Apply to preview motion mapping in real time.
Click to expand configuration code
{
  "layers": {
    "845139cb-26bc-40b3-8161-8ab60af4baf5": {
      "visible": true,
      "frameLocked": true,
      "label": "Grid",
      "instanceId": "845139cb-26bc-40b3-8161-8ab60af4baf5",
      "layerId": "foxglove.Grid",
      "size": 10,
      "divisions": 10,
      "lineWidth": 1,
      "color": "#248eff",
      "position": [
        0,
        0,
        0
      ],
      "rotation": [
        0,
        0,
        0
      ],
      "order": 1
    }
  },
  "cameraState": {
    "perspective": true,
    "distance": 8.362406704377788,
    "phi": 74.10829292531537,
    "thetaOffset": 13.624928863620116,
    "targetOffset": [
      1.3462285617160472,
      3.872395794634993,
      -4.022926534191149e-17
    ],
    "target": [
      0,
      0,
      0
    ],
    "targetOrientation": [
      0,
      0,
      0,
      1
    ],
    "fovy": 45,
    "near": 0.5,
    "far": 5000
  },
  "followMode": "follow-pose",
  "followTf": "world",
  "scene": {
    "meshUpAxis": "z_up",
    "transforms": {
      "showLabel": false,
      "enablePreloading": true,
      "axisSize": 0
    },
    "ignoreColladaUpAxis": true
  },
  "transforms": {},
  "topics": {
    "/robot_description": {
      "visible": true
    }
  },
  "publish": {
    "type": "point",
    "poseTopic": "/move_base_simple/goal",
    "pointTopic": "/clicked_point",
    "poseEstimateTopic": "/initialpose",
    "poseEstimateXDeviation": 0.5,
    "poseEstimateYDeviation": 0.5,
    "poseEstimateThetaDeviation": 0.26179939
  },
  "imageMode": {}
}
Calibration
- Hold the right controller
 for about 3 seconds to reset position.
 - Keep the calibration pose (standing or seated, choose one): arms parallel to the ground, controllers held with palms facing inward, then press A on the right controller.
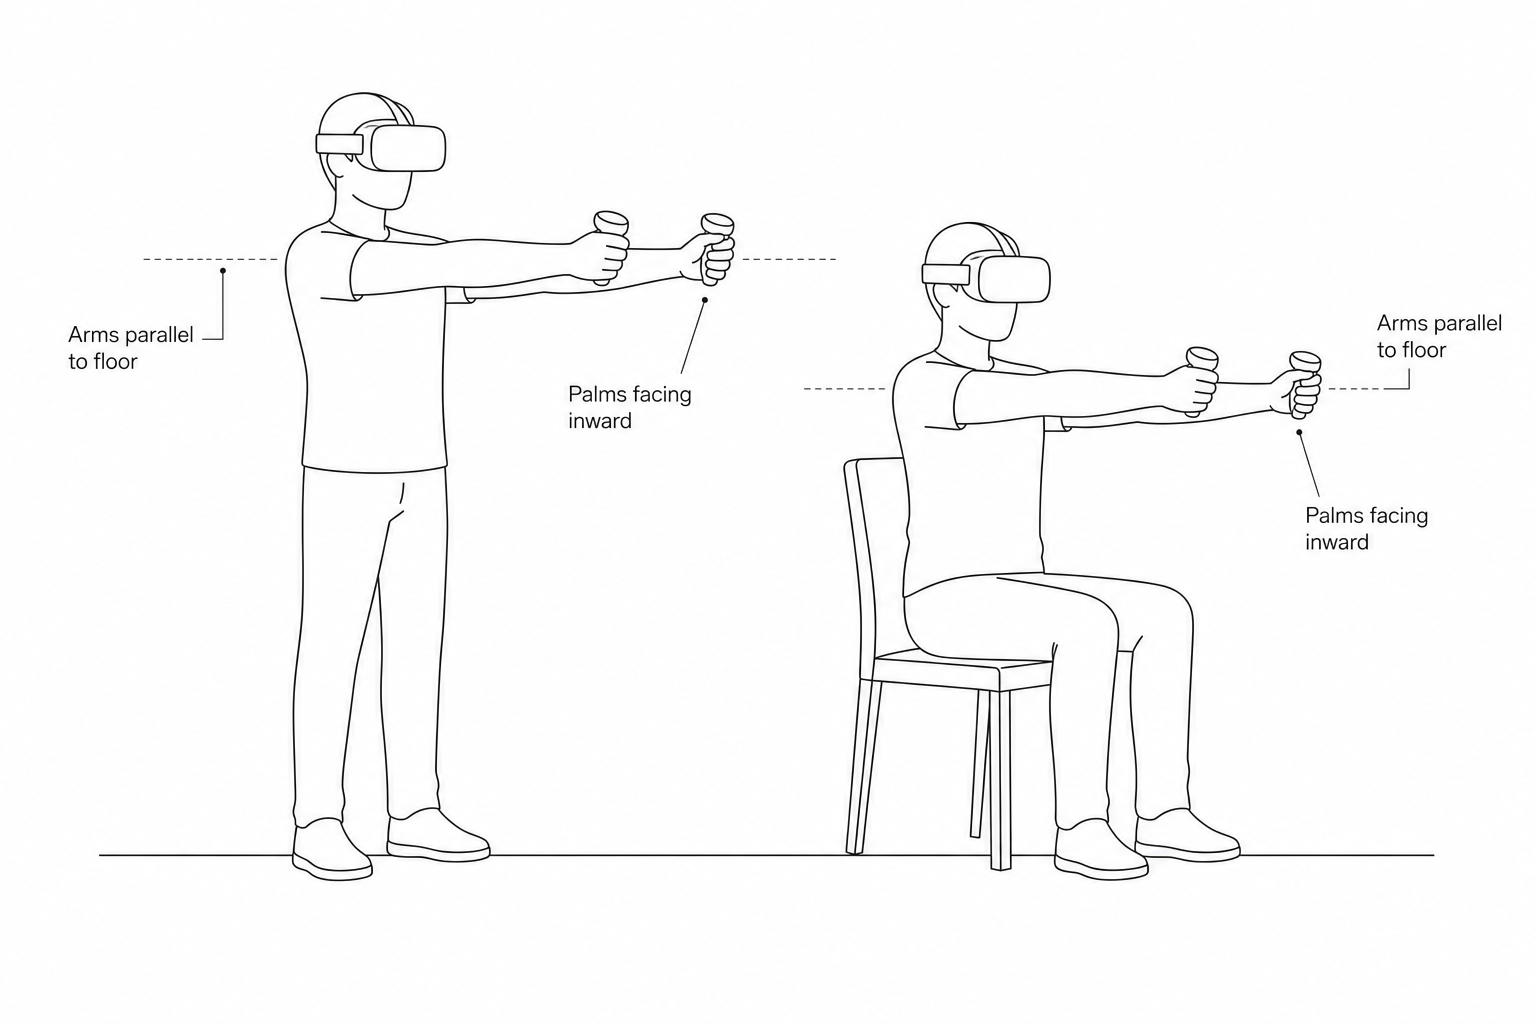
- In Foxglove, the robot model should follow your motion. Recalibrate if the pose looks wrong.
Attention
- After calibration, keep both feet fixed during teleoperation.
- To move, disconnect teleoperation with B, move, then recalibrate.
Real robot operation
Warning
- Real robot operation involves risk. Keep a 3‑meter clear area around the robot.
- Connect to the real robot only after the teleoperation program runs normally and the preview looks correct.
- Confirm preview joint positions match the robot pose before enabling control.
- Do not switch to other modes (walking, running demos, etc.) during teleoperation.
- In an emergency:
- LT + B: enter damping mode
- LB + RB: power off actuators
Real robot operation by model
Follow the standard boot process to start the robot.
- Zero position mode (Press A)
- Standing mode (Press X)
- In Standing Mode, press D‑pad Right to connect teleoperation
- In Standing Mode, press D‑pad Left to disconnect teleoperation
Follow the standard boot process to start the robot.
- Zero position mode (Press A)
- Motion mode (Press X)
- In Motion Mode, press D‑pad Right to connect teleoperation
- In Motion Mode, press D‑pad Left to disconnect teleoperation
Hand mapping on the real robot
- Right controller A: calibration
- Right controller B: disconnect teleoperation
- Right controller Meta: reset VR position
- Right controller A touch: right thumb rotation
- Left controller X touch: left thumb rotation
- Right Trigger: right thumb/index open/close
- Left Trigger: left thumb/index open/close
- Right Grip: right middle/ring/little finger open/close
- Left Grip: left middle/ring/little finger open/close
Last updated: 2026-05-20