Recording and Playback
Example 1: Start foxglove_bridge and Record Data
Enable MCAP recording of complete ROS 2 topics on the remote end, with data stored in the ~/.ros/bags/ directory by default. Foxglove supports playback of this MCAP package (contains only message data by default). To display robot model animations simultaneously, refer to Example 2.
-
Connect to the robot NUC:
-
Enable bridge mode and start recording:
Press Ctrl+C to stop recording.# Please select the corresponding command by model: # Adam Pro ./pnd_bridge.sh --enable-foxglove-bridge --enable-record --robot adam_pro --domain-id 0 # Adam U ./pnd_bridge.sh --enable-foxglove-bridge --enable-record --robot adam_u --domain-id 0 # Adam SP ./pnd_bridge.sh --enable-foxglove-bridge --enable-record --robot adam_sp --domain-id 0 # Adam Lite ./pnd_bridge.sh --enable-foxglove-bridge --enable-record --robot adam_lite --domain-id 0 -
Find the recorded file:
You will see files named with the recording timestamp. -
Open a new terminal on your local machine and download the recorded file (replace
YYYYMMDDHH_MMSSwith the actual filename): -
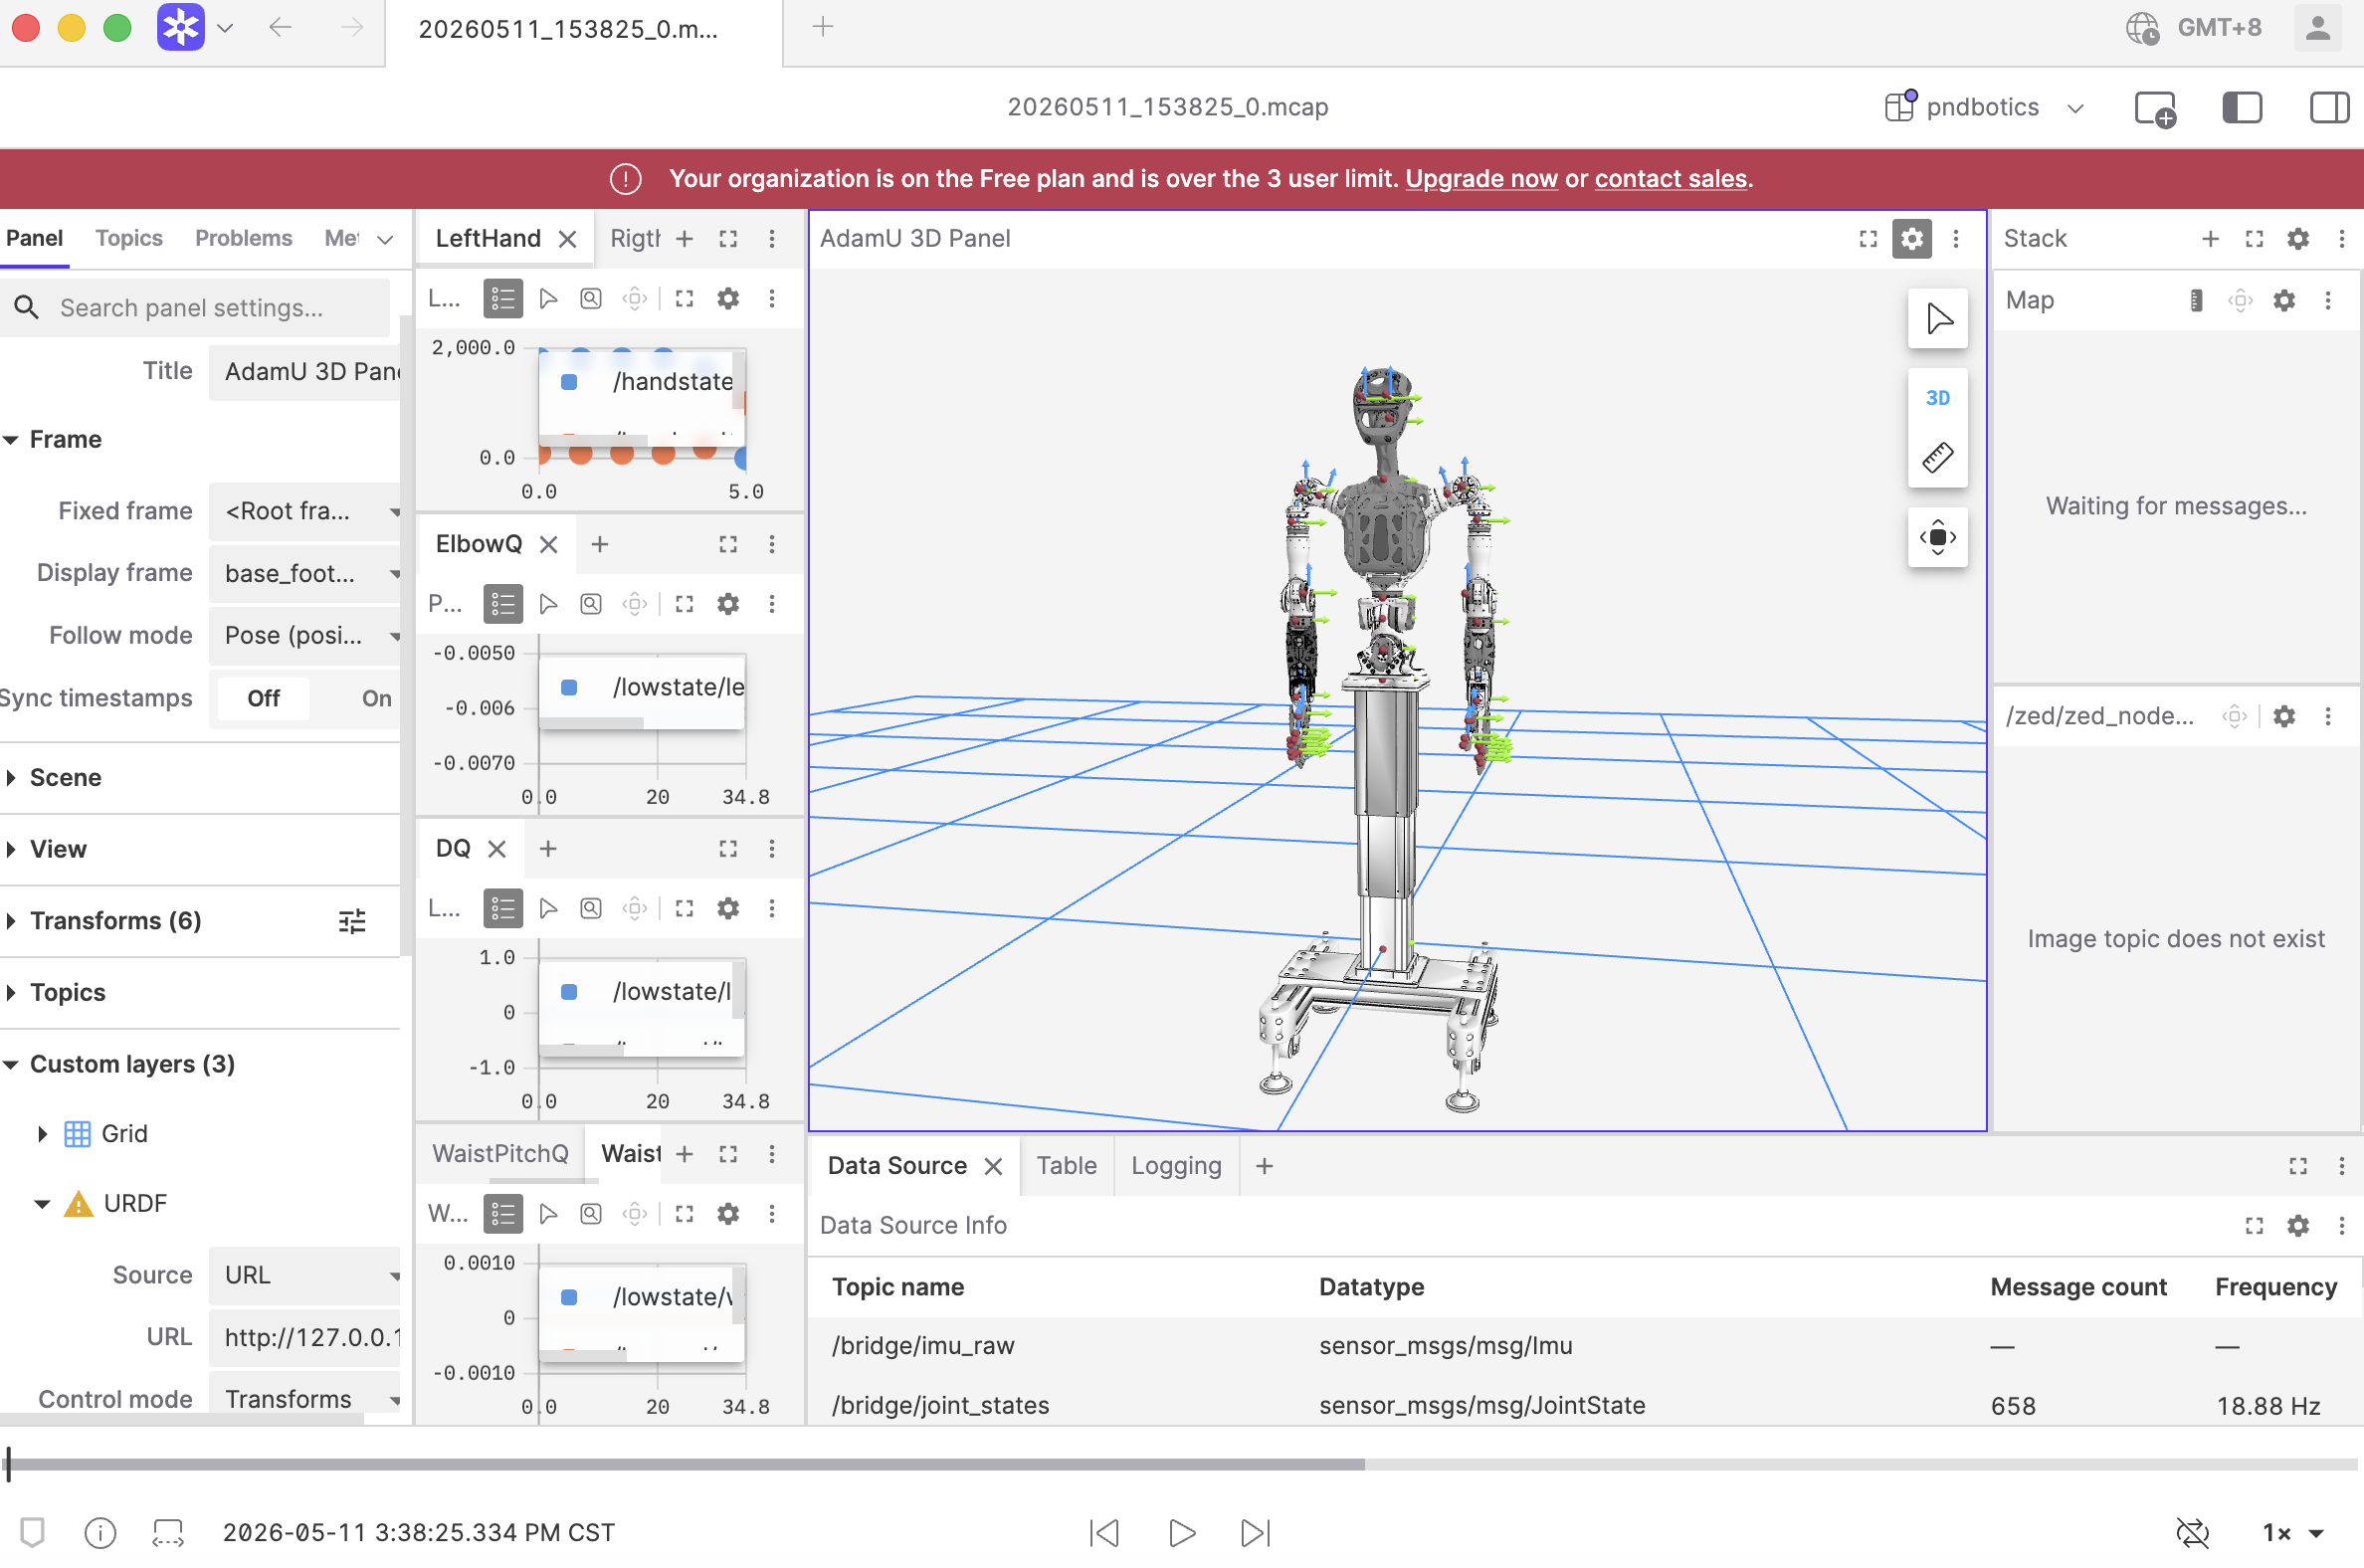
Use Google Chrome to access Foxglove Dashboard or open the Foxglove Desktop client.
-
Click Open local file and import the
YYYYMMDD_HHMMSS.mcapfile.
Note
- Domain ID Matching: Ensure the
--domain-idparameter matches the system environment variable ROS_DOMAIN_ID exactly. - WebSocket Service: After enabling
--enable-foxglove-bridge, the robot end will start a WebSocket service on port 8765. The local Foxglove client can connect to this port for real-time data monitoring.
Example 2: Playback Local MCAP Package and Load Robot Model
-
Open a terminal on your local machine and synchronize remote data to local:
-
Start a lightweight file server (default address: http://127.0.0.1:8000):
-
Use Google Chrome to access Foxglove Dashboard or open the Foxglove Desktop client.
-
Click Open local file and import the
YYYYMMDD_HHMMSS.mcapfile. -
In the Foxglove interface, click 3DPanel --> Custom Layers --> URDF:
- Source: Select URL.
- URL: Enter the URDF path for the corresponding robot model, for example:
http://127.0.0.1:8000/adam_u/adam_u.urdfhttp://127.0.0.1:8000/adam_pro/adam_pro.urdf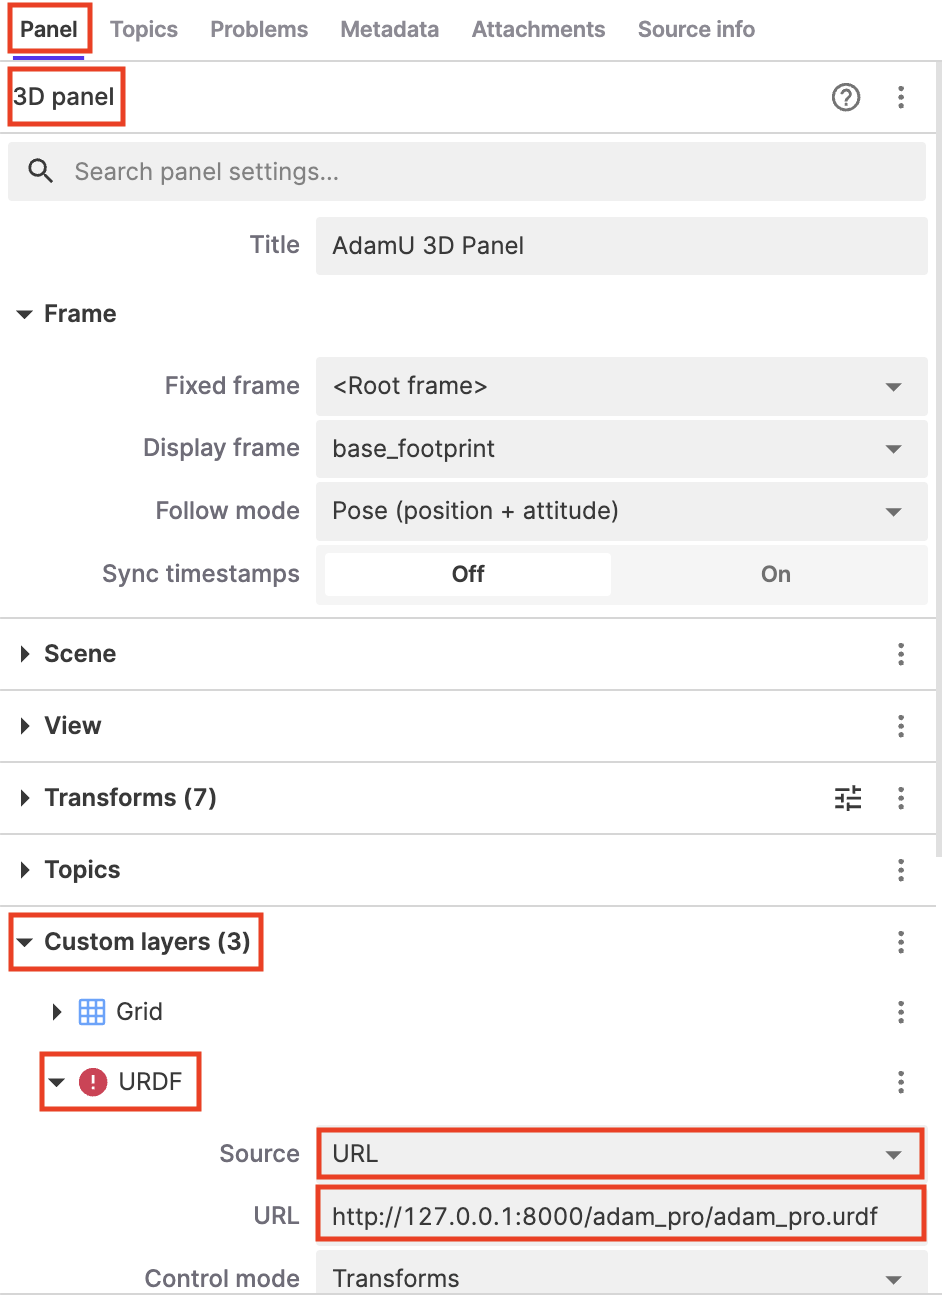
After configuration, you can use the buttons at the bottom of the interface to play/pause: