Adam-U Ultra
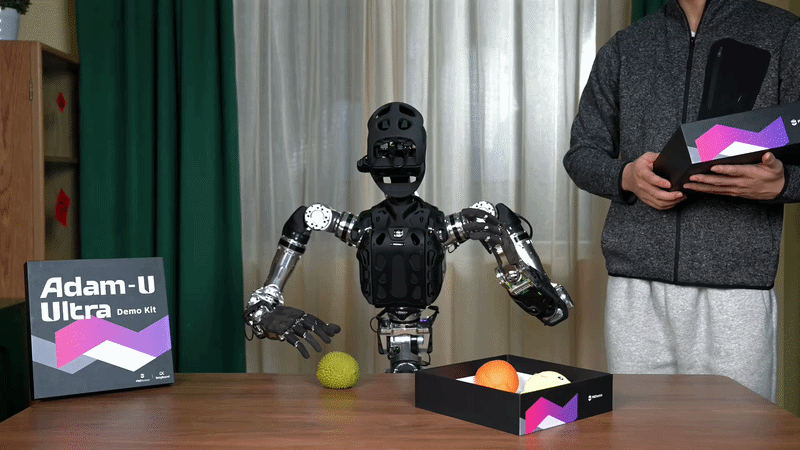
This solution is based on the Adam-U robot body, integrated with the Being-H VLA (Vision-Language-Action) large model. Unlike traditional preset-scripted robots, this system achieves end-to-end control from visual input to action execution through the VLA model, enabling the robot to autonomously complete "desktop pick and place into a box" task cycles.
Key Features
- Out-of-the-Box: Combined with a dedicated Demo Kit and encrypted software package, it enables automated sorting loops without the need for secondary development.
- Fully Automated Cycles: Once started, it requires no human intervention, automatically executing the entire process of recognition, grasping, and boxing.
- High Fault Tolerance: Features non-fatal exception handling (such as a single failed grasp); the system will automatically attempt subsequent targets rather than terminating immediately.
System Architecture

Configuration & Environment
Hardware Configuration
| Component | Requirement |
|---|---|
| Robot Body | Adam-U Ultra |
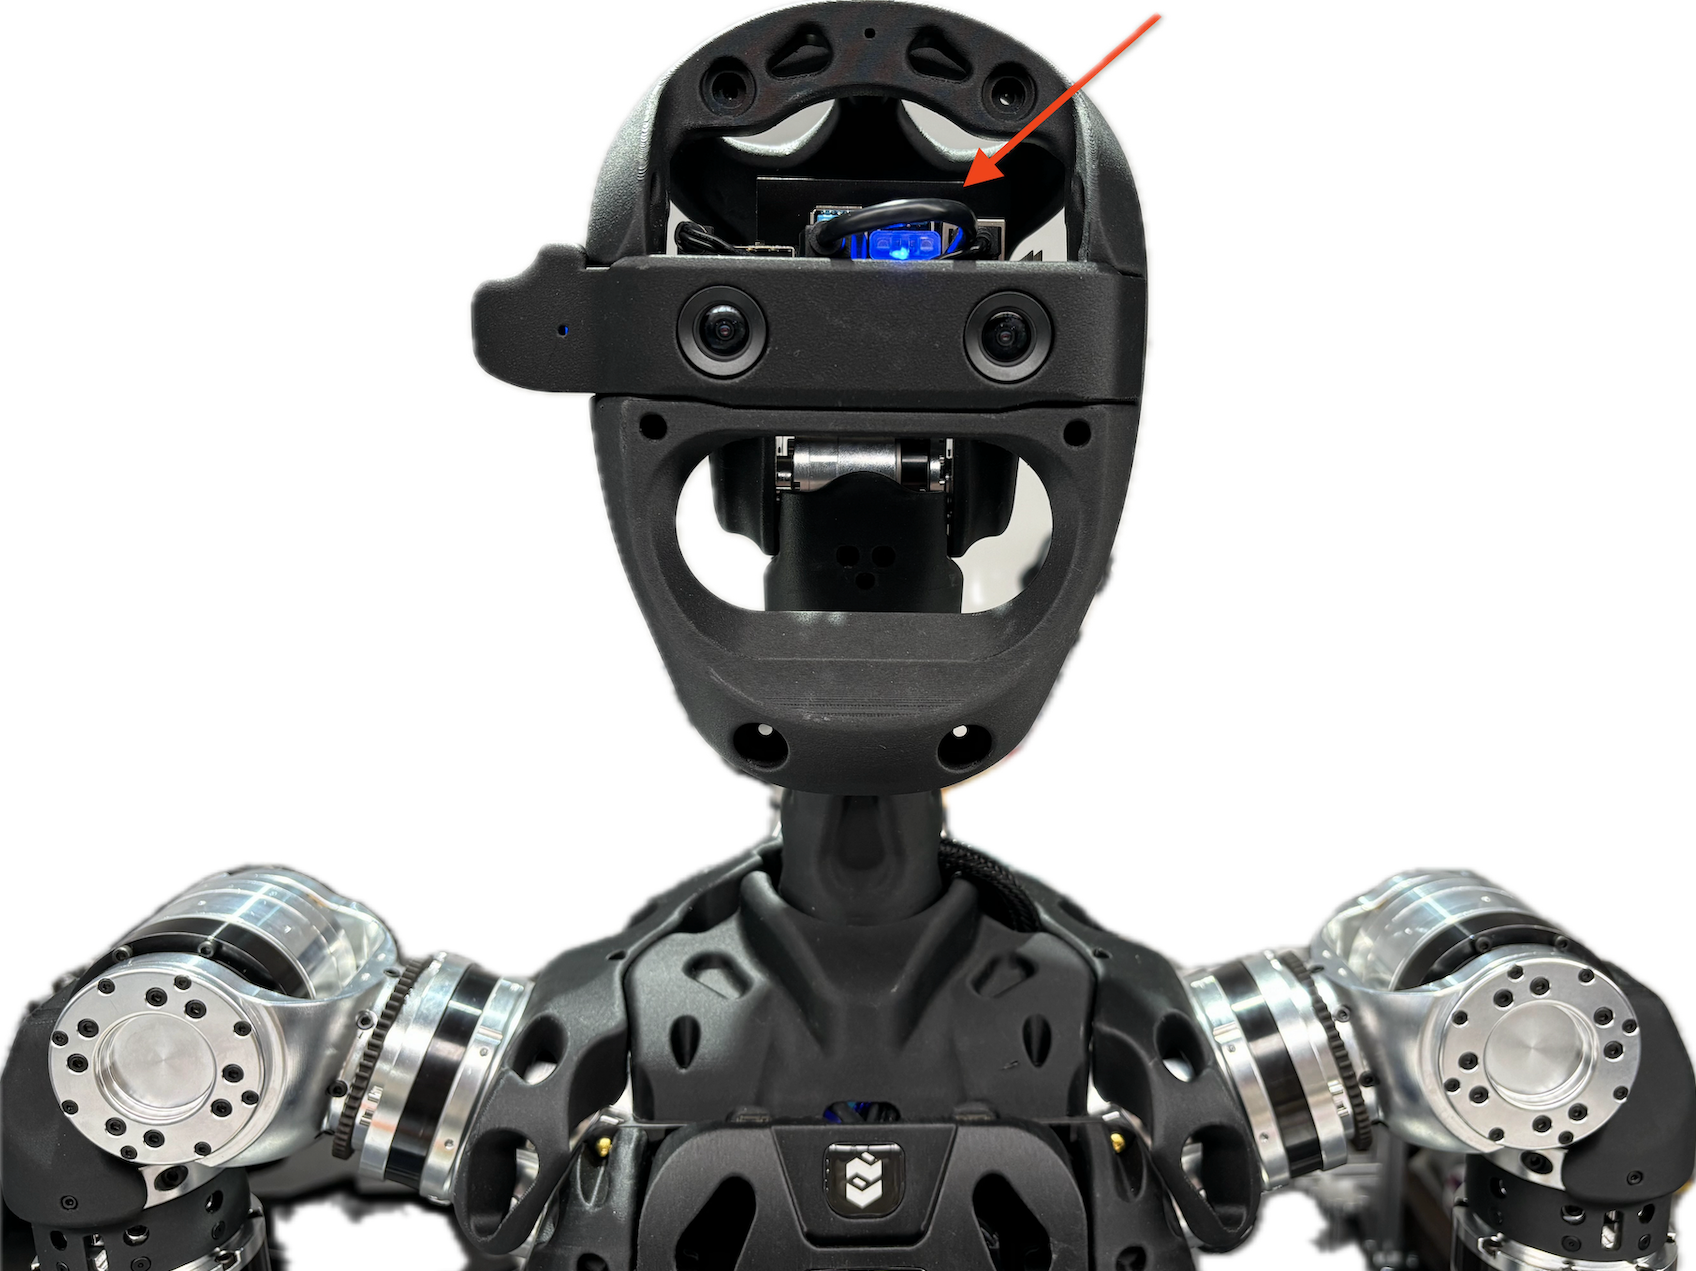
| Authorization Device | Dedicated Dongle (inserted into the USB port at the robot's head) |
| Interaction Terminal | A display screen is recommended for visual operations |
Network Configuration
Ensure the user's computer and the robot are on the same network segment.
- Default IP Example:
192.168.XX.XX
Physical Environment Preparation
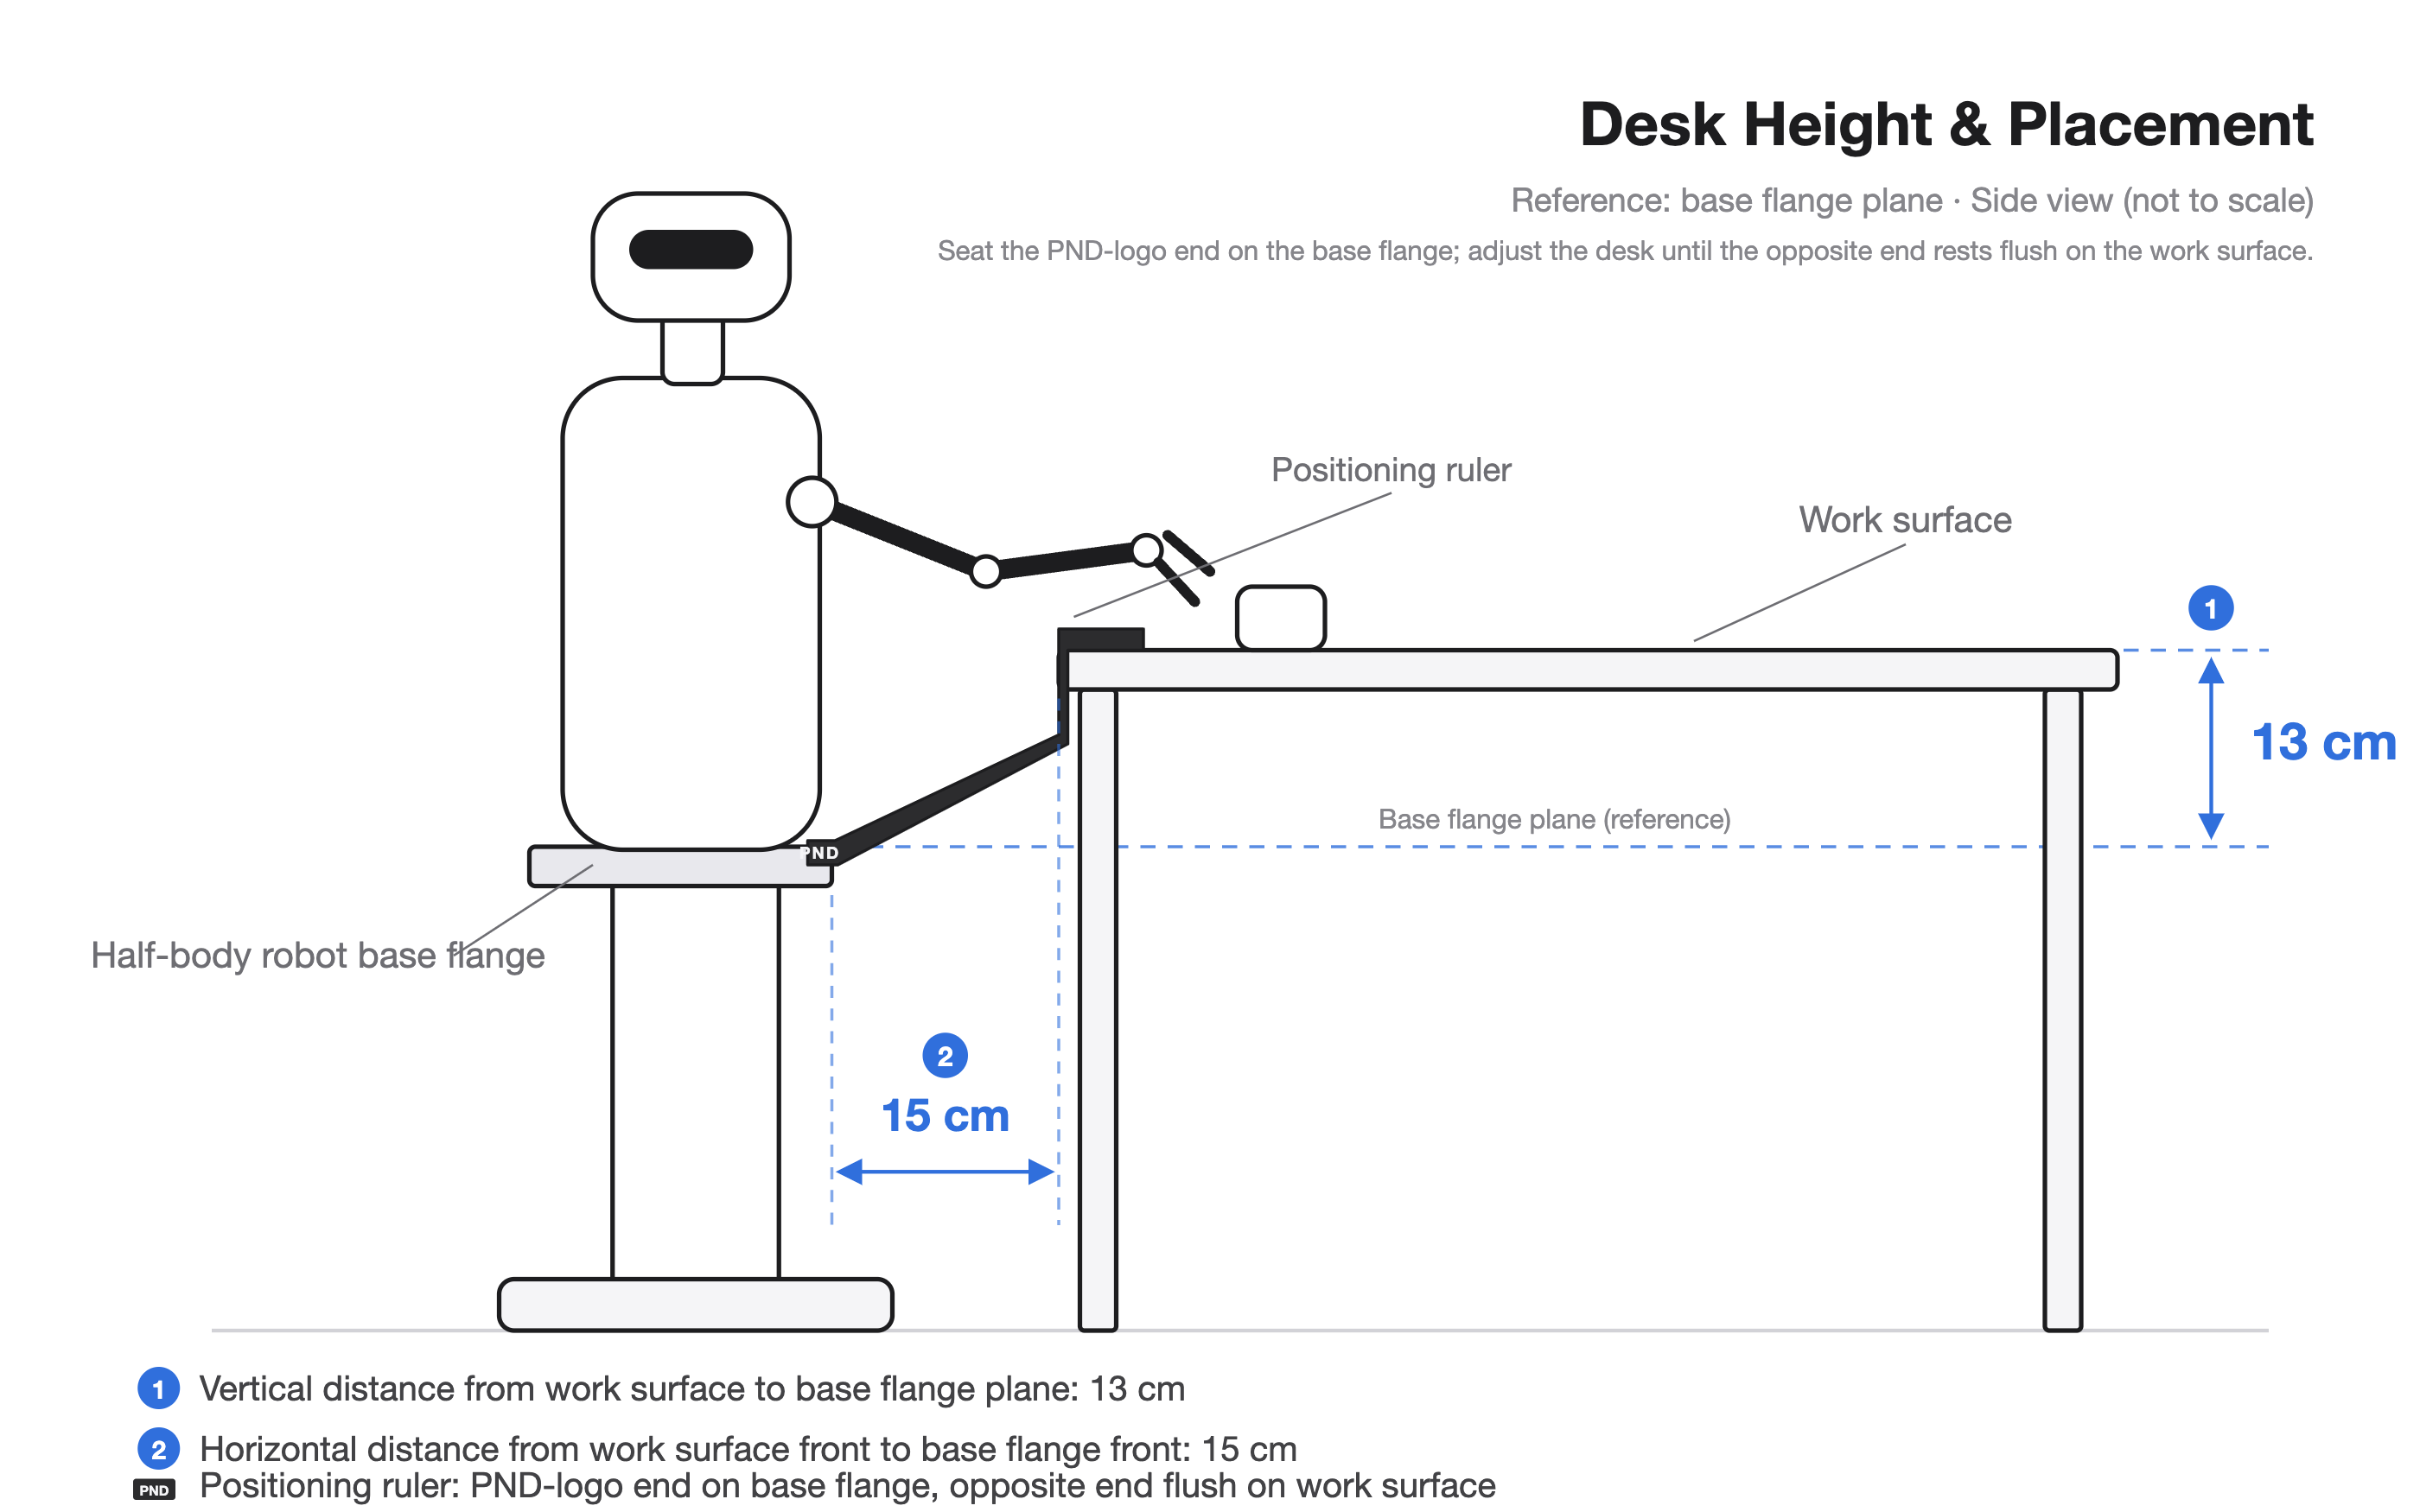
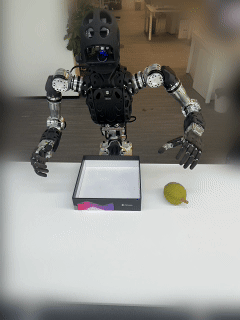
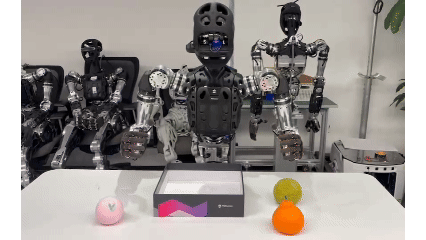
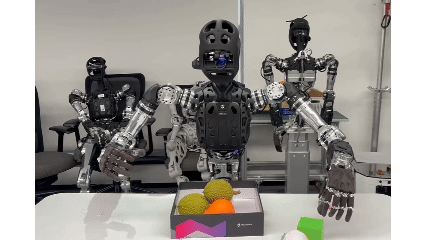
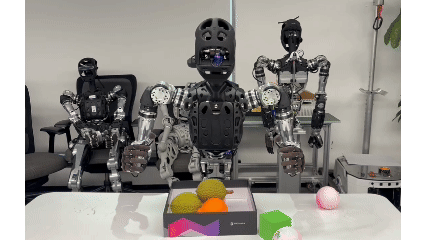
Place a table in front of the robot body so that the robot is centered relative to the table. Use a positioning ruler to adjust and fix the distance between the robot and the table.
1. Table Dimensions and Field of View (FOV)
-
Recommended Size: No less than 80cm × 100cm to cover the robot's primary range of motion and provide a clear FOV.
-
Minimum Size: No less than 60cm × 60cm (sizes too small will cause the desktop to occupy insufficient space in the FOV, affecting recognition performance).
-
Visual Requirements: The desktop should occupy the main area of the robot's FOV; operational objects and the box must be completely within the visible range.
2. Spatial Relative Position
Place the end of the positioning ruler printed with the PND logo against the robot's torso base flange. Adjust the horizontal and vertical distance of the table so that the end of the positioning ruler without the logo fits against the table edge:
3. Lighting and Background
-
Lighting: Avoid strong backlighting, flickering, or extremely dark environments.
-
Material: The desktop should avoid strong specular reflections or large areas of transparent material.
-
Environmental Isolation: Avoid obstacles and non-staff members entering the workspace during operation to prevent obscuring the FOV.
Real Machine Control
Step 1: Environment Initialization
1.1 Start the Adam-U according to the standard Boot Process.
1.2 Insert the dongle into the USB port on the front of the robot's head. A solid blue indicator light indicates successful recognition.
Step 2: Start Perception and Model Services
Note: Please confirm that the user computer and the robot are on the same network segment. Refer to Network Connection.
Open Terminal 1 (Visual Perception):
# Connect to the robot NUC
ssh pnd-humanoid@192.168.XX.XX # Replace XX.XX with the actual IP address located on the back of the remote control handle; initial password: pndxyz

# Connect to the robot NX
ssh pnd-humanoid@10.10.20.126 # Initial password: pndxyz
bash run_zed.sh
Open Terminal 2 (Model Server):
# Connect to the robot NUC
ssh pnd-humanoid@192.168.XX.XX # Replace XX.XX with the actual IP address located on the back of the remote control handle; initial password: pndxyz

# Connect to the robot NX
ssh pnd-humanoid@10.10.20.126 # Initial password: pndxyz
docker restart being-h
docker exec -it being-h bash
cd Being-H_Server/
bash scripts/deploy/orin_nx/run_server_adamu.sh
-
Loading: The terminal displays
Loading model from /root/Being-H_Model/Adam-U_Pick. -
Startup Success: Wait about 2 minutes; the terminal will display
Server is ready and listening on tcp://0.0.0.0:8888.
Step 3: Run Interaction Logic
Open Terminal 3 (Client Interaction):
# Connect to the robot NUC
ssh pnd-humanoid@192.168.XX.XX # Replace XX.XX with the actual IP address located on the back of the remote control handle; initial password: pndxyz
cd Being-H_Client/
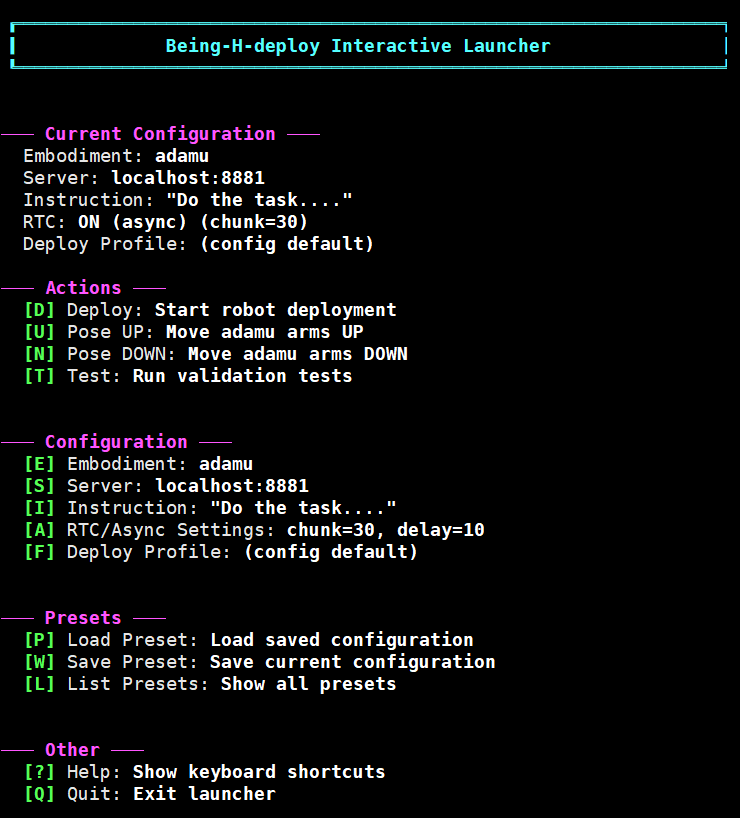
bash scripts/start
-
The terminal returns an interface as shown, indicating the main control thread has started successfully.
Step 4: Key Interaction
Use the keyboard to control in the Terminal 3 interface. After each step, please press the Enter key to confirm as prompted:
4.1 Configuration Phase
-
Press
P: Enter configuration options. -
Press
1: Select the model.
4.2 Preparation Phase
Warning
Keys in this phase will trigger robot movements. Ensure the physical environment is prepared and there are no obstacles within 1 meter of the robot.
-
Object Placement Suggestion: Clear the desktop. Place the Demo Kit square box in the center of the table and close to the robot. It is recommended that the operator places one item at a time; place the next one while the robot is grasping, enabling alternating left and right hand use.
-
Enter Developer Mode: Press
LO+ROon the remote control (press the joysticks vertically down). Success is indicated when the RCU indicator changes from slow purple breathing to slow blue breathing.
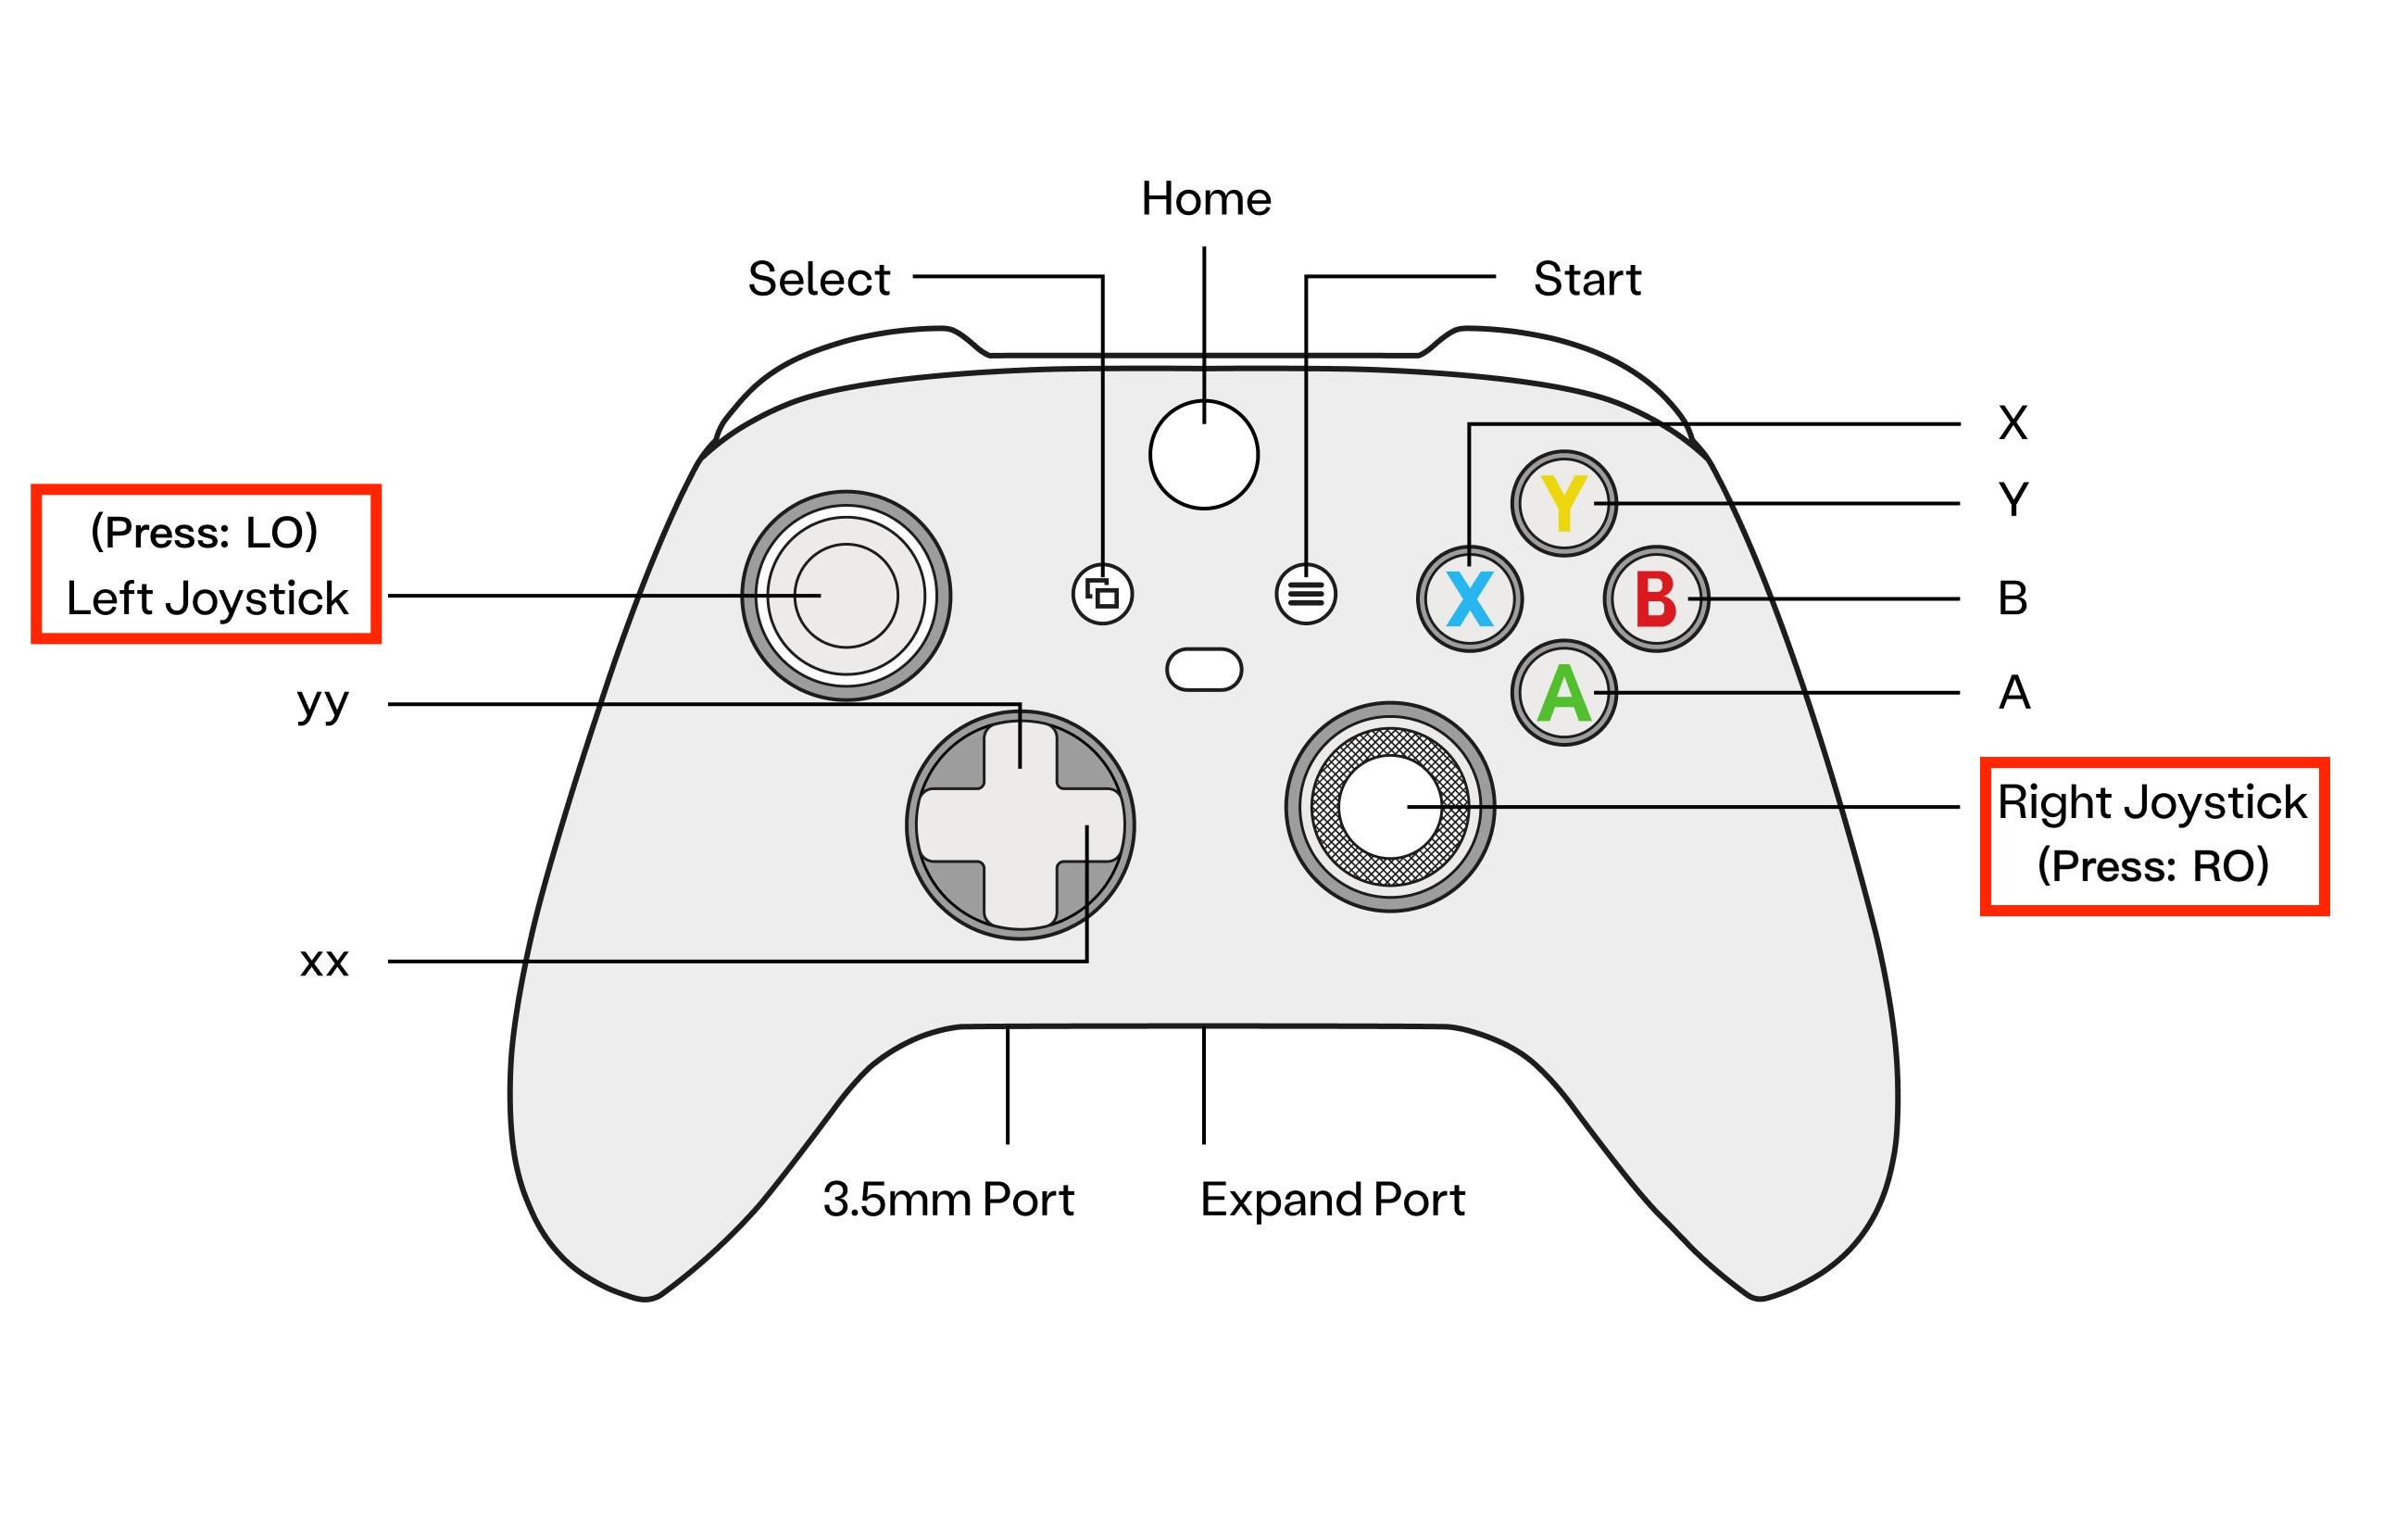
- Initialize Pose: Press
U. Adam-U executes "Raise Arms."
- Deployment Preparation: Press
D. Adam-U executes "Lean Forward/Lower Head."
4.3 Running Phase
- Start Task: Press
S. Run the Pick & Place task.
- Reset: Press
R. Stop grasping; you can pressSagain to restart.
4.4 Completion Phase
- Press
Rto reset -> PressCtrl+Cto return to the upper level -> PressN. Adam-U executes "Lower Arms."
Viewing Camera Feed
Connect the HDMI port of the robot's head computing unit (NX) to a display screen, and connect a keyboard and mouse to the USB/Type C ports.
- Stop "Terminal 1" on the user computer, keeping "Terminal 2" and "Terminal 3" running.
- Open a terminal in the NX and enable visualization:
Troubleshooting (FAQ)
| Symptom | Possible Cause | Suggested Action |
|---|---|---|
| Software prompts authorization exception | Dongle not inserted or poor interface contact | Re-plug the dongle and check the indicator light status. |
| Frequent grasping failures | Environmental lighting or position offset | 1. Check for strong light directed at the camera; 2. Re-calibrate the relative distance between the desktop and the flange. |
| Model runs successfully, but robot does not react | Object is out of field of view | View the camera feed via an external monitor and readjust object positions. |
| Program crashes during operation | Hardware overheating or high system resource usage | Check if cooling is normal; restart after cooling down. |
Last Updated: 2026-04-09