快速开始
系统要求
- Noitom:Windows 10/11,用户 PC 需运行 Axis Studio 3,详见 Noitom 配置。
- Meta Quest 3(WebVR):头显设备与机器人同网段。机器人 NUC 需部署 Caddy(见 Meta Quest 3 文档)。
- PICO:头显设备与机器人同网段。详见 PICO。
遥操作启动成功后必须使用 Foxglove 进行可视化,确认机器人动作映射效果符合预期。
准备工作
-
连接机器人NUC
-
安装遥操作程序(需接入互联网,已安装可跳过)
运行遥操作程序
请选择设备类型
安装依赖 Caddy(已安装可跳过):
sudo apt install -y debian-keyring debian-archive-keyring apt-transport-https curl
curl -1sLf 'https://dl.cloudsmith.io/public/caddy/stable/gpg.key' | sudo gpg --dearmor -o /usr/share/keyrings/caddy-stable-archive-keyring.gpg
curl -1sLf 'https://dl.cloudsmith.io/public/caddy/stable/debian.deb.txt' | sudo tee /etc/apt/sources.list.d/caddy-stable.list
sudo chmod o+r /usr/share/keyrings/caddy-stable-archive-keyring.gpg
sudo chmod o+r /etc/apt/sources.list.d/caddy-stable.list
sudo apt update
sudo apt install caddy
启动程序:
设备侧配置与标定
Foxglove 可视化
- 在PC端安装并启动 Foxglove Studio
- 注册登录后点击"Open Connection"
- 通过WebSocket连接机器人:
ws://localhost:8765(将localhost替换为机器人实际IP) - 进入三维可视化面板,打开设置:
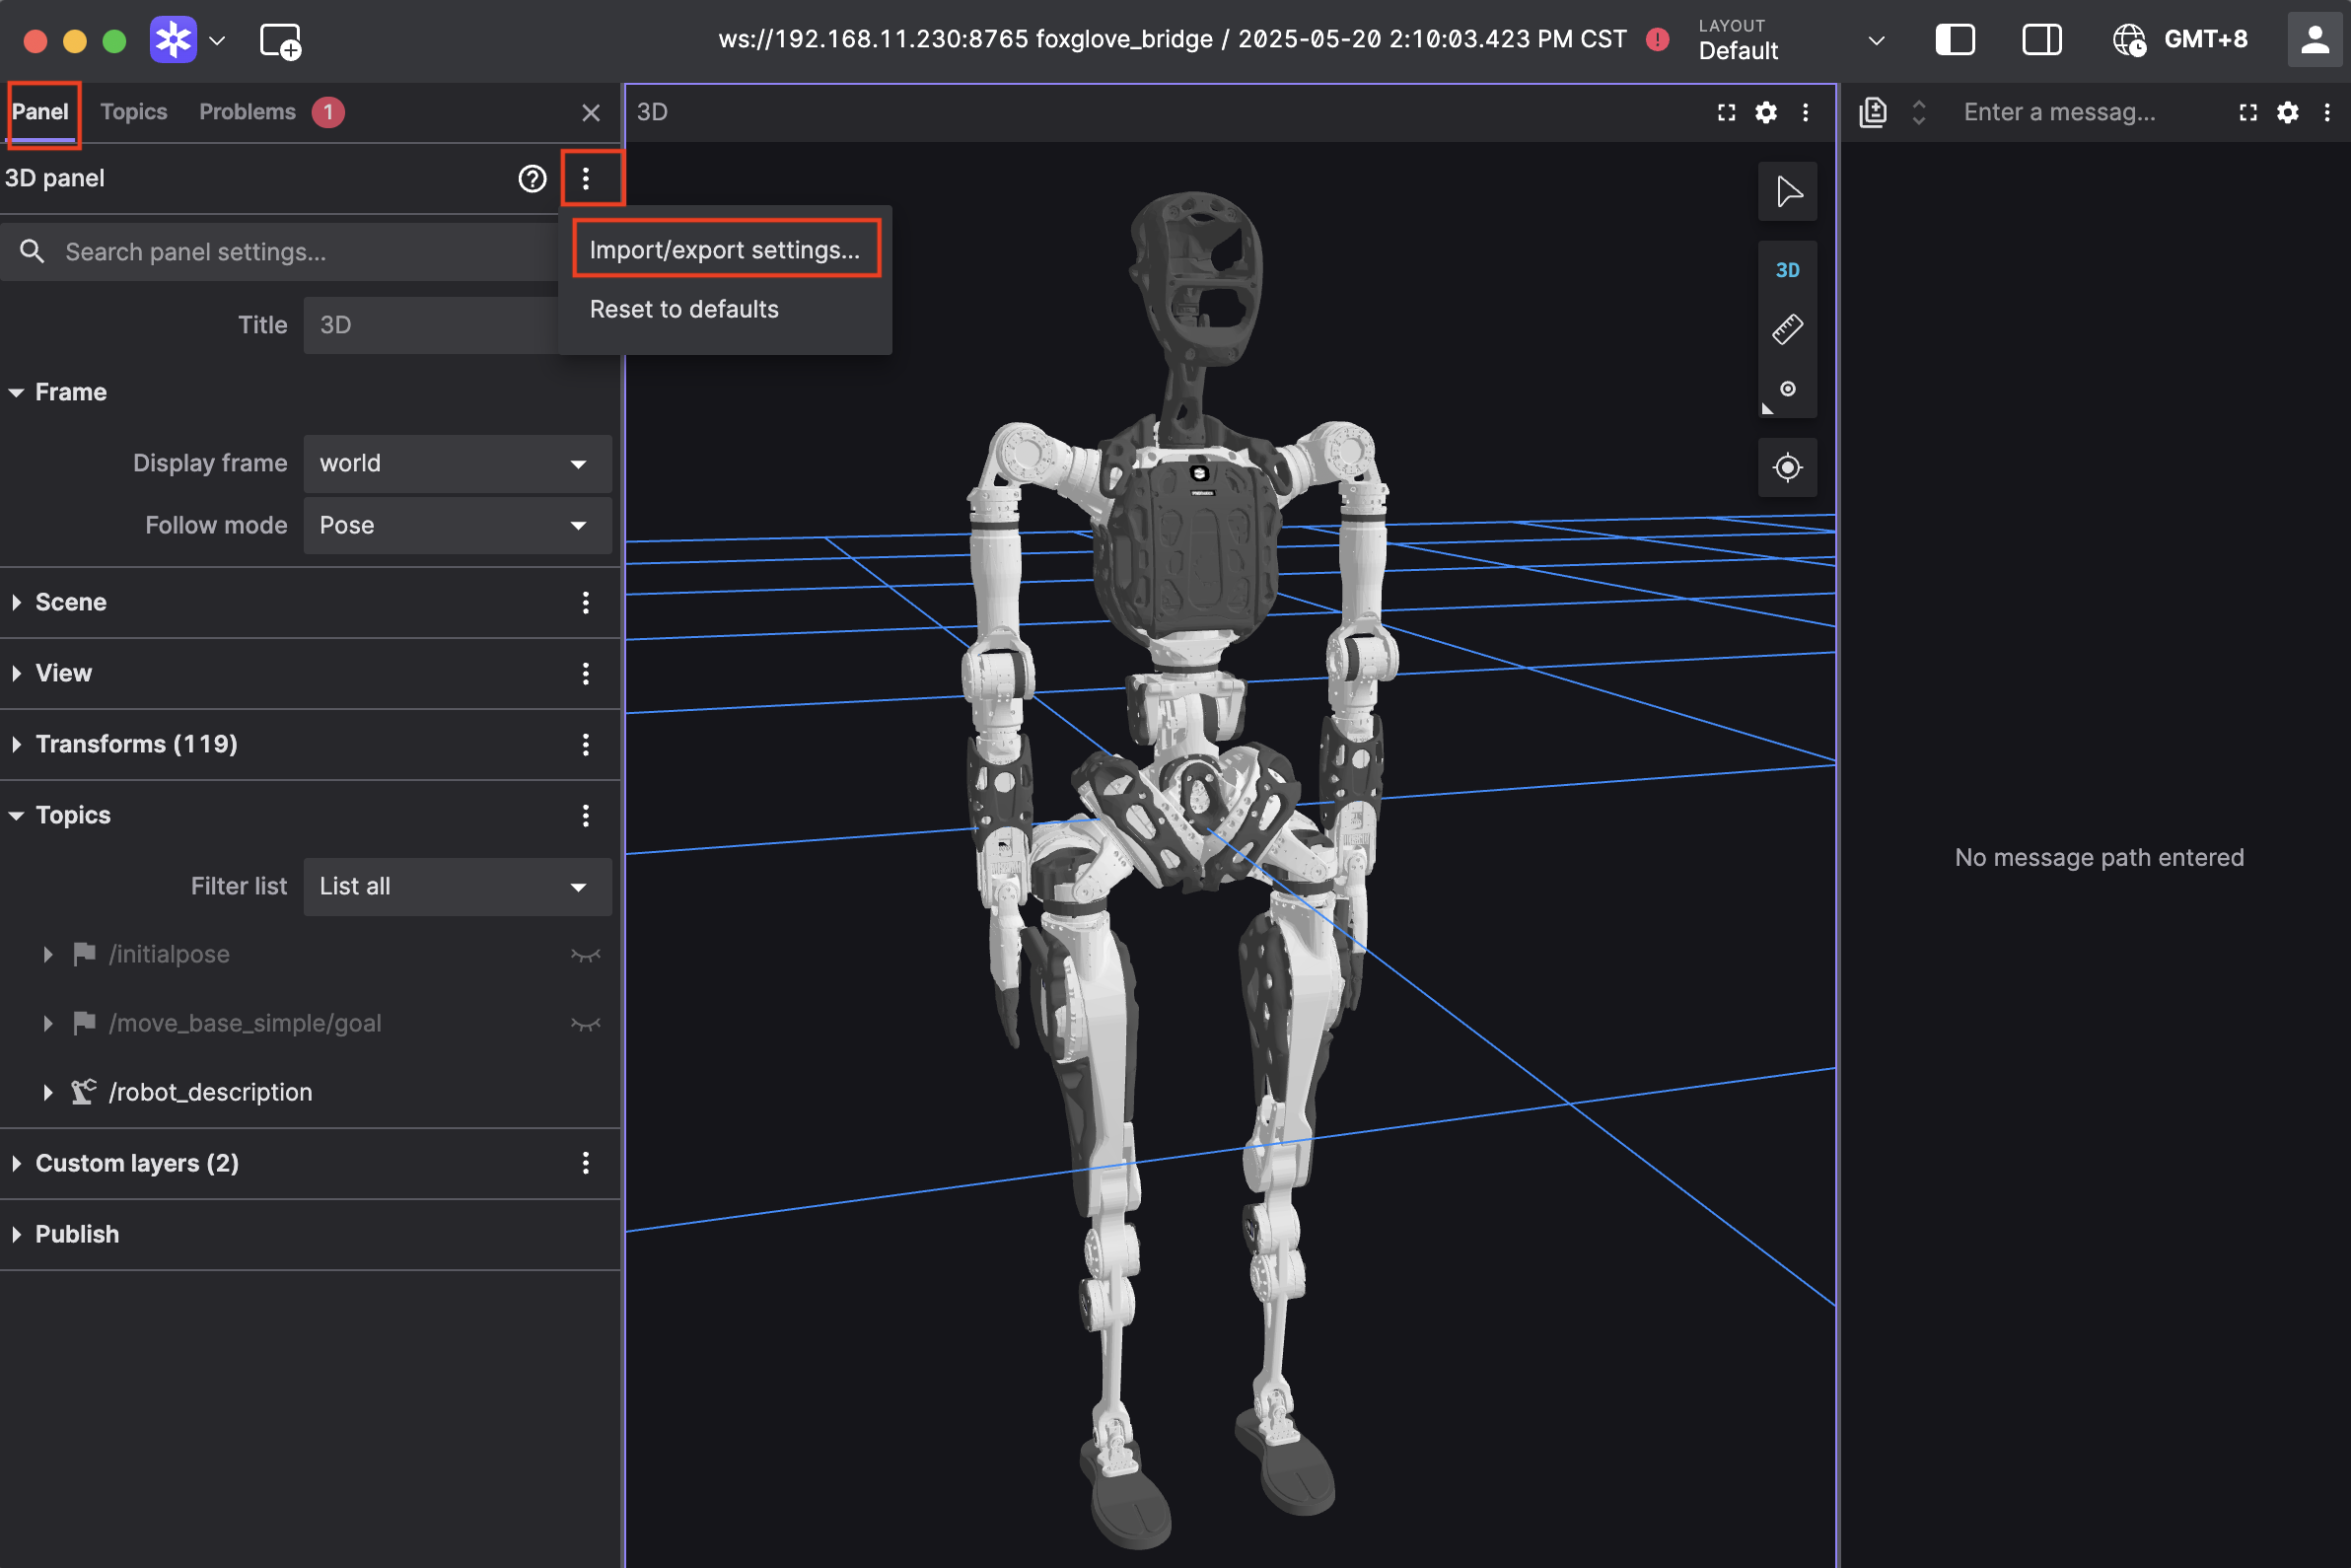 5. 复制下方代码粘贴到到设置页面,点击"Apply"。配置成功后即可实时观察机器人动作映射效果
点击展开配置代码
{
  "layers": {
    "845139cb-26bc-40b3-8161-8ab60af4baf5": {
      "visible": true,
      "frameLocked": true,
      "label": "Grid",
      "instanceId": "845139cb-26bc-40b3-8161-8ab60af4baf5",
      "layerId": "foxglove.Grid",
      "size": 10,
      "divisions": 10,
      "lineWidth": 1,
      "color": "#248eff",
      "position": [
        0,
        0,
        0
      ],
      "rotation": [
        0,
        0,
        0
      ],
      "order": 1
    }
  },
  "cameraState": {
    "perspective": true,
    "distance": 8.362406704377788,
    "phi": 74.10829292531537,
    "thetaOffset": 13.624928863620116,
    "targetOffset": [
      1.3462285617160472,
      3.872395794634993,
      -4.022926534191149e-17
    ],
    "target": [
      0,
      0,
      0
    ],
    "targetOrientation": [
      0,
      0,
      0,
      1
    ],
    "fovy": 45,
    "near": 0.5,
    "far": 5000
  },
  "followMode": "follow-pose",
  "followTf": "world",
  "scene": {
    "meshUpAxis": "z_up",
    "transforms": {
      "showLabel": false,
      "enablePreloading": true,
      "axisSize": 0
    },
    "ignoreColladaUpAxis": true
  },
  "transforms": {},
  "topics": {
    "/robot_description": {
      "visible": true
    }
  },
  "publish": {
    "type": "point",
    "poseTopic": "/move_base_simple/goal",
    "pointTopic": "/clicked_point",
    "poseEstimateTopic": "/initialpose",
    "poseEstimateXDeviation": 0.5,
    "poseEstimateYDeviation": 0.5,
    "poseEstimateThetaDeviation": 0.26179939
  },
  "imageMode": {}
}
实机操作
安全警告
- 实机操作存在一定风险,请确保机器人周围3米范围内无障碍物
- 仅在pnd_teleoperation正常运行且预览效果符合预期时,方可接入实机控制
- 接入数据前确认预览中的关节位置与实际机器人姿态基本一致
- 遥操作期间禁止切换其他运行模式(如行走、跑步等演示程序)
- 遇到异常情况立即执行以下紧急操作:
- LT+B:进入阻尼模式
- LB+RB:执行器断电
各型号实机操作
启动adam_demo(程序已自启动可跳过)
打开新的终端
- 零位模式(按下 A)
- 站立模式(按下 X)
- 在站立模式下按下 十字键 Right 接入teleoperation数据
- 在站立模式下按下 十字键 Left 断开teleoperation数据
1.启动 pnd_service_dds(程序已自启动可跳过)
✅ 当终端返回
[DDS] Starting publish loop (400 Hz)...时,表示服务已成功启动。
2.启动 pnd_adam_dds(程序已自启动可跳过)
打开新的终端
✅ 当终端返回
FSM start!时,表示服务已成功启动。机器人启动后默认进入 阻尼模式。
- 零位模式(按下 A)
- 动作模式(按下 X)
- 在动作模式中按下 十字键 Right 接入teleoperation数据
- 在动作模式中按下 十字键 Left 断开teleoperation数据
最后更新:2026-05-12