🕹️ PND Adam Teleoperation
A real-time motion mapping framework designed for the Adam series humanoid robots, delivering natural and smooth teleoperation via high‑precision motion‑capture systems.
Supports Noitom Motion Capture System and Meta Quest 3S as input sources.
📋 Supported Models
| Model | Noitom Mocap | VR Headset |
|---|---|---|
| Adam SP | ✅ | In progress |
| Adam Pro | ✅ | In progress |
| Adam U | ✅ | ✅ |
Demo
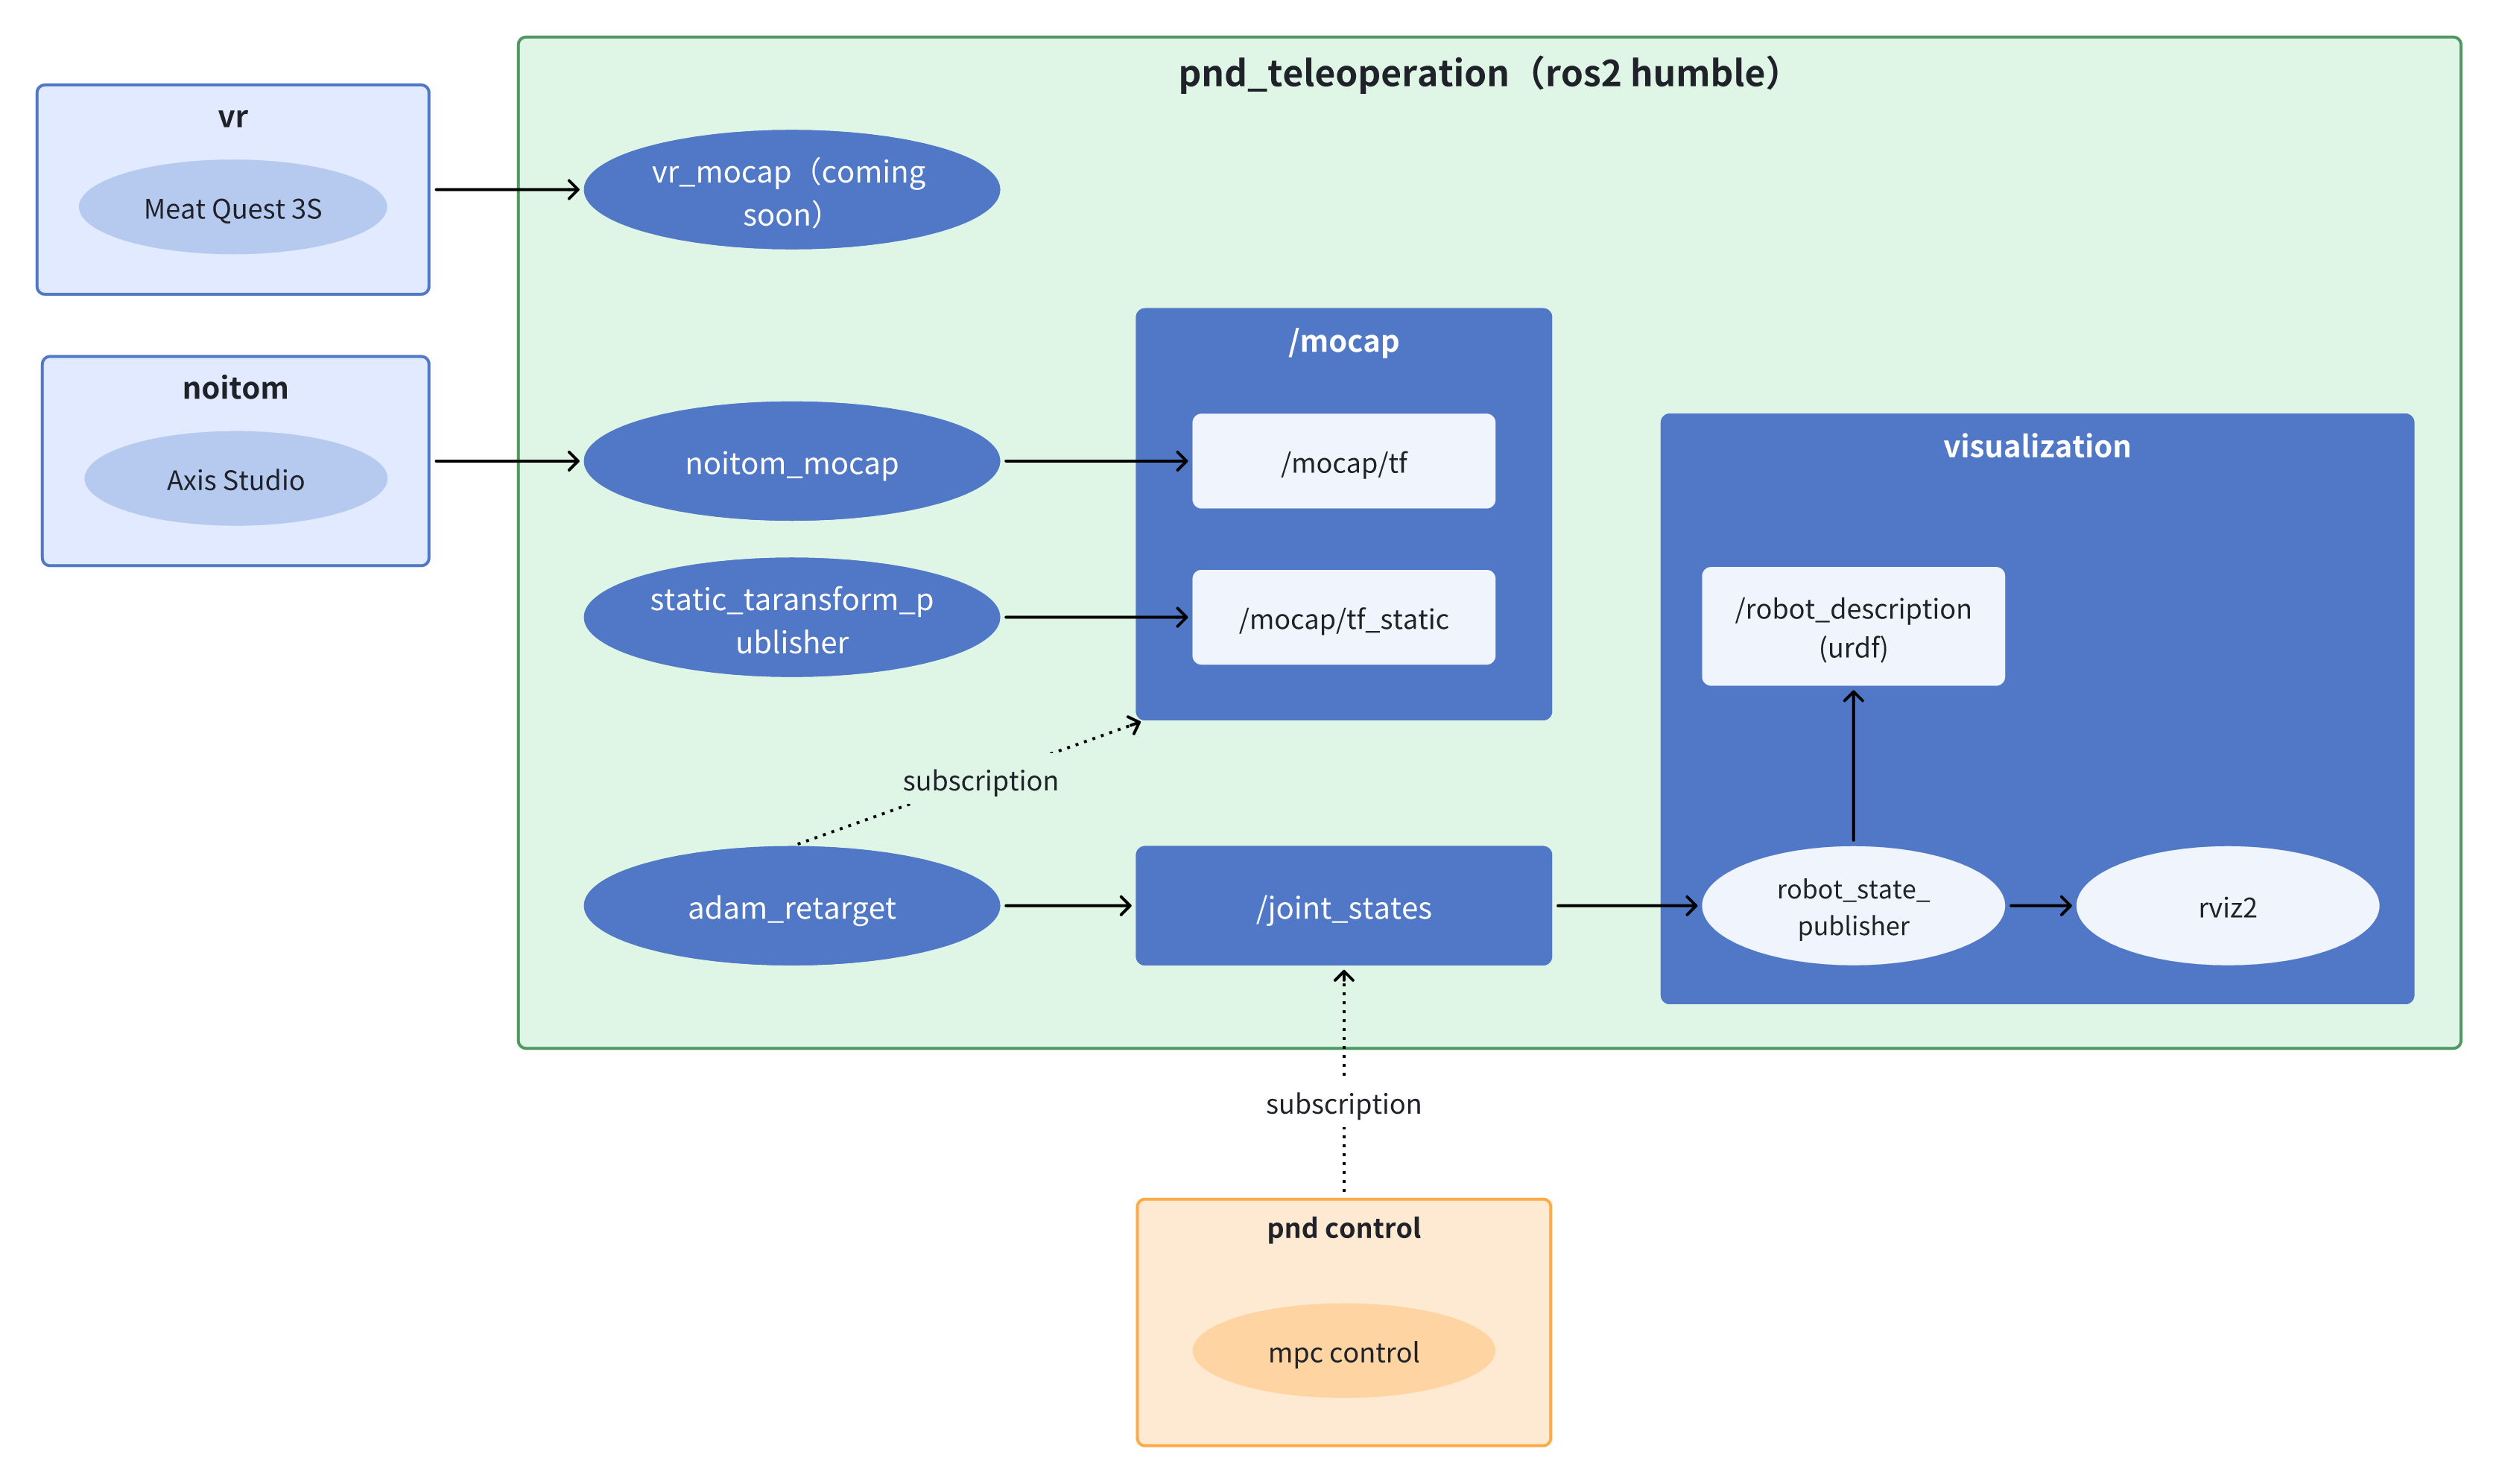
🏗️ System Architecture
The system uses a distributed architecture:
- Motion Input Layer: Noitom motion‑capture system (Windows) or Meta Quest 3S VR device
- Control Core Layer:
pnd_teleoperationandpnd-controlrunning on the Adam robot’s onboard NUC - Data Pipeline: Real‑time communication based on ROS 2 Humble
⚙️ Environment Setup
The Adam robot’s built‑in NUC is pre‑installed with the full runtime environment.
If deploying on another device, configure the following:
- OS: Ubuntu 22.04 LTS
- Middleware: ROS 2 Humble
- Math Library: casadi 3.6.7 (requires source build)
sudo apt-get update && sudo apt-get install -y \
    build-essential \
    coinor-libipopt-dev \
    gfortran \
    liblapack-dev \
    pkg-config \
    swig \
    git \
    cmake \
    python3 \
    python3-pip \
    git-lfs \
    --install-recommends
cd /tmp && \
git clone https://github.com/casadi/casadi.git casadi && \
cd casadi && \
git checkout 3.6.7 && \
mkdir build && \
cd build && \
cmake -DWITH_PYTHON=ON -DWITH_IPOPT=ON -DWITH_OPENMP=ON -DWITH_THREAD=ON .. && \
make -j$(nproc) && \
sudo make install && \
sudo ldconfig
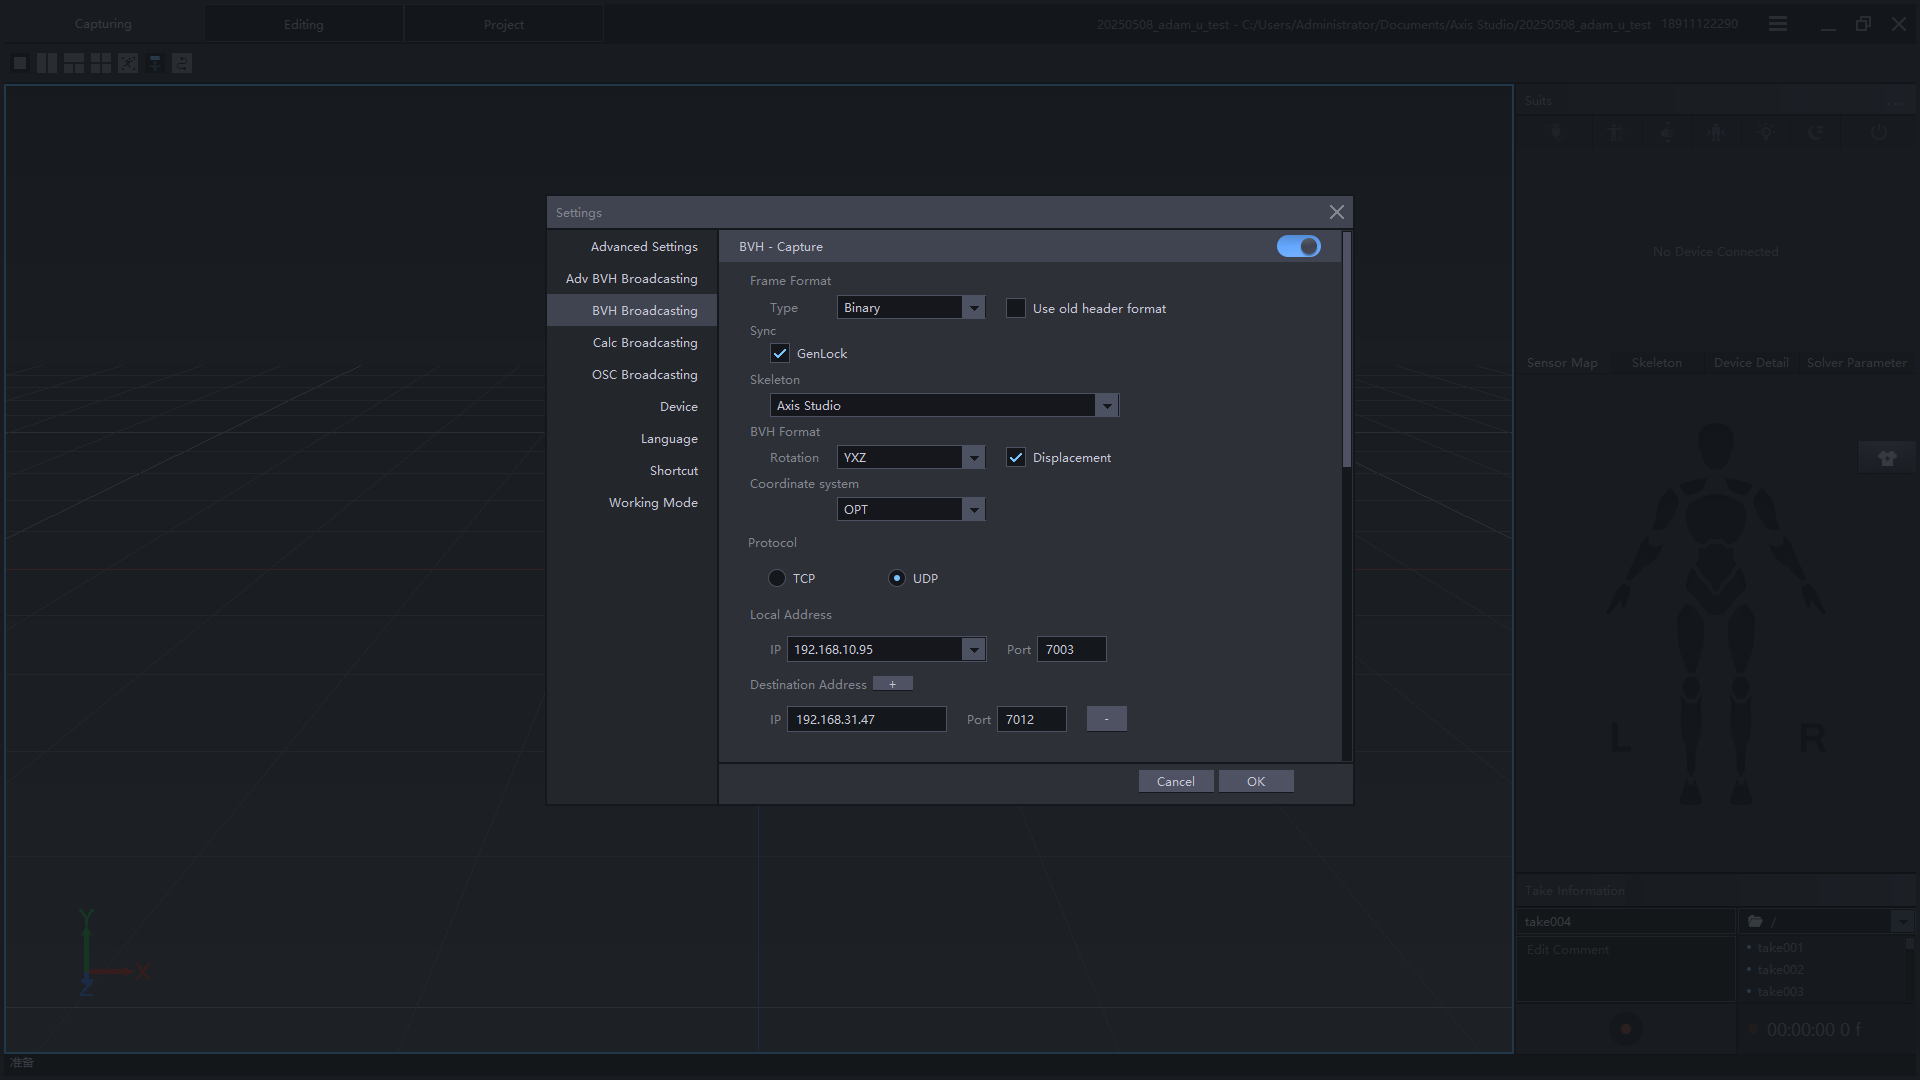
💃 Motion Capture Setup
Motion_capture
Launch Axis Studio, complete sensor connection and calibration.
Enable BVH broadcast and send the UDP motion stream to the target robot IP.
Refer to the Video
BVH Broadcast Key Points:
- Local Address: The IP of the computer running Axis Studio
- Target Address: The IP of the Adam robot
- Network Requirement: Both devices must be on the same LAN
Notice
- After calibration, keep both feet fixed when beginning teleoperation
- To change position, disconnect teleoperation, move, then re‑calibrate
Prerequisites:
- VR device and Adam robot must be on the same LAN
pnd_teleoperationis running- Python dependencies installed
Steps:
- Open https://192.168.XX.XX:8443 in the Meta Quest 3S browser
- Click Start Controller Tracking
- Foxglove will show real‑time controller & HMD pose
Calibration Pose:

Calibration Procedure:
- Hold pose → long‑press right controller
 for 3 seconds
 - Press A on right controller to confirm calibration
- The robot model in Foxglove will follow VR motion
- Press B to disconnect teleoperation
🚀 Start Teleoperation
SSH into the robot (IP printed on controller back, default password: pndxyz):
ssh pnd-humanoid@192.168.XX.XX
cd ~/Documents/
git clone https://github.com/pndbotics/pnd_teleoperation.git
cd pnd_teleoperation
./build.sh

sudo su
./run.sh [adam_type] [mocap_driver] [algorithm] # adam_type: adam_sp/adam_u/adam_pro; mocap_driver: noitom/vr; algorithm: pinocchio/mink;
Open a new terminal:
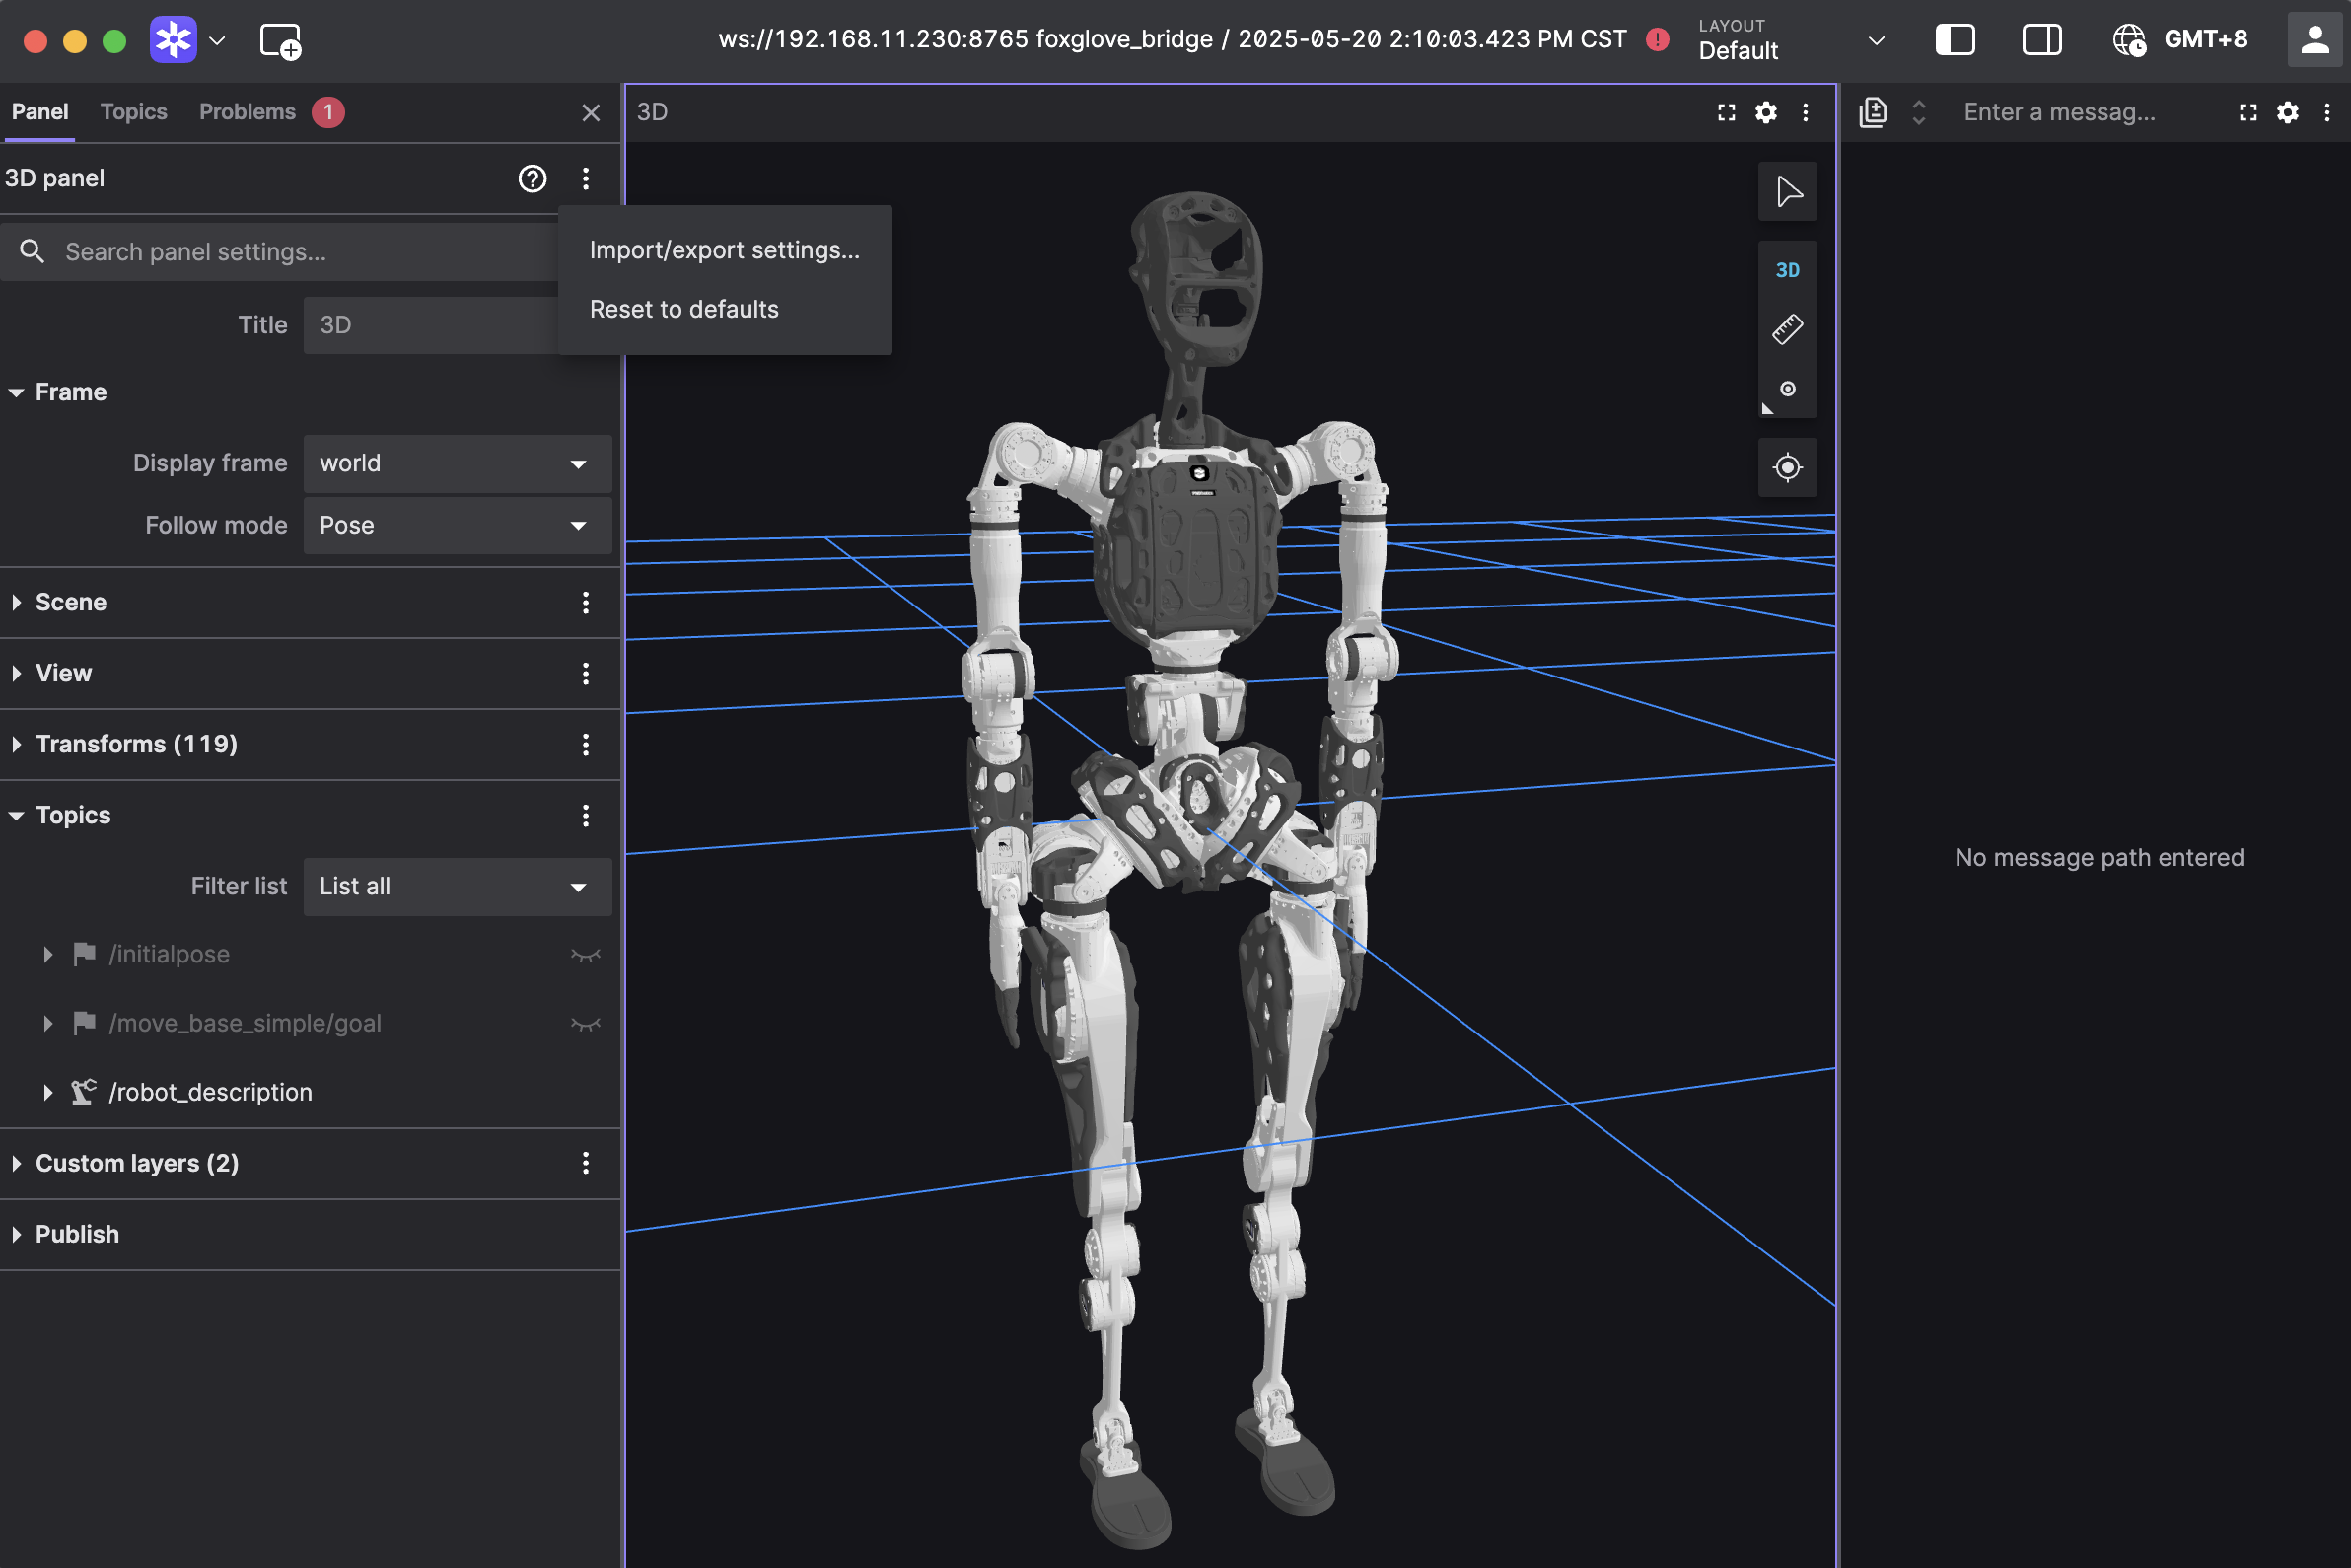
🖥️ Foxglove Visualization
- Install & launch Foxglove Studio
- Login → Open Connection
- Connect via WebSocket:
ws://localhost:8765(replace localhost with robot IP) - Import configuration below → click Apply
- You can now view real‑time teleoperation mapping
{
  "layers": {
    "845139cb-26bc-40b3-8161-8ab60af4baf5": {
      "visible": true,
      "frameLocked": true,
      "label": "Grid",
      "instanceId": "845139cb-26bc-40b3-8161-8ab60af4baf5",
      "layerId": "foxglove.Grid",
      "size": 10,
      "divisions": 10,
      "lineWidth": 1,
      "color": "#248eff",
      "position": [
        0,
        0,
        0
      ],
      "rotation": [
        0,
        0,
        0
      ],
      "order": 1
    }
  },
  "cameraState": {
    "perspective": true,
    "distance": 8.362406704376102,
    "phi": 78.01200929751727,
    "thetaOffset": -81.68452995867766,
    "targetOffset": [
      -4.304686610834797,
      0.46408895757669916,
      -2.8097074529725844e-16
    ],
    "target": [
      0,
      0,
      0
    ],
    "targetOrientation": [
      0,
      0,
      0,
      1
    ],
    "fovy": 45,
    "near": 0.5,
    "far": 5000
  },
  "followMode": "follow-pose",
  "followTf": "world",
  "scene": {
    "meshUpAxis": "z_up",
    "transforms": {
      "showLabel": false,
      "axisScale": 0
    },
    "ignoreColladaUpAxis": true
  },
  "transforms": {},
  "topics": {
    "/robot_description": {
      "visible": true
    }
  },
  "publish": {
    "type": "point",
    "poseTopic": "/move_base_simple/goal",
    "pointTopic": "/clicked_point",
    "poseEstimateTopic": "/initialpose",
    "poseEstimateXDeviation": 0.5,
    "poseEstimateYDeviation": 0.5,
    "poseEstimateThetaDeviation": 0.26179939
  },
  "imageMode": {}
}
🤖 Real Robot Operation
Safety Warning
- Keep a 3‑meter radius clear around the robot
- Operate only when
pnd_teleoperationpreview matches expected motion - Ensure joint positions match real robot before connecting
- Do NOT run other demo modes during teleoperation
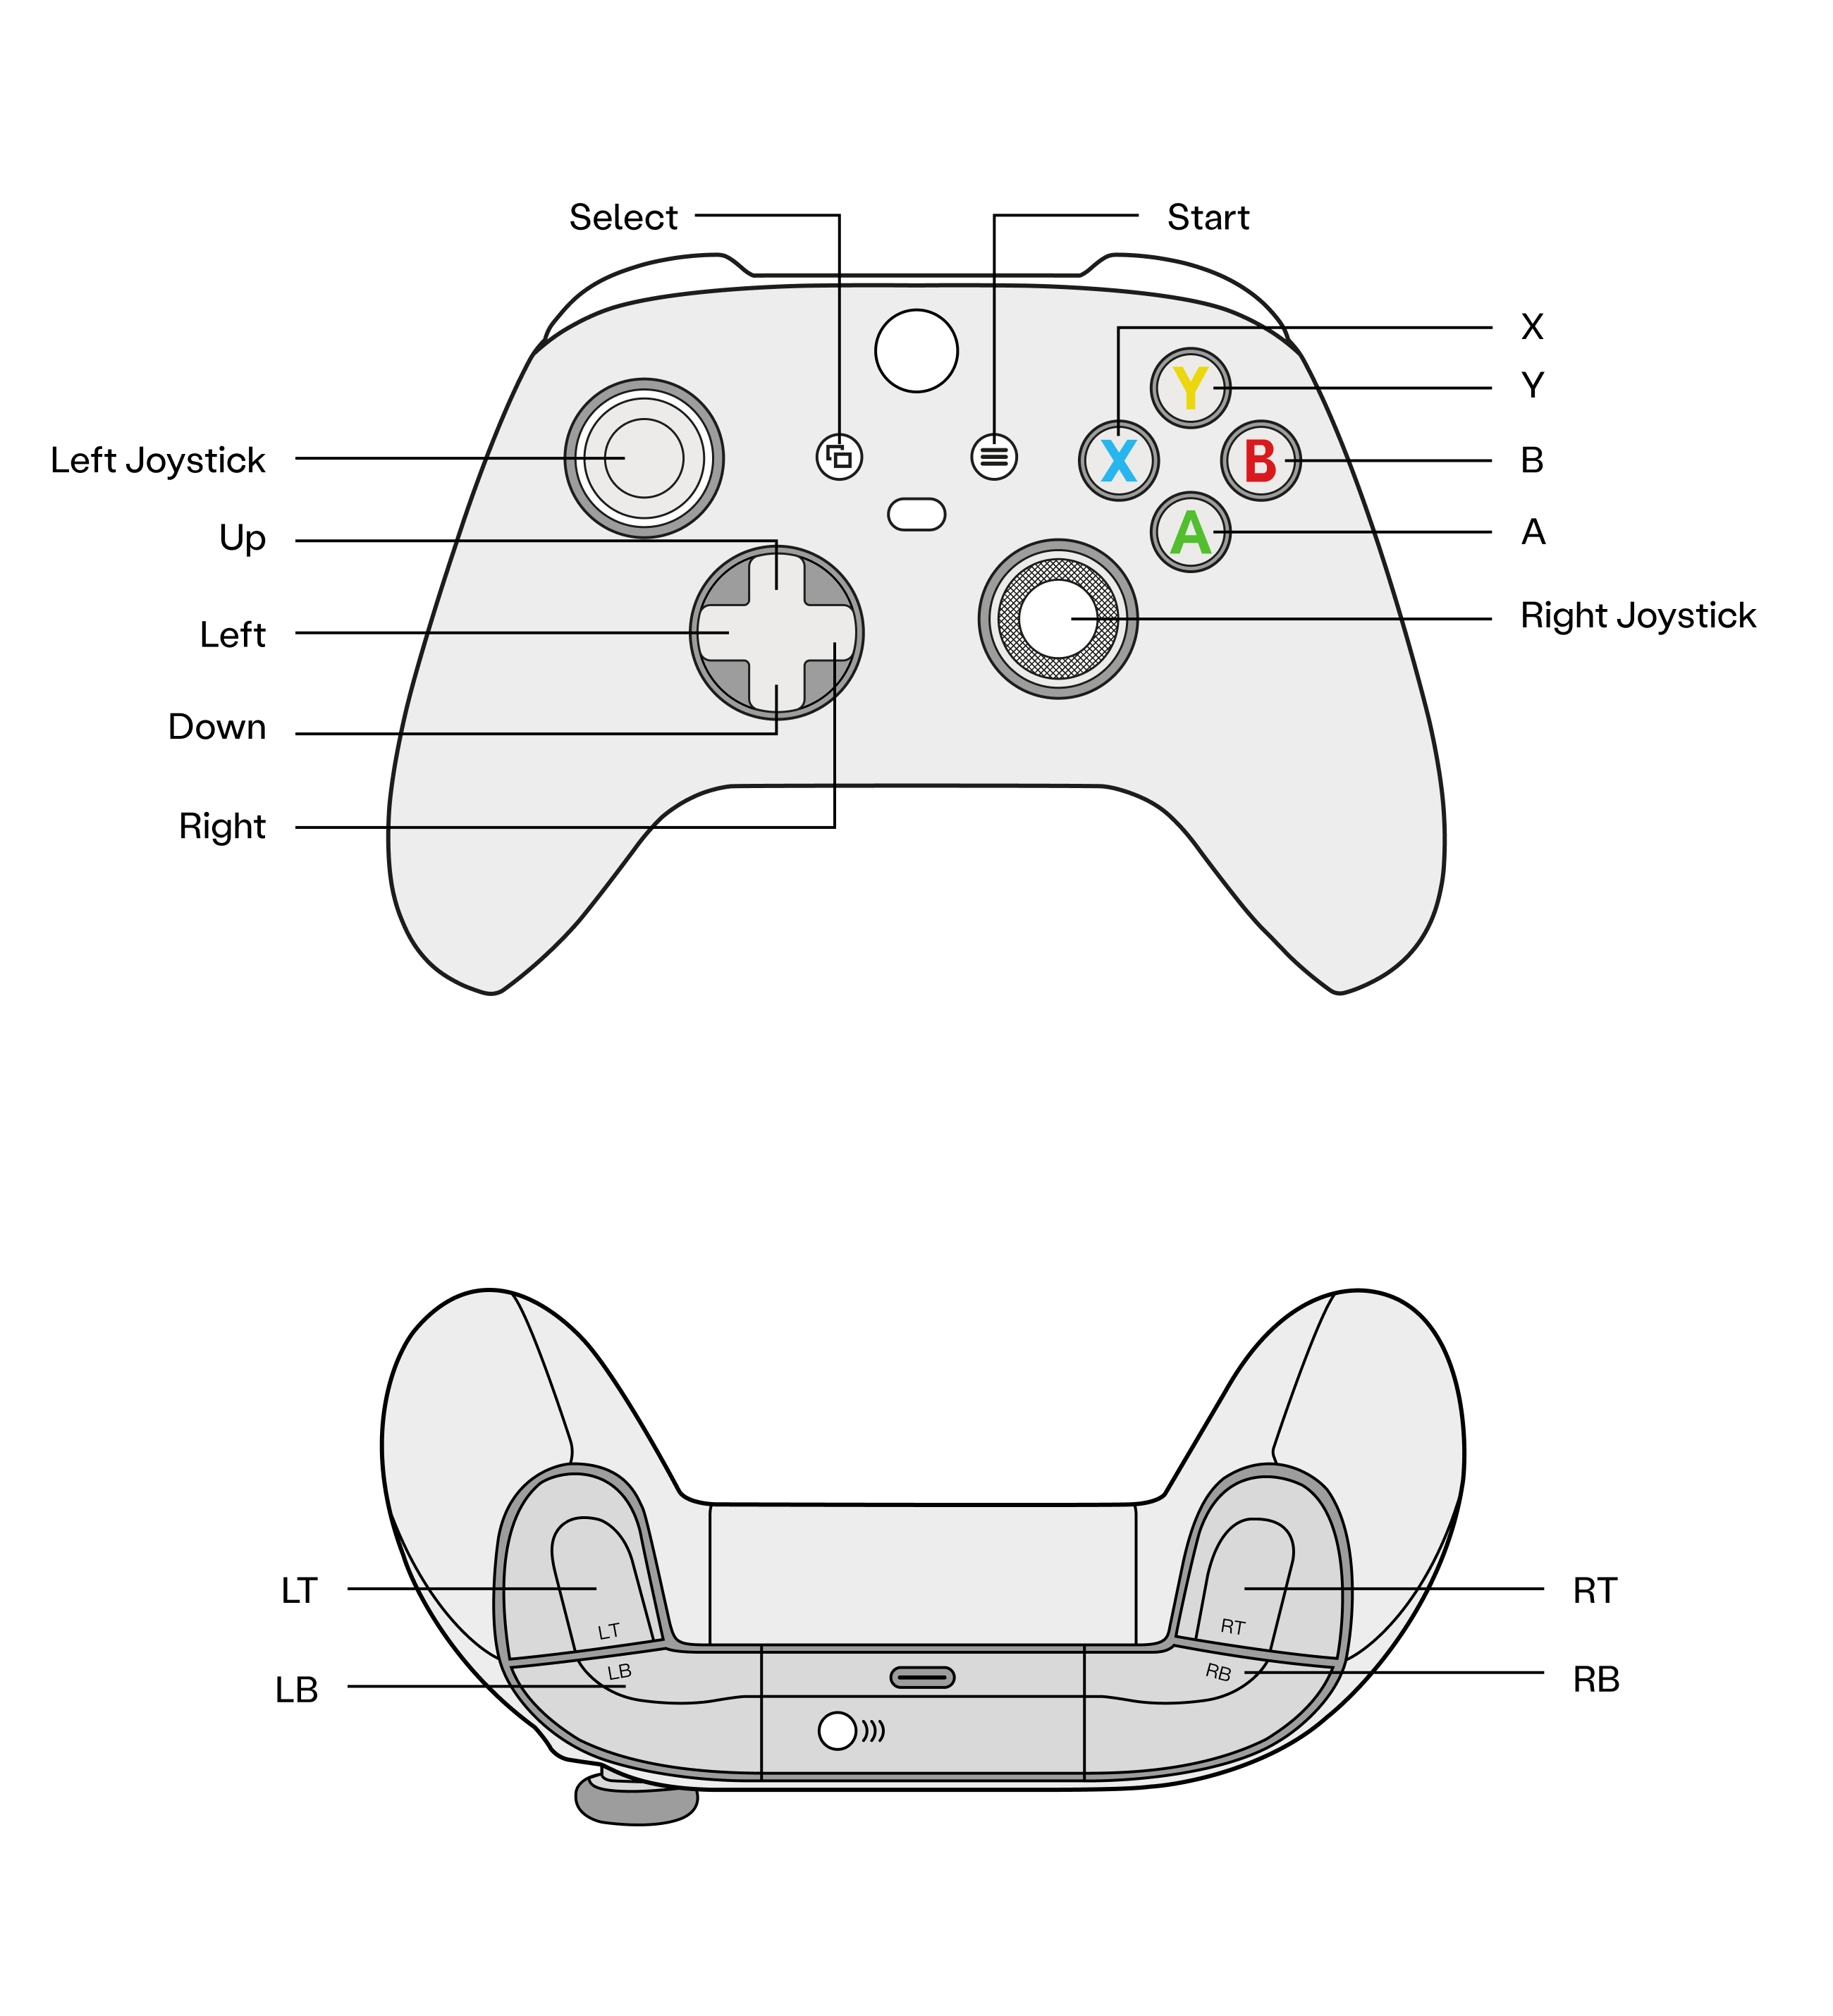
- Emergency actions:
- LT+B — Damping Mode
- LB+RB — Power off actuators
Real_robot_operation
Teleoperation is currently based on adam_demo.
Controller operations are the same as adam_demo.
-
Start adam_demo
Open a new terminal
-
Zero Position Mode (press A)
- Standing Mode (press X)
- Press D-pad Right to connect teleoperation
- Press D-pad Left to disconnect
1.Start pnd_service_dds

✅ When the terminal shows [DDS] Starting publish loop (400 Hz)..., it indicates that the service has started successfully.
2.Start pnd_adam_dds
Open a new terminal
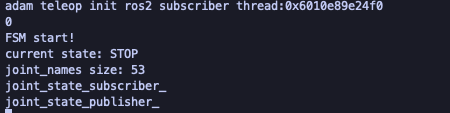
✅ When the terminal shows FSM start!, it indicates that the service has started successfully. After the robot starts, it defaults to the Damping mode.
- Zero Position Mode (A)
- Motion Mode (X)
- Press D-pad Right to connect teleoperation
- Press D-pad Left to disconnect
❓ FAQ
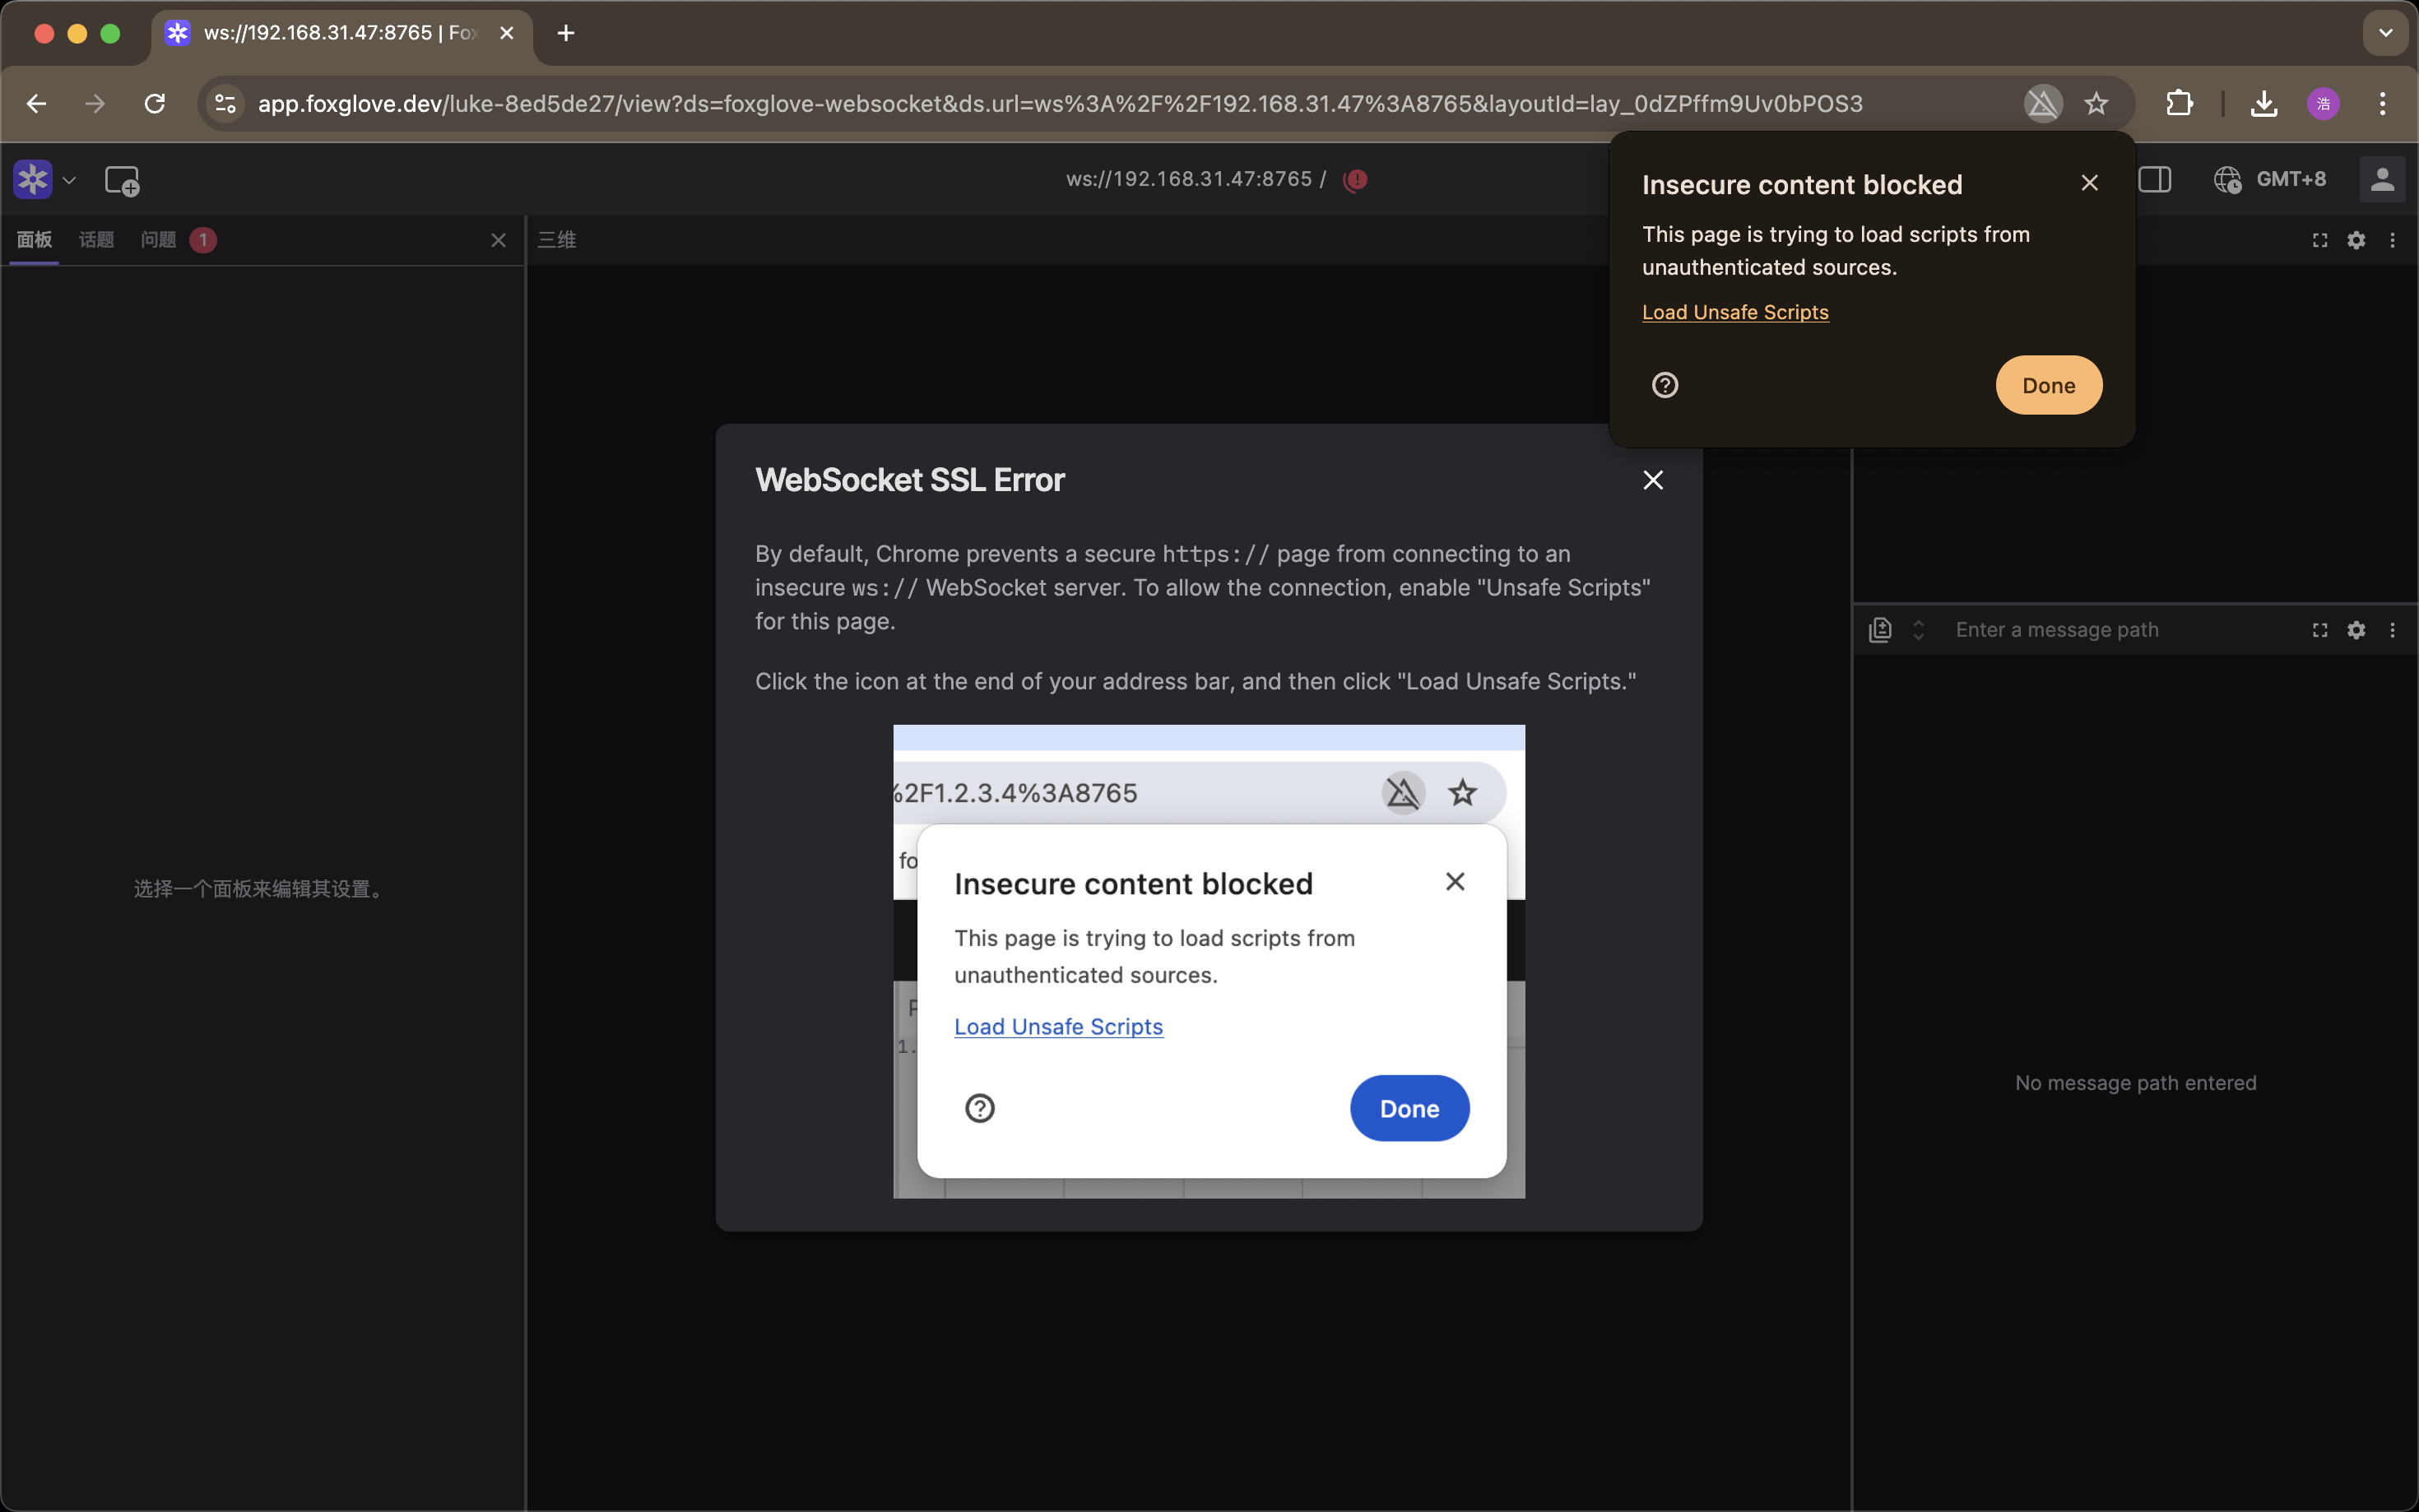
If Foxglove shows SSL warnings, click Load unsafe scripts.
Last Updated: 2026‑01‑26