Remote Control
Mode Definitions
| Concept | Description |
|---|---|
| Damping Mode | All joints stop active motion and remain at their current positions. There is noticeable damping when joints are moved. |
| Zero Position Mode | All joints move to predefined fixed positions and lock. |
| Motion Mode | In this state, preset actions can be executed, teleoperation can be enabled, or data recording can be performed. |
| Developer Mode | Recommended to enter from Damping Mode. Used for SDK development. In this mode, the robot receives user control data for custom control. |
RCU Indicator Instructions
The RCU indicator is located below the battery cover on the front of the robot's chest.
| Status | Color |
|---|---|
| RCU startup successful, Not connected to NUC | 🟣 Purple, fast breathing |
| RCU startup successful, Connected to NUC | 🟣 Purple, slow breathing |
| Developer mode | 🔵 Blue, slow breathing |
| Low battery | 🔴 Red, fast breathing |
| Battery not connected | 🔴 Red, slow breathing |
| Zero position check abnormal | 🟡 Yellow, steady on |
| Actuator abnormal | 🟡 Yellow, slow breathing |
| Absolute encoder abnormal | 🟡 Yellow, fast breathing |
Operation Instructions
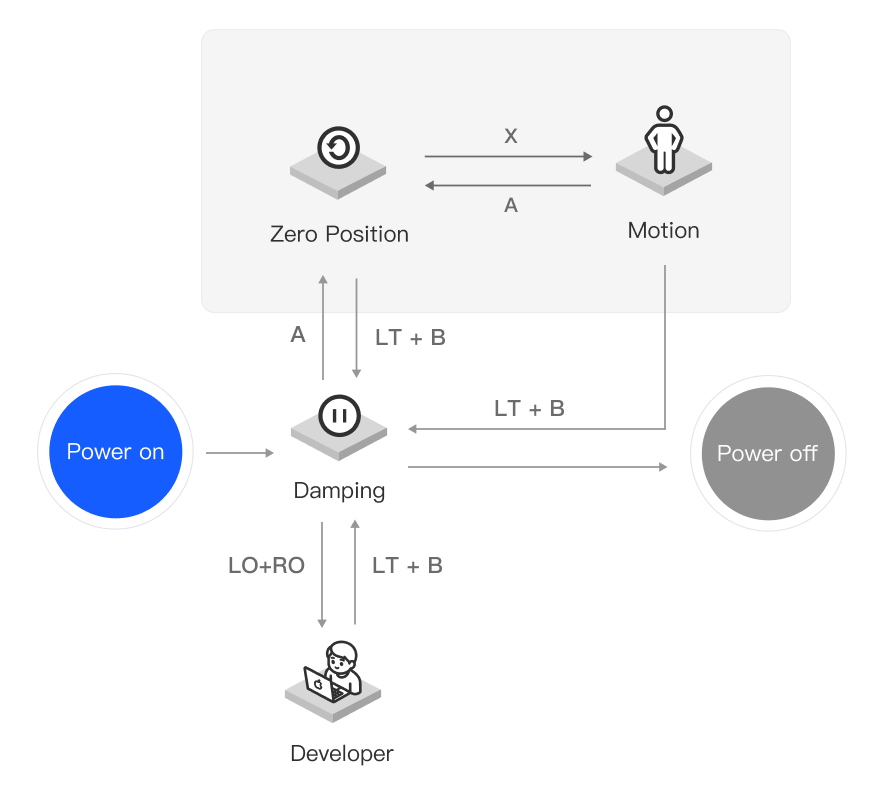
| Mode | Button | Previous State | Function Description |
|---|---|---|---|
| Damping Mode | LT + B | Any Mode | Can be triggered in any mode, used for safe standby or stopping motion |
| Zero Position Mode | A | Damping / Motion | Enter Zero Position Mode, all joints move to fixed positions and lock |
| Motion Mode | X | Zero Position | Enter Motion Mode from Zero Position Mode to execute preset actions, enable teleoperation, or record data |
| RB | Motion | Execute a single preset action | |
| RT + RB | Motion | Continuously execute multiple preset actions | |
| D-pad → | Motion | Enable teleoperation receiving mode | |
| D-pad ← | Motion | Exit teleoperation receiving mode | |
| LT + LB | Motion | Trigger start/end of data recording (records all joints + finger position data). - Log path: /etc/pndbotics/pnd_adam_dds/logs - Playback path: /etc/pndbotics/pnd_adam_dds/resource/motion |
|
| Developer Mode | LO + RO | Damping | Enter Developer Mode from Damping Mode to receive user control data for custom control |
| LT + B | Developer | Exit user control and switch back to Damping Mode | |
| Actuator Power Off | LB + RB | Any Mode | Immediately cut off power in emergency situations |
| Actuator Power On | Y + B | Power On | Used for step-by-step startup and recovery after emergency power-off |
Button Description
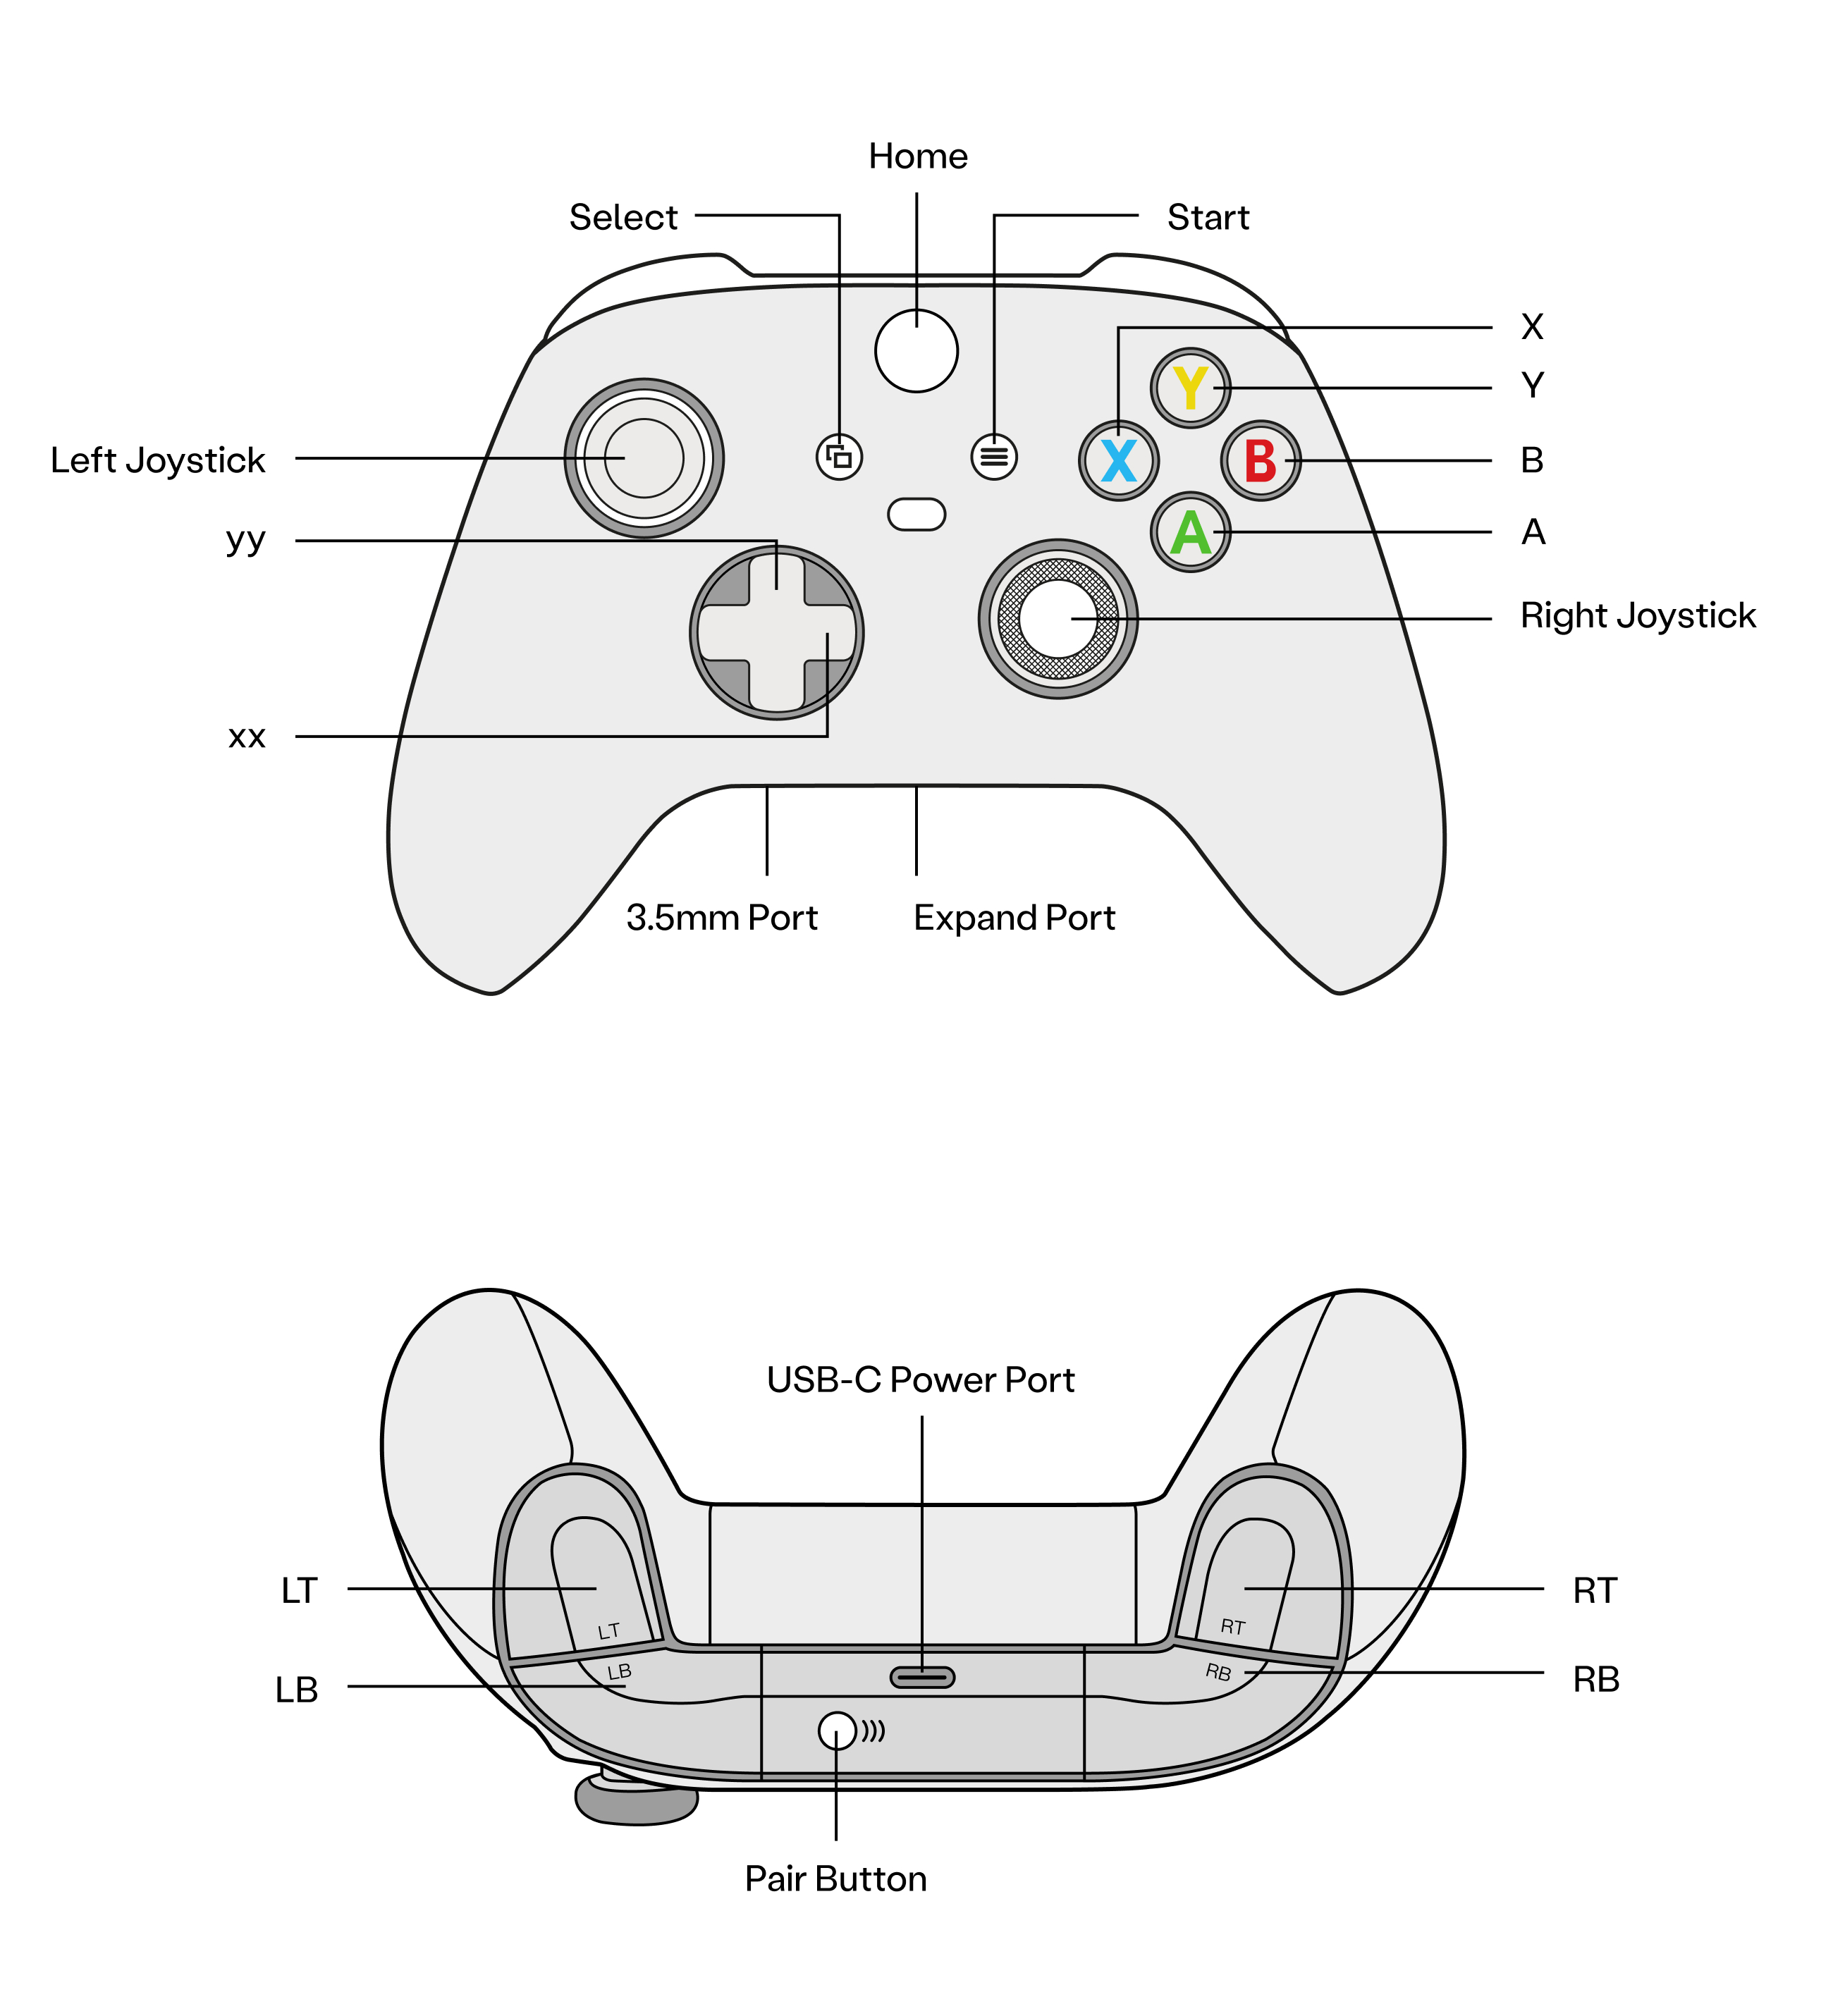
Pairing & Connection
The controller is paired by default at the factory and connects automatically on startup. If you need to replace the controller and re-pair it, follow the steps below:
- Enter the robot IP in the browser:
192.168.XX.XX(found on the back of the controller) to access the PAC interface. - Press and hold the controller pairing button until the indicator light flashes rapidly.
- Click “Wireless Settings”, find the device name “Xbox Wireless Controller” under “Available Devices”, and click to pair and connect.

Last Updated: 2026-02-03