Quick Development (Real)
This document introduces rapid development for Adam-U using pnd_sdk_python. By connecting the robot to the user's computer via a wired connection, real robot control is achieved.
System Environment
Development is recommended on Ubuntu 22.04 x86_64.
macOS and Windows are not supported at this time.
SDK Installation
The following operations are run on the user's computer
# Install system dependencies
sudo apt install libyaml-cpp-dev libspdlog-dev libboost-all-dev libglfw3-dev python3-pip

# Install Python SDK
cd ~
git clone https://github.com/pndbotics/pnd_sdk_python.git
cd pnd_sdk_python
sudo pip3 install -e .
🔗 Reference: pnd_sdk_python
Environment Configuration
- Use an Ethernet cable to connect the robot and the user computer.
The Ethernet port is located on the back of the robot.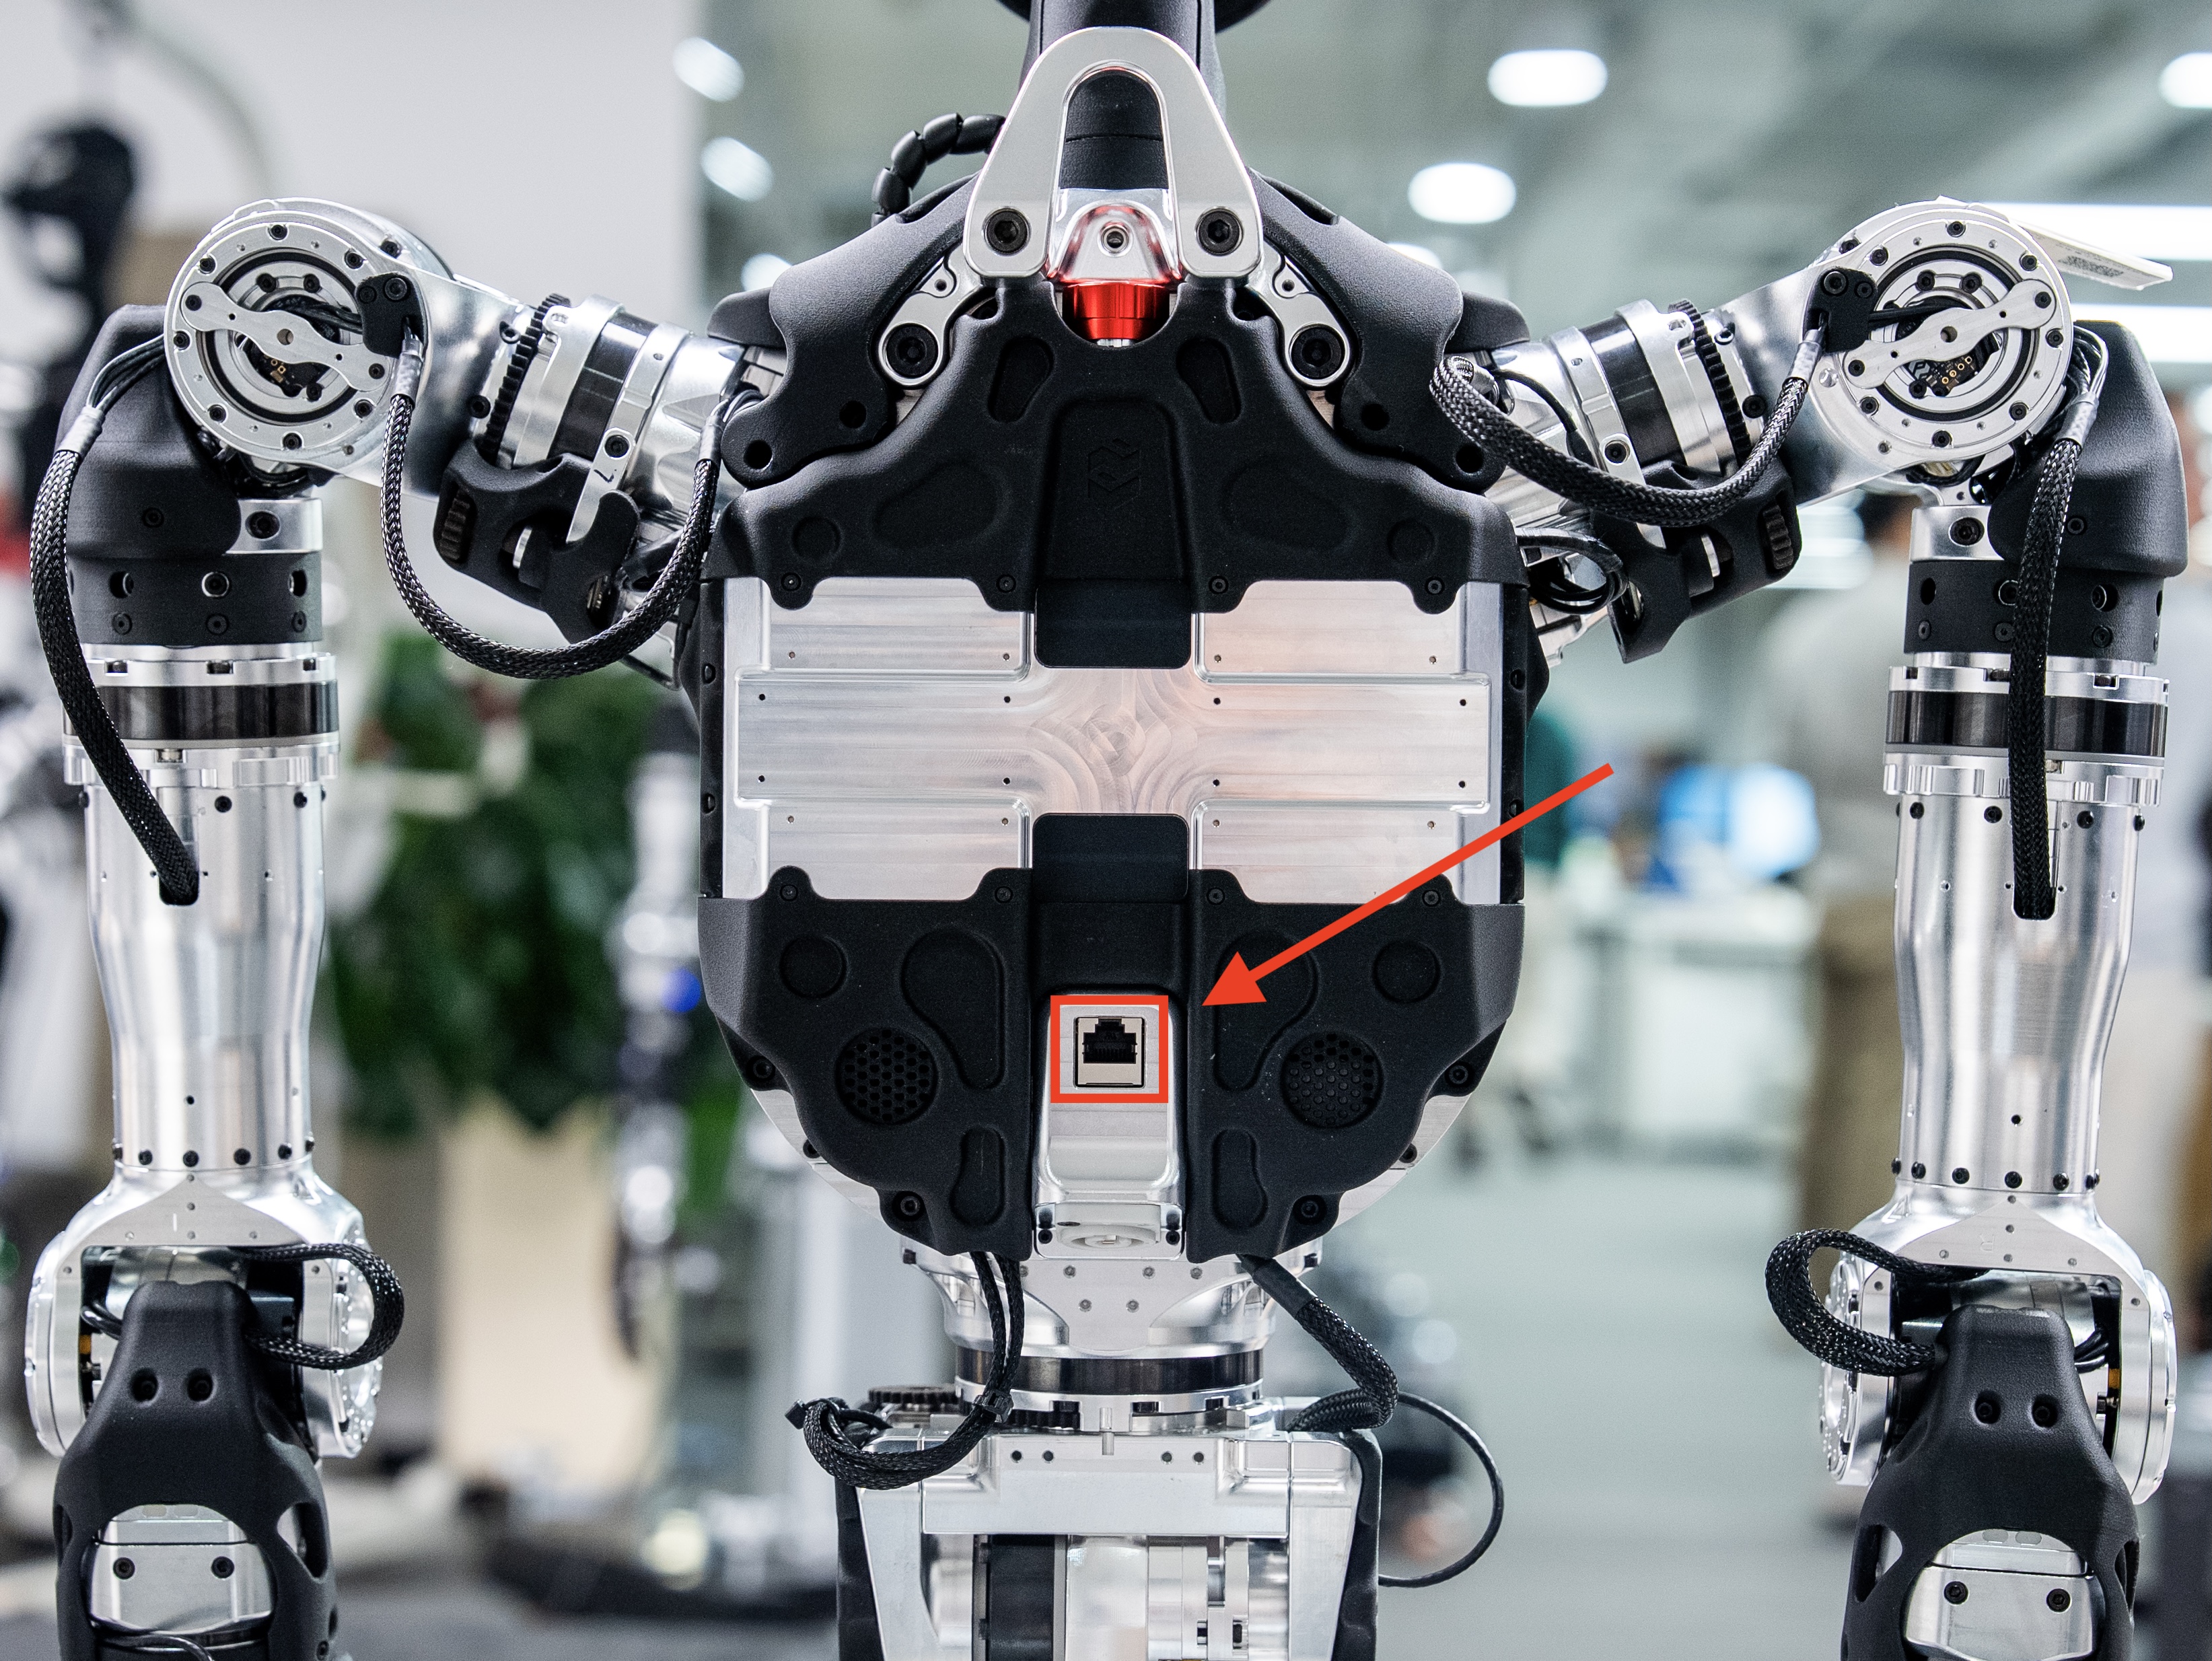
- On the user computer, configure the network to be on the same subnet as the robot. Modify the IP address, for example:
10.10.20.XXX. After modification, click "Apply" to save. It will take effect after you close the "network connection" and restart it.

Developer Mode
Note
- Confirm that the Demo startup has been completed
- For more operations and mode descriptions, refer to Remote Control Instructions
Ensure the robot is in Damping Mode, then press the remote control LO + RO (push the joysticks vertically down) to enter Developer Mode.
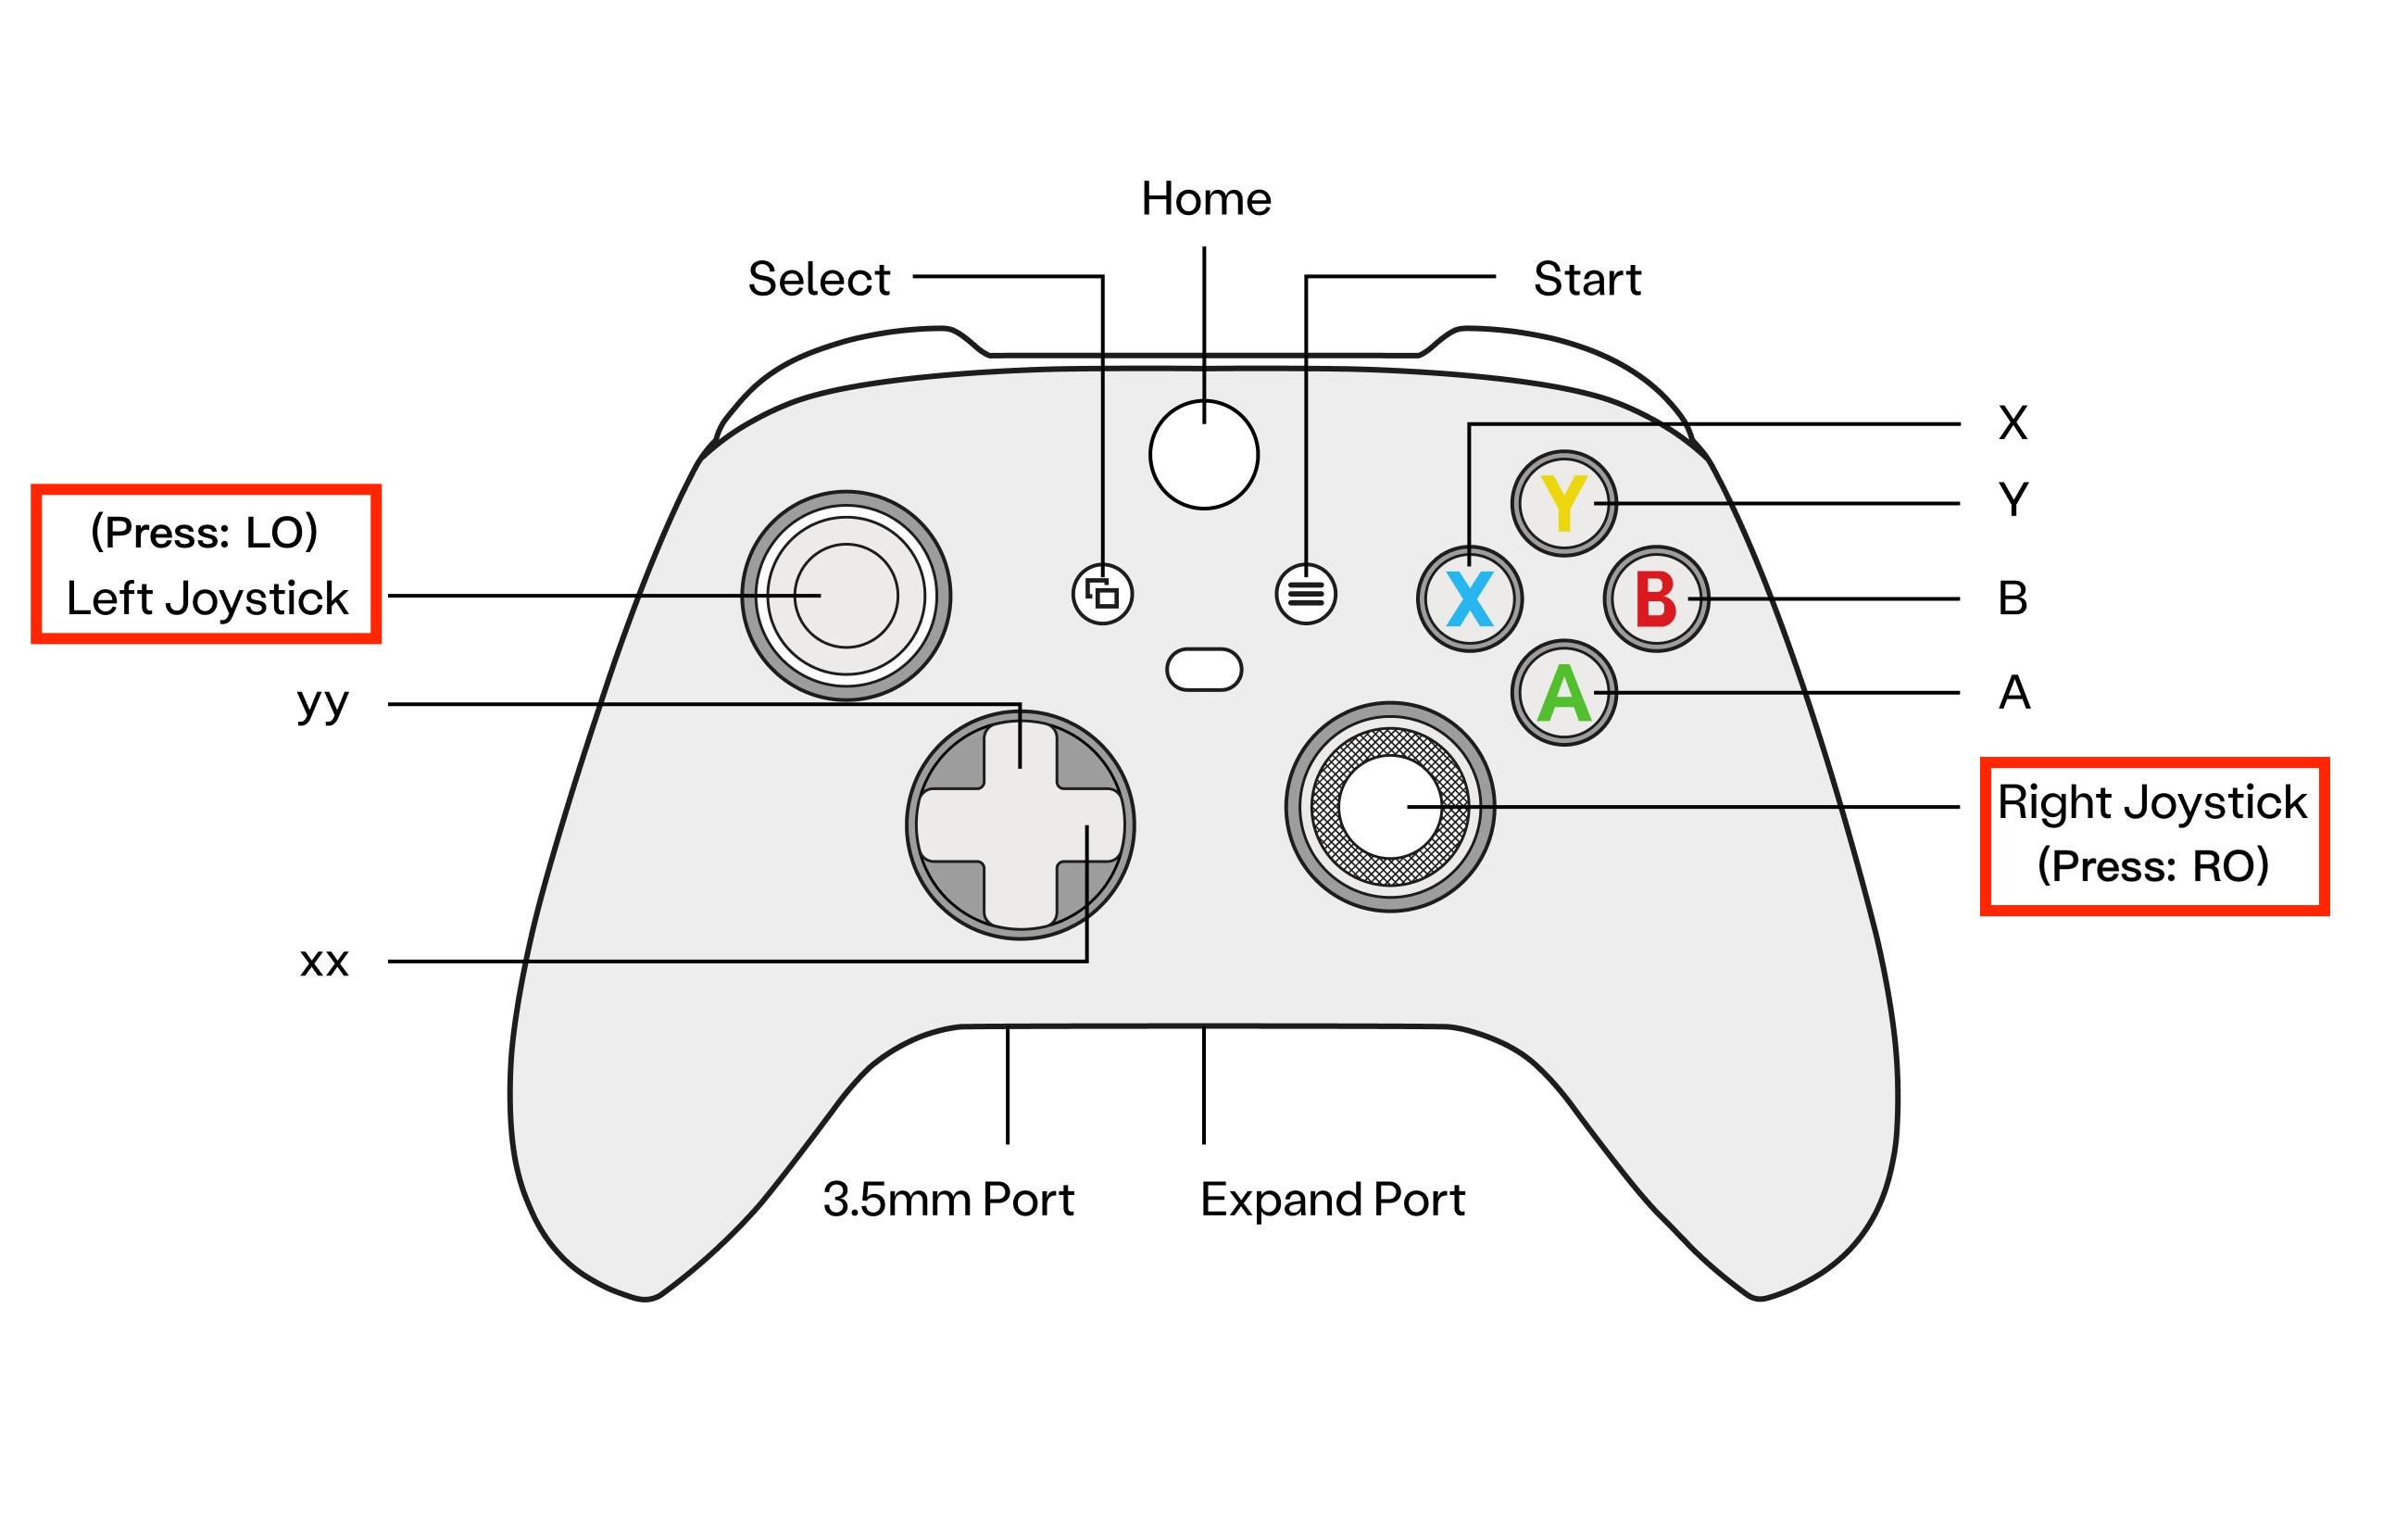
The RCU indicator light will change from purple slow breathing to blue slow breathing, indicating successful entry into Developer Mode. At this point, you can use the SDK for development and debugging.

Run Control Example
This control example will make the robot's two arms move. Please keep a safe distance.
Open a new terminal:
# Get network interface name
ip a

# Run the control example (replace enp59s0 with the actual wired network interface name)
cd ~/pnd_sdk_python/example/low_level/adam_u
python3 open_arm.py enp59s0
Exiting Developer Mode
Press the remote control LT + B to exit Developer Mode. The RCU indicator light will change from blue slow breathing to purple slow breathing, indicating successful exit from Developer Mode and entry into Damping Mode.