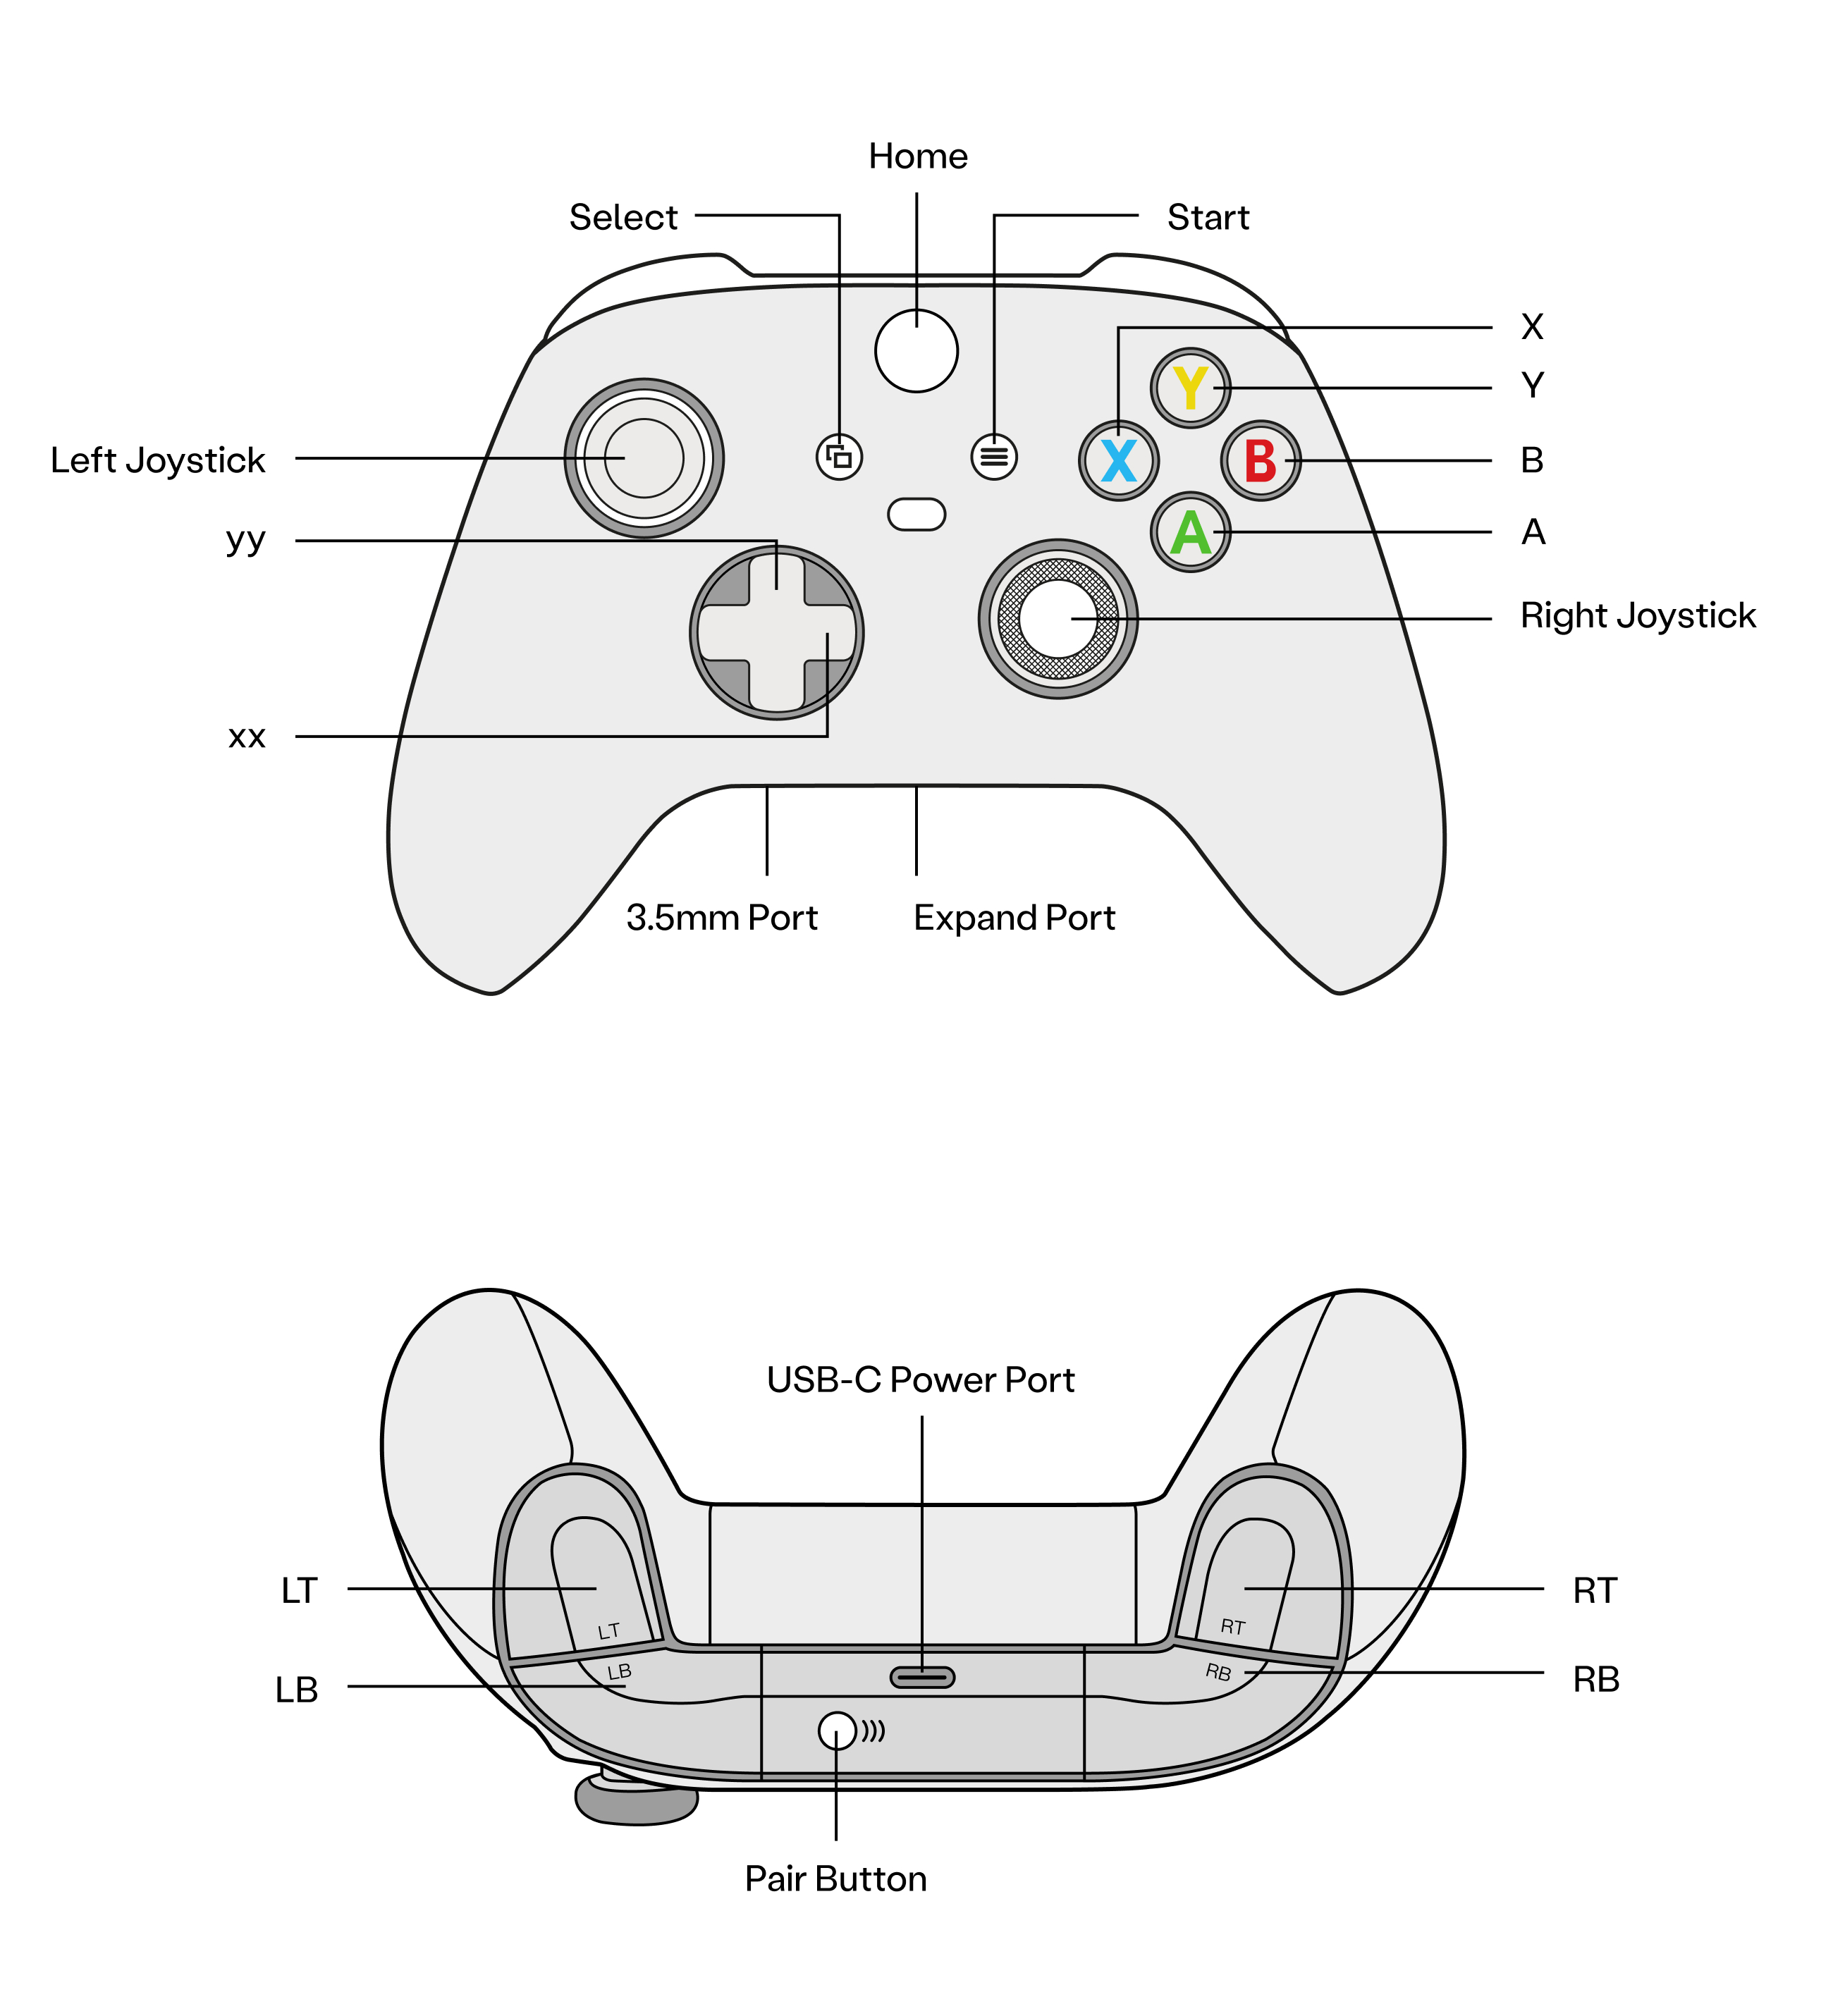
Quick Start
Unboxing
Two people stand at the robot’s head and waist positions respectively. One person uses the suspension hook to secure Adam, while the other lifts the robot at the waist and removes Adam from the crate.
Charging Instructions
Important
The robot may be delivered with low battery. Fully charge before use.
- Plug the charger into the power source first, then connect it to the robot charging port.
- Adjust the charger knob and set the current to 10A (recommended).
Power-On
Note
In an emergency, first press LB + RB on the Remote Control to cut off power, then press the red emergency stop button on the robot body.
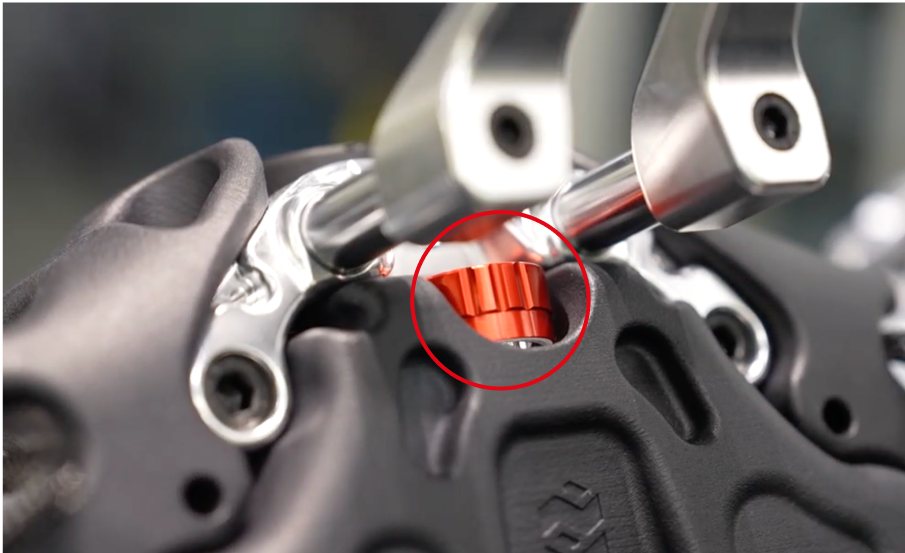
Step1: Full-body Inspection
Check that all actuator cables are securely connected and ensure the red emergency stop button on the robot body is released.
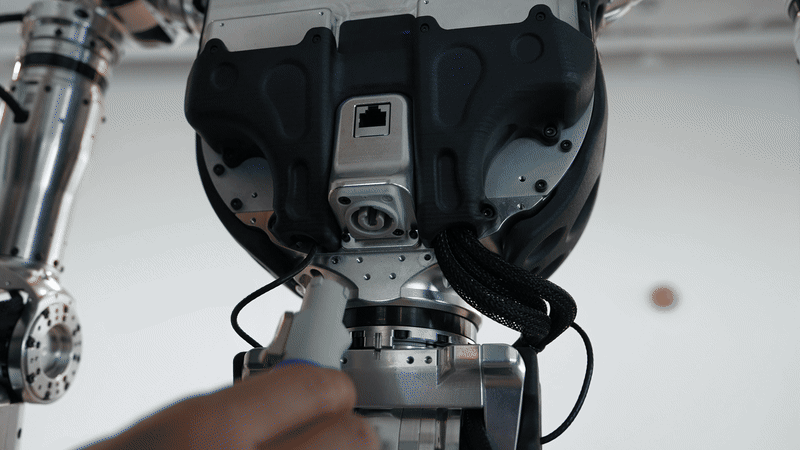
Step2: Network Connection
Insert the Ethernet cable into the router’s WAN port. After powering on, wait for 30 seconds. The indicator light turning from red to white indicates a successful connection.
Connect your computer to the router’s Wi-Fi:
SSID: pndbotics
Password: pnd1234567
Step3: Power On
Step3.1: RCU Startup
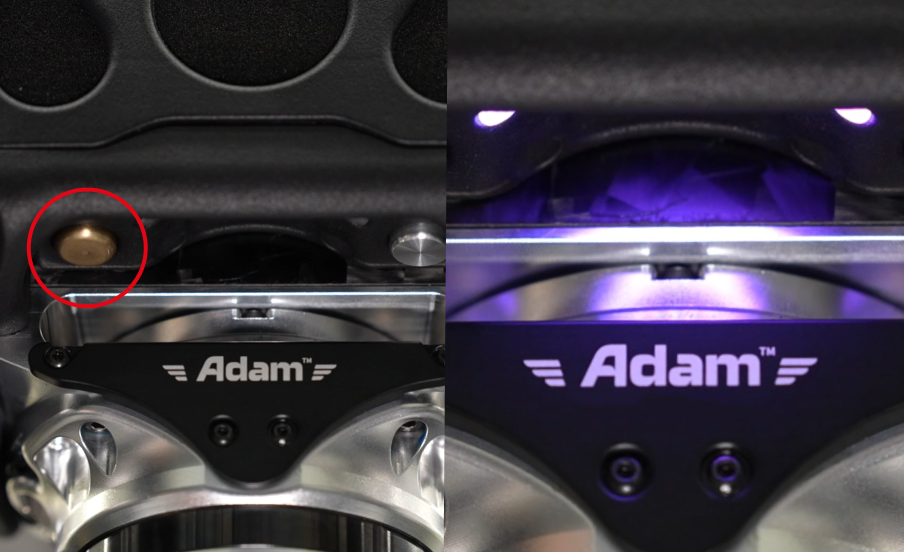
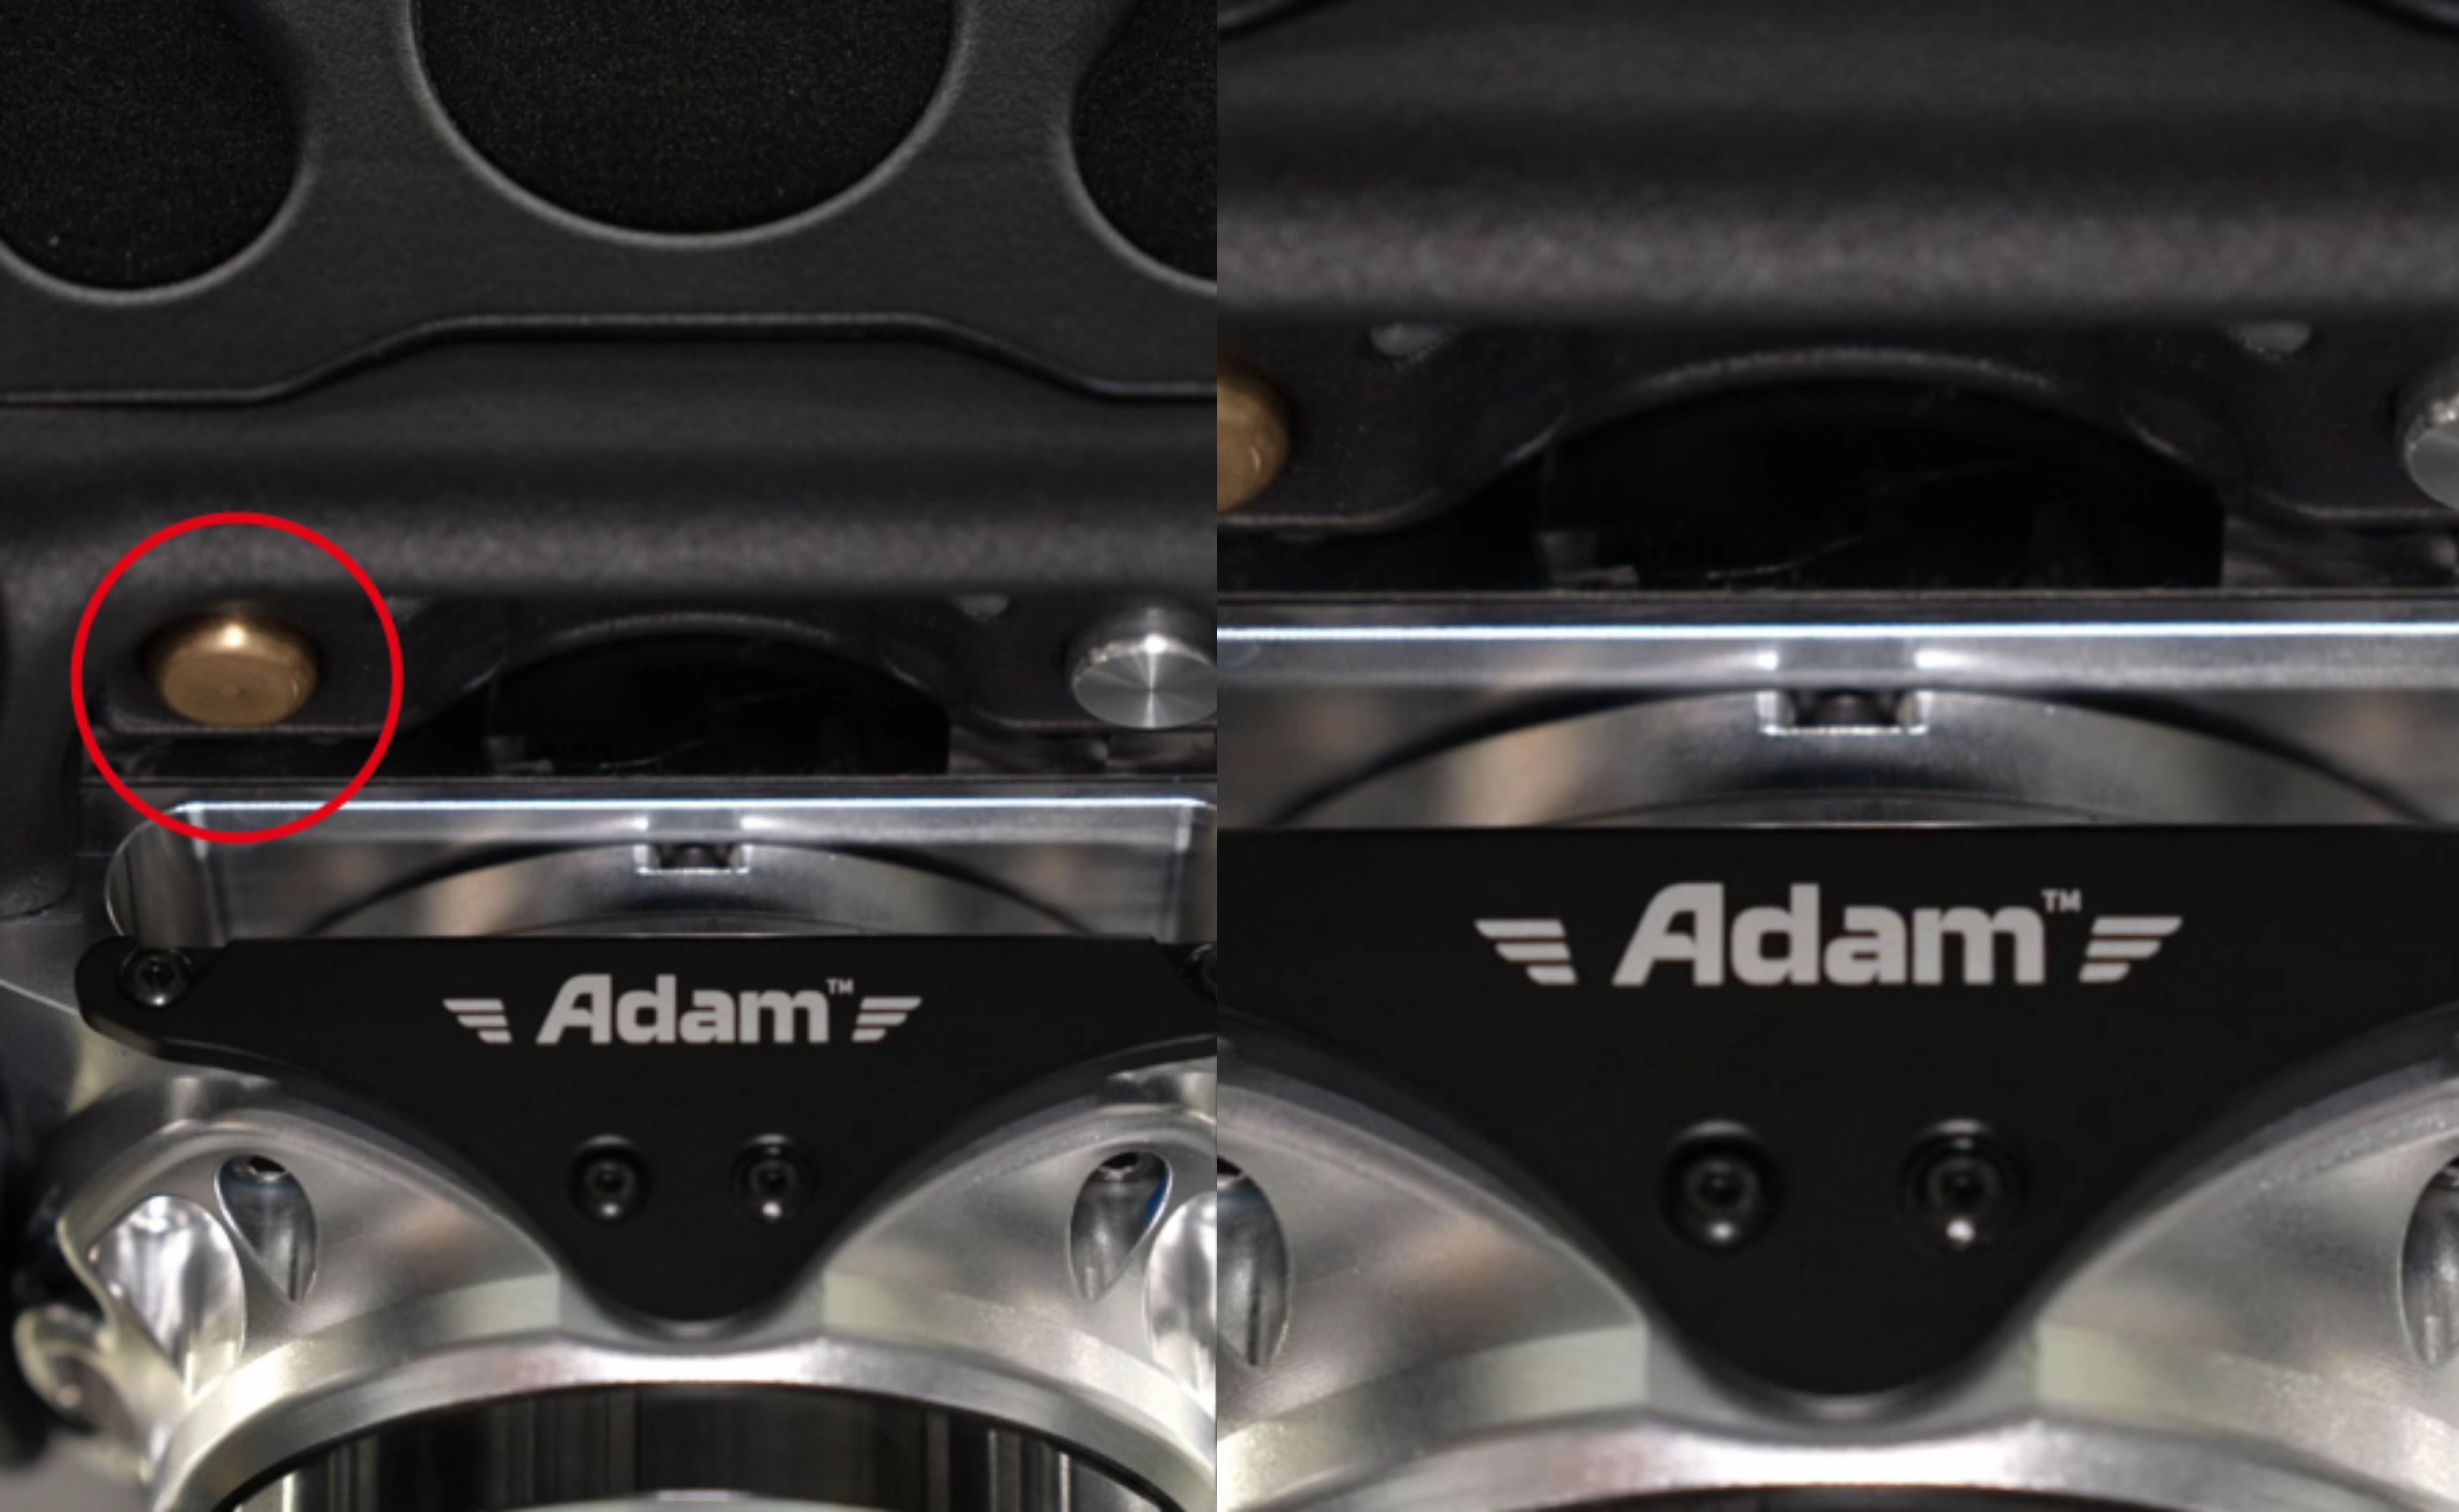
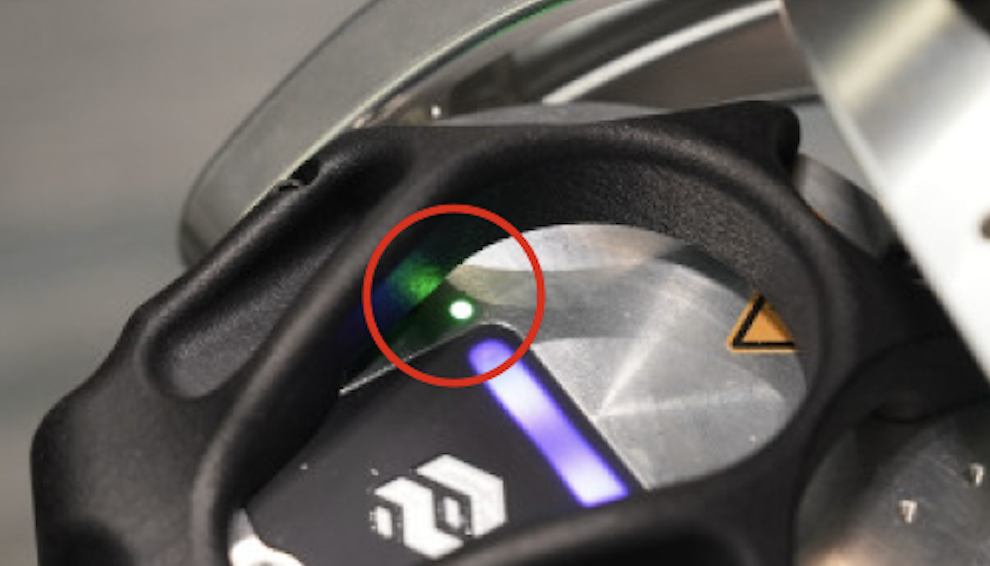
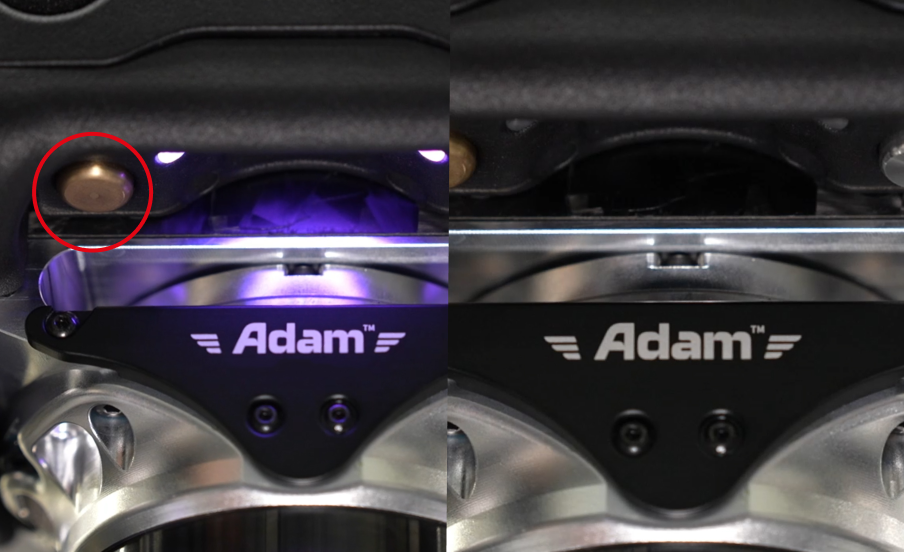
Short-press (1s) the gold button on the left side under the chest battery cover. The following two conditions can be used to determine the RCU firmware version:
-
If the RCU indicator shows fast purple breathing, the RCU has started successfully, FW_version < v0.3.0.
-
If the RCU indicator does not light up, the RCU startup has failed, FW_version ≥ v0.3.0.
Please_select_version
Step3.2: NUC Startup
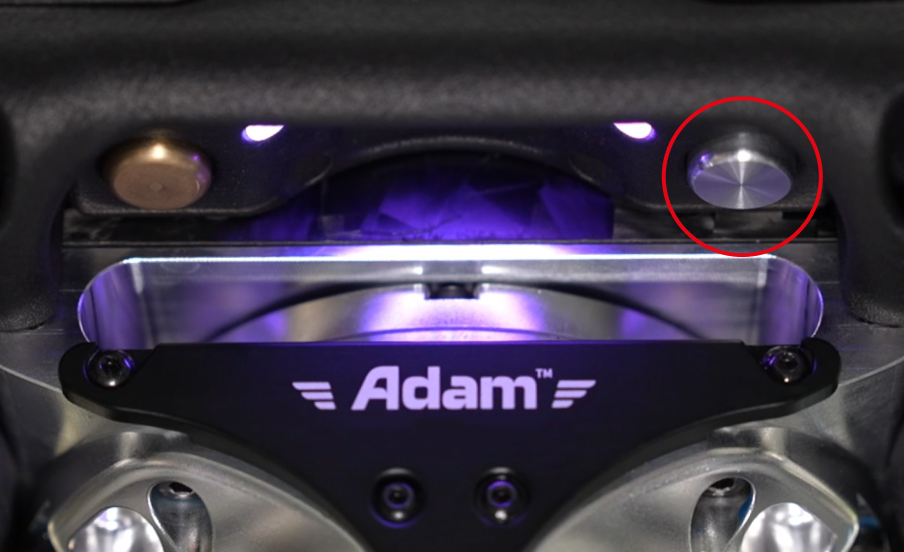
-
Short-press the silver button on the right side under the chest battery cover to start the NUC.
-
After waiting about 20s, if the RCU indicator shows slow purple breathing, the NUC has started successfully and communication is normal.
Step3.3: Software Upgrade
Skip this step if the upgrade has already been completed.
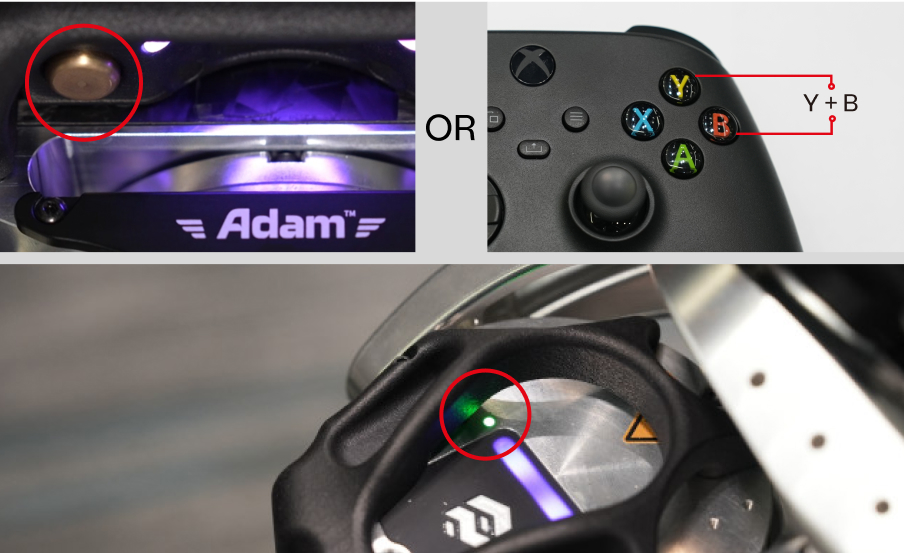
Step3.4: Actuator Power On
Short-press the gold button, or press the remote controller buttons Y + B simultaneously.
After waiting 7–8s, if the actuator indicator shows slow purple breathing and the actuator Ethernet status indicator is steady green, the actuators are powered on successfully and communication is normal.
Step3.5: Demo Startup (Two Services)
Step3.5.1: Start pnd_service_dds
On the user computer, open a terminal, connect to the NUC via SSH, and start the service:
# Replace XX.XX with the actual IP address (printed on the back of the remote controller)
ssh pnd-humanoid@192.168.XX.XX
# Initial password: pndxyz
cd ~/Documents/adam_u_deploy/pnd_service_dds
sudo ./run.sh

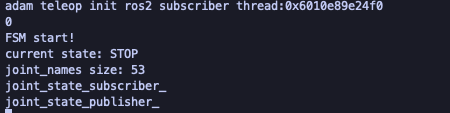
✅ When the terminal displays 系统初始化完成,进入主循环, the service has started successfully.
Step3.5.2: Start pnd_adam_dds
On the user computer, open a new terminal, connect to the NUC via SSH, and start the service:
# Replace XX.XX with the actual IP address (printed on the back of the remote controller)
ssh pnd-humanoid@192.168.XX.XX
# Initial password: pndxyz
cd ~/Documents/adam_u_deploy/pnd_adam_dds
sudo ./run.sh
✅ When the terminal displays FSM start!, the service has started successfully. The complete Demo startup is successful, and the robot enters Damping Mode, ready for real robot control.
One-Button Startup
Long-press (3s) the gold button on the left side under the chest battery cover. The RCU indicator shows slow purple breathing.
After waiting 10s, if all actuator indicators show slow purple breathing and the actuator Ethernet status indicators show fast green flashing, the Demo has started successfully. The robot enters Damping Mode and is ready for real robot control.
Tips
- Indicator not lit: Check whether the emergency stop switch has been released.
- Indicator turns red: Short-press the gold button to power off the actuators, then short-press again to power them on.
Real Robot Control
- Press the Home button on the remote controller to power on. When the indicator lights steadily, the automatic connection is complete.
- Press the A button to enter Zero Position Mode. In Zero Position Mode, press the X button to enter Motion Mode, and press the RB button to execute preset actions (each press triggers the next action).
For more operations and mode descriptions, refer to the Remote Controller Guide.
Power-Off
Step1: Damping Mode
In the Zero Position Mode, Short-press the remote controller key combination LT + B to enter Damping Mode.
Step2: Power-Off
Long-press the gold button on the robot body for 6s. When the purple RCU indicator turns off, shutdown is successful.
Battery Management
- Keep the robot power on and connect the computer to the router with Wi-Fi (on the same network as the robot).
- Enter the robot IP in the browser:
192.168.XX.XX. - Check the battery level under Basic Information in the PAC interface.

Base Lift Platform Operation
Lift Operation
Press and hold the 🔼 button to raise the lift platform. Release to stop. The height (displayed number) increases on the three-digit display.
Press and hold the 🔽 button to lower the lift platform. Release to stop. The height (displayed number) decreases on the three-digit display.
Memory Mode
On the height display screen, briefly press the S button. The height value will start flashing. Press the number keys (1, 2, 3, 4) to record the current height to the corresponding position. If no number key is pressed within 6 seconds while flashing, the system exits memory mode. On the height display screen, press a number key to recall the corresponding height, and the lift platform will automatically move to that position.
Last Updated: 2026-01-29