PMC Operating instructions
PND Motion Control (PMC) is to control the actuators.
Instructions
- Power on the Raspberry Pi that running PMC server.
- Connect the tablet to the same network as the Raspberry Pi and open the downloaded app. You will see the following content:
Device Connection Interface
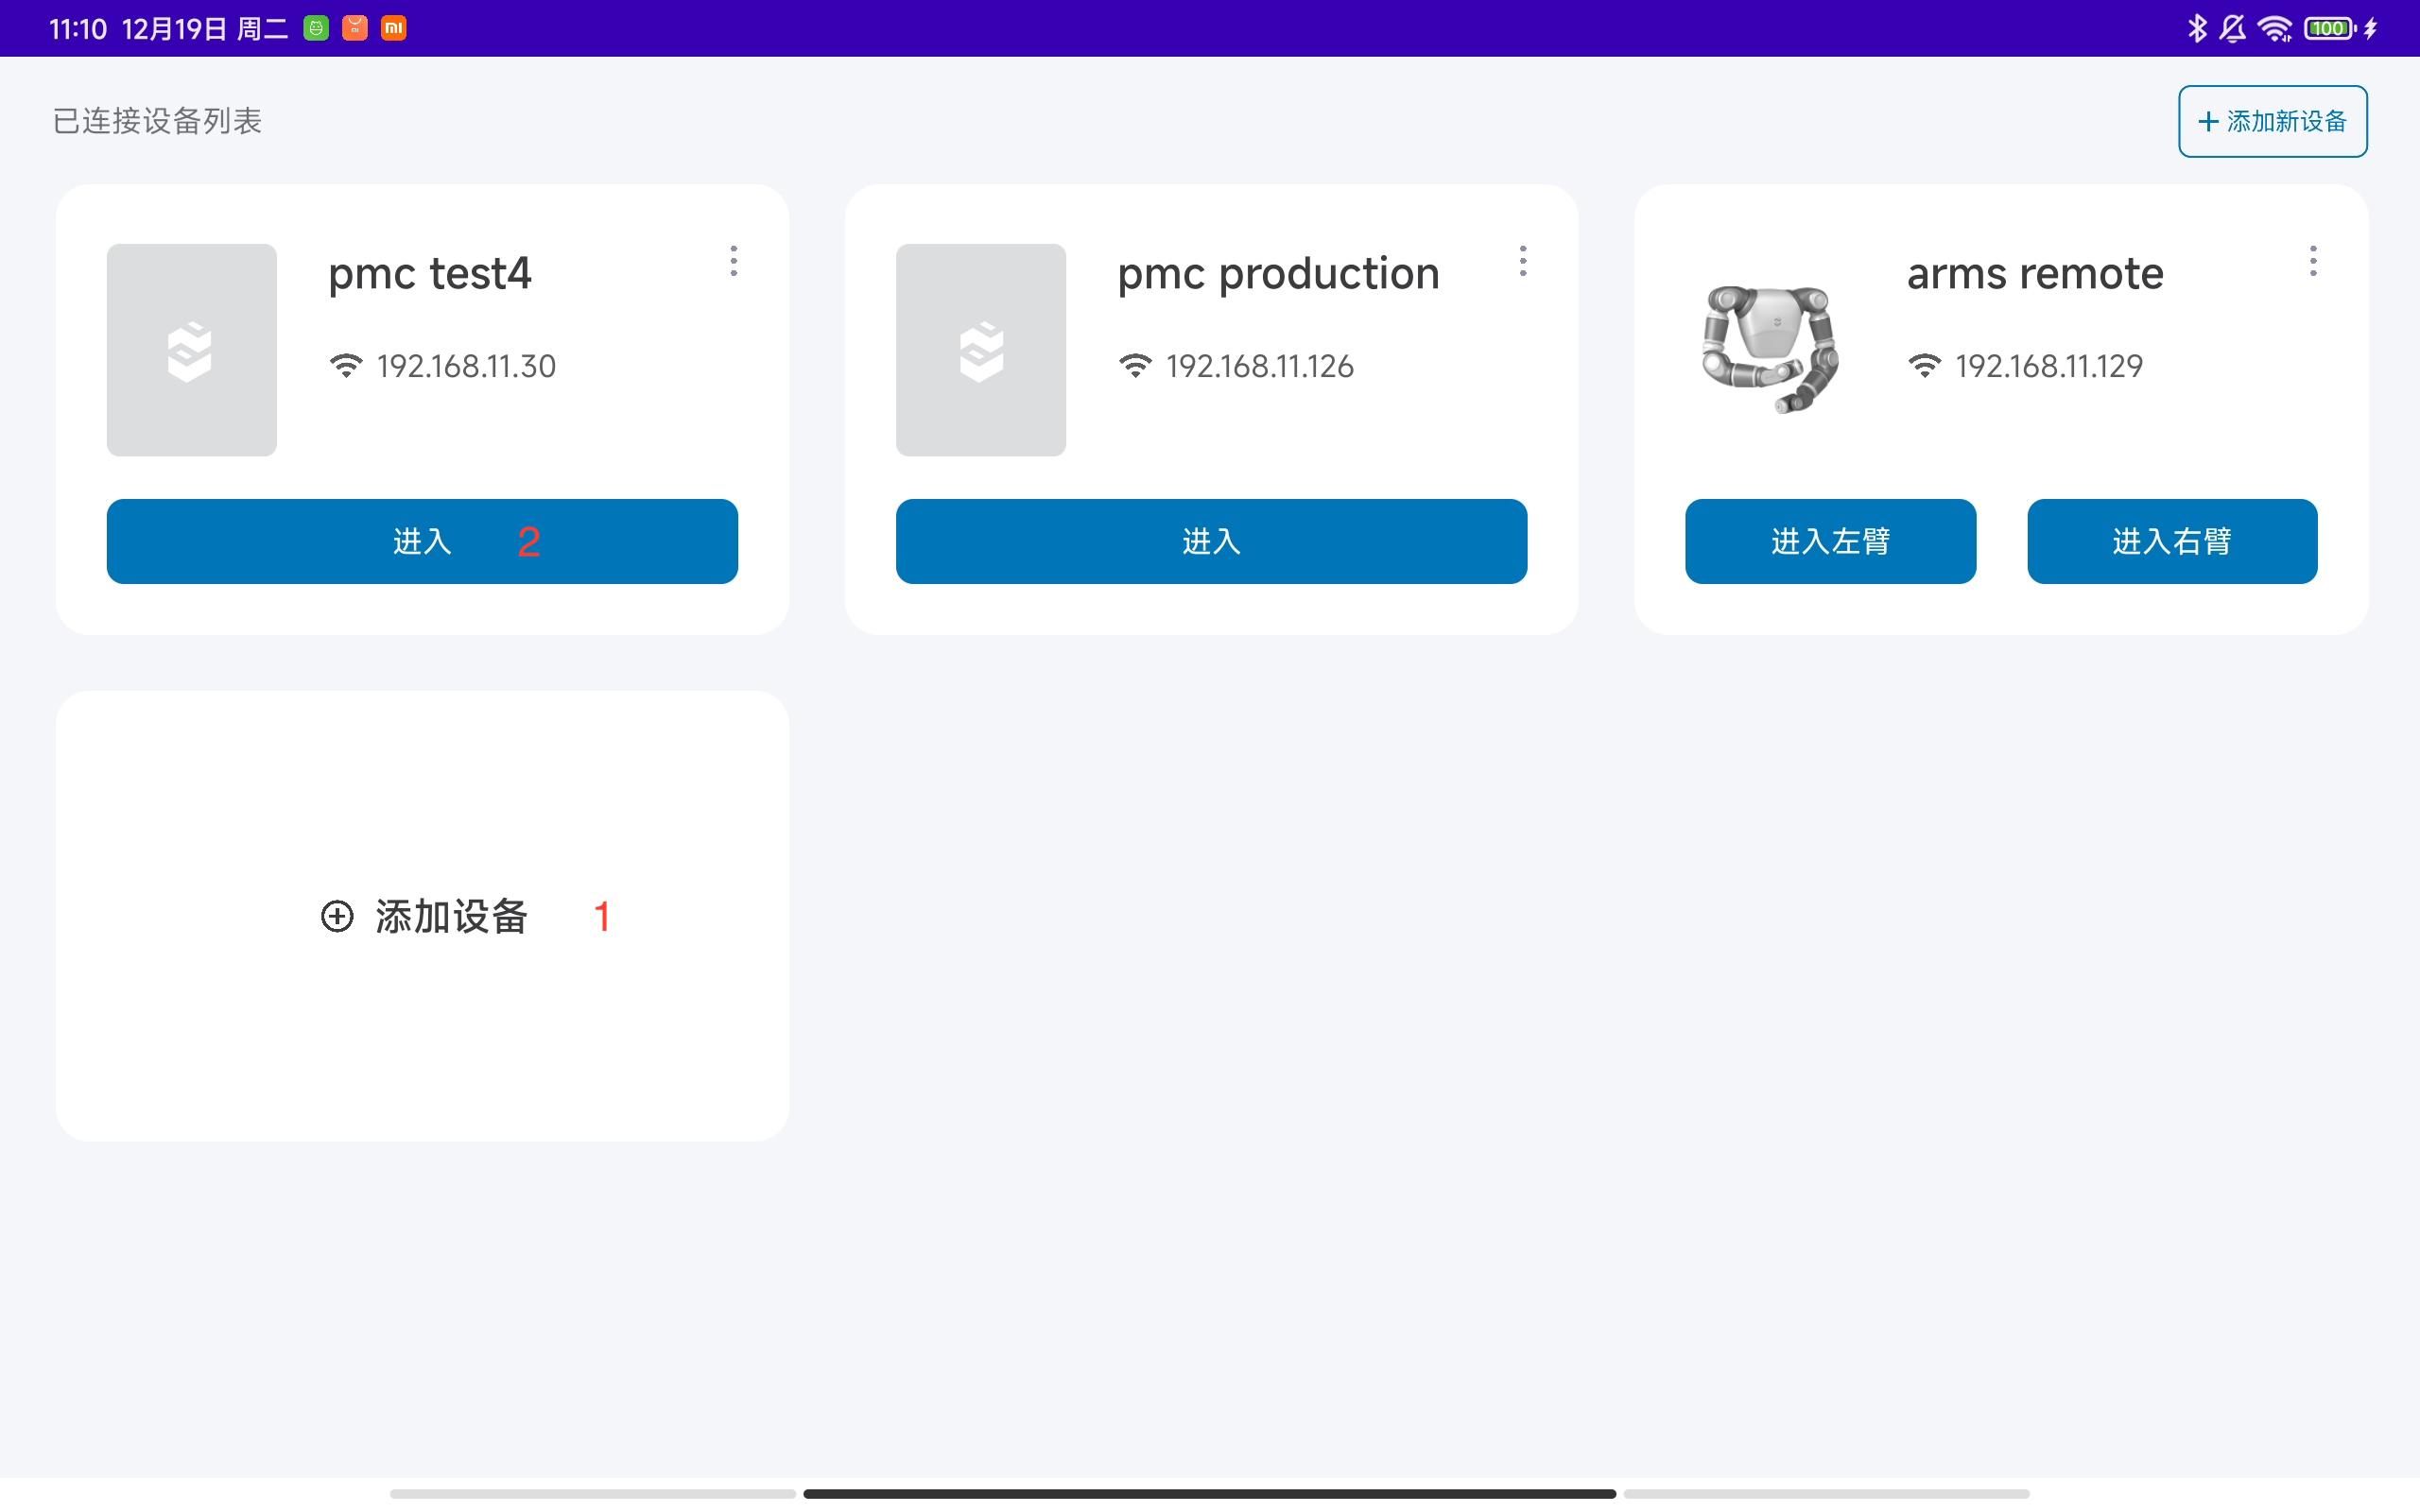
- Click the Add Device button to enter the network configuration page.
- Enter the PMC operation page.
Note
After the network configuration is completed, wait for the PMC card to show.
Device network configuration
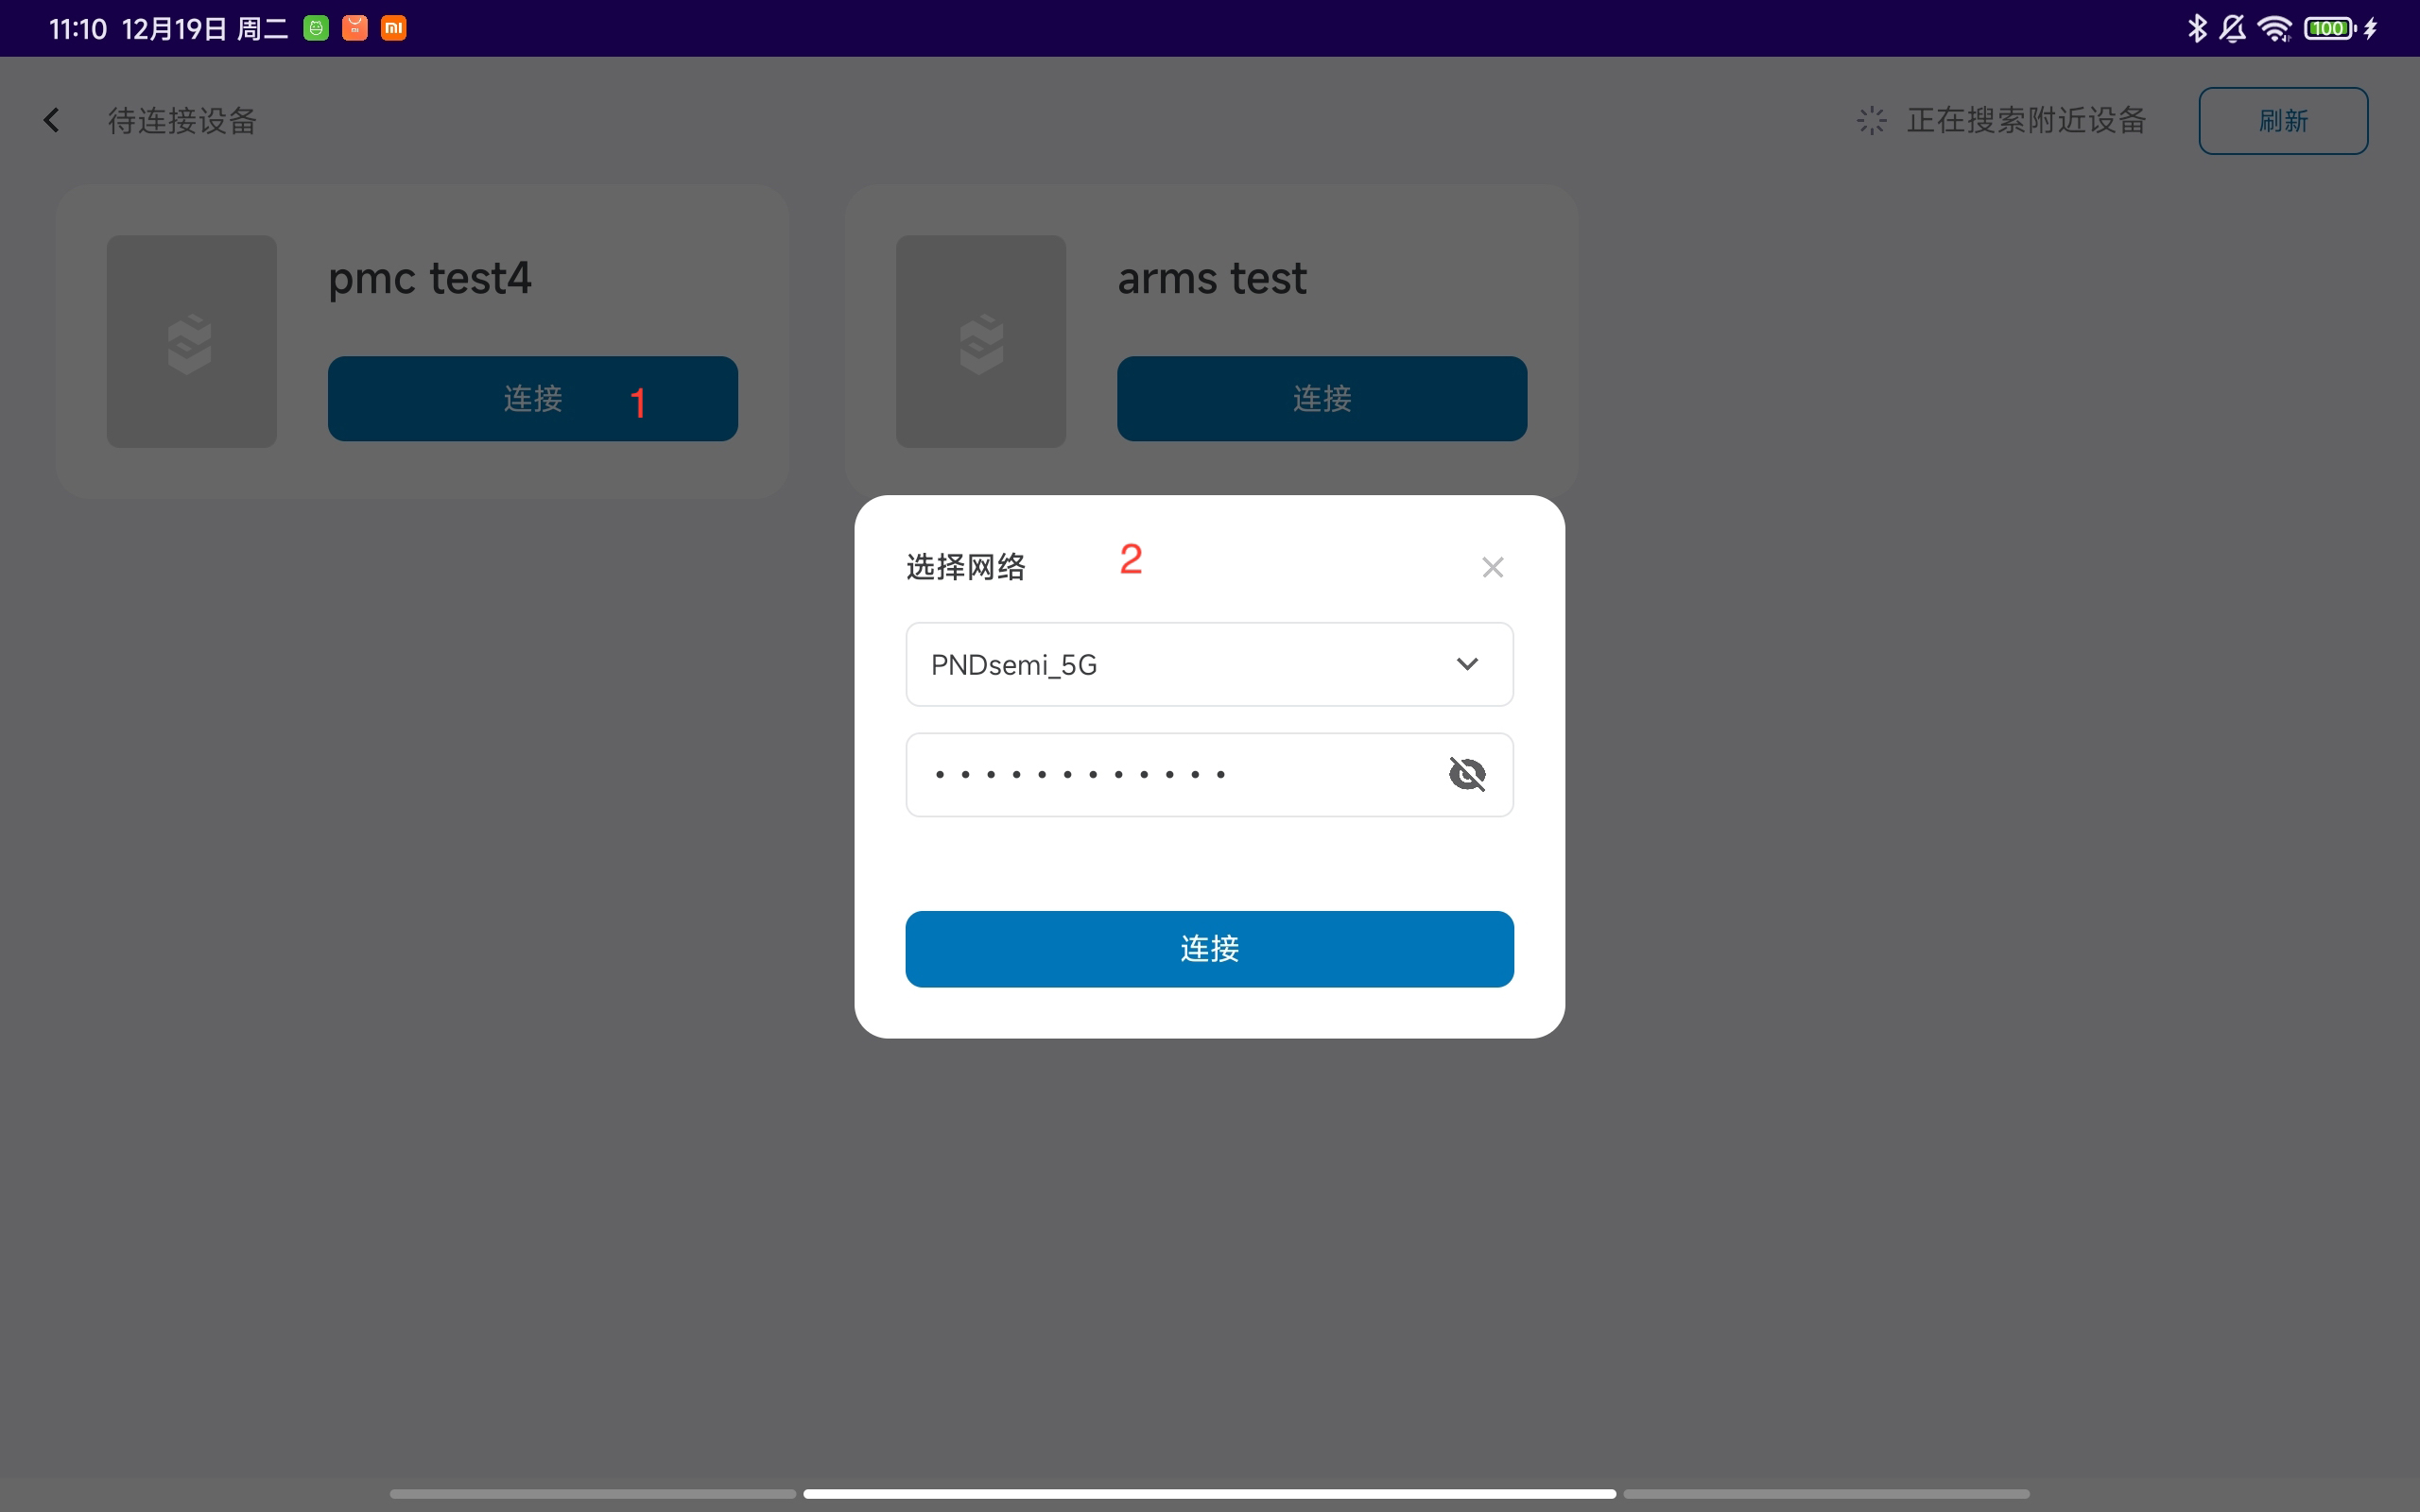
- Open the network configuration pop-up box.
- Enter the name and password of the Wi-Fi network, click the connect button. After the network configuration is successful, return to the device connection page.
Control Interface

-
Device connection status: connected or disconnected
-
Switch between device configuration tab and function tab
-
Switch between configuration mode and operation mode
-
Search for device list. Devices include actuators, IO boards, and encoders
-
Clear device list
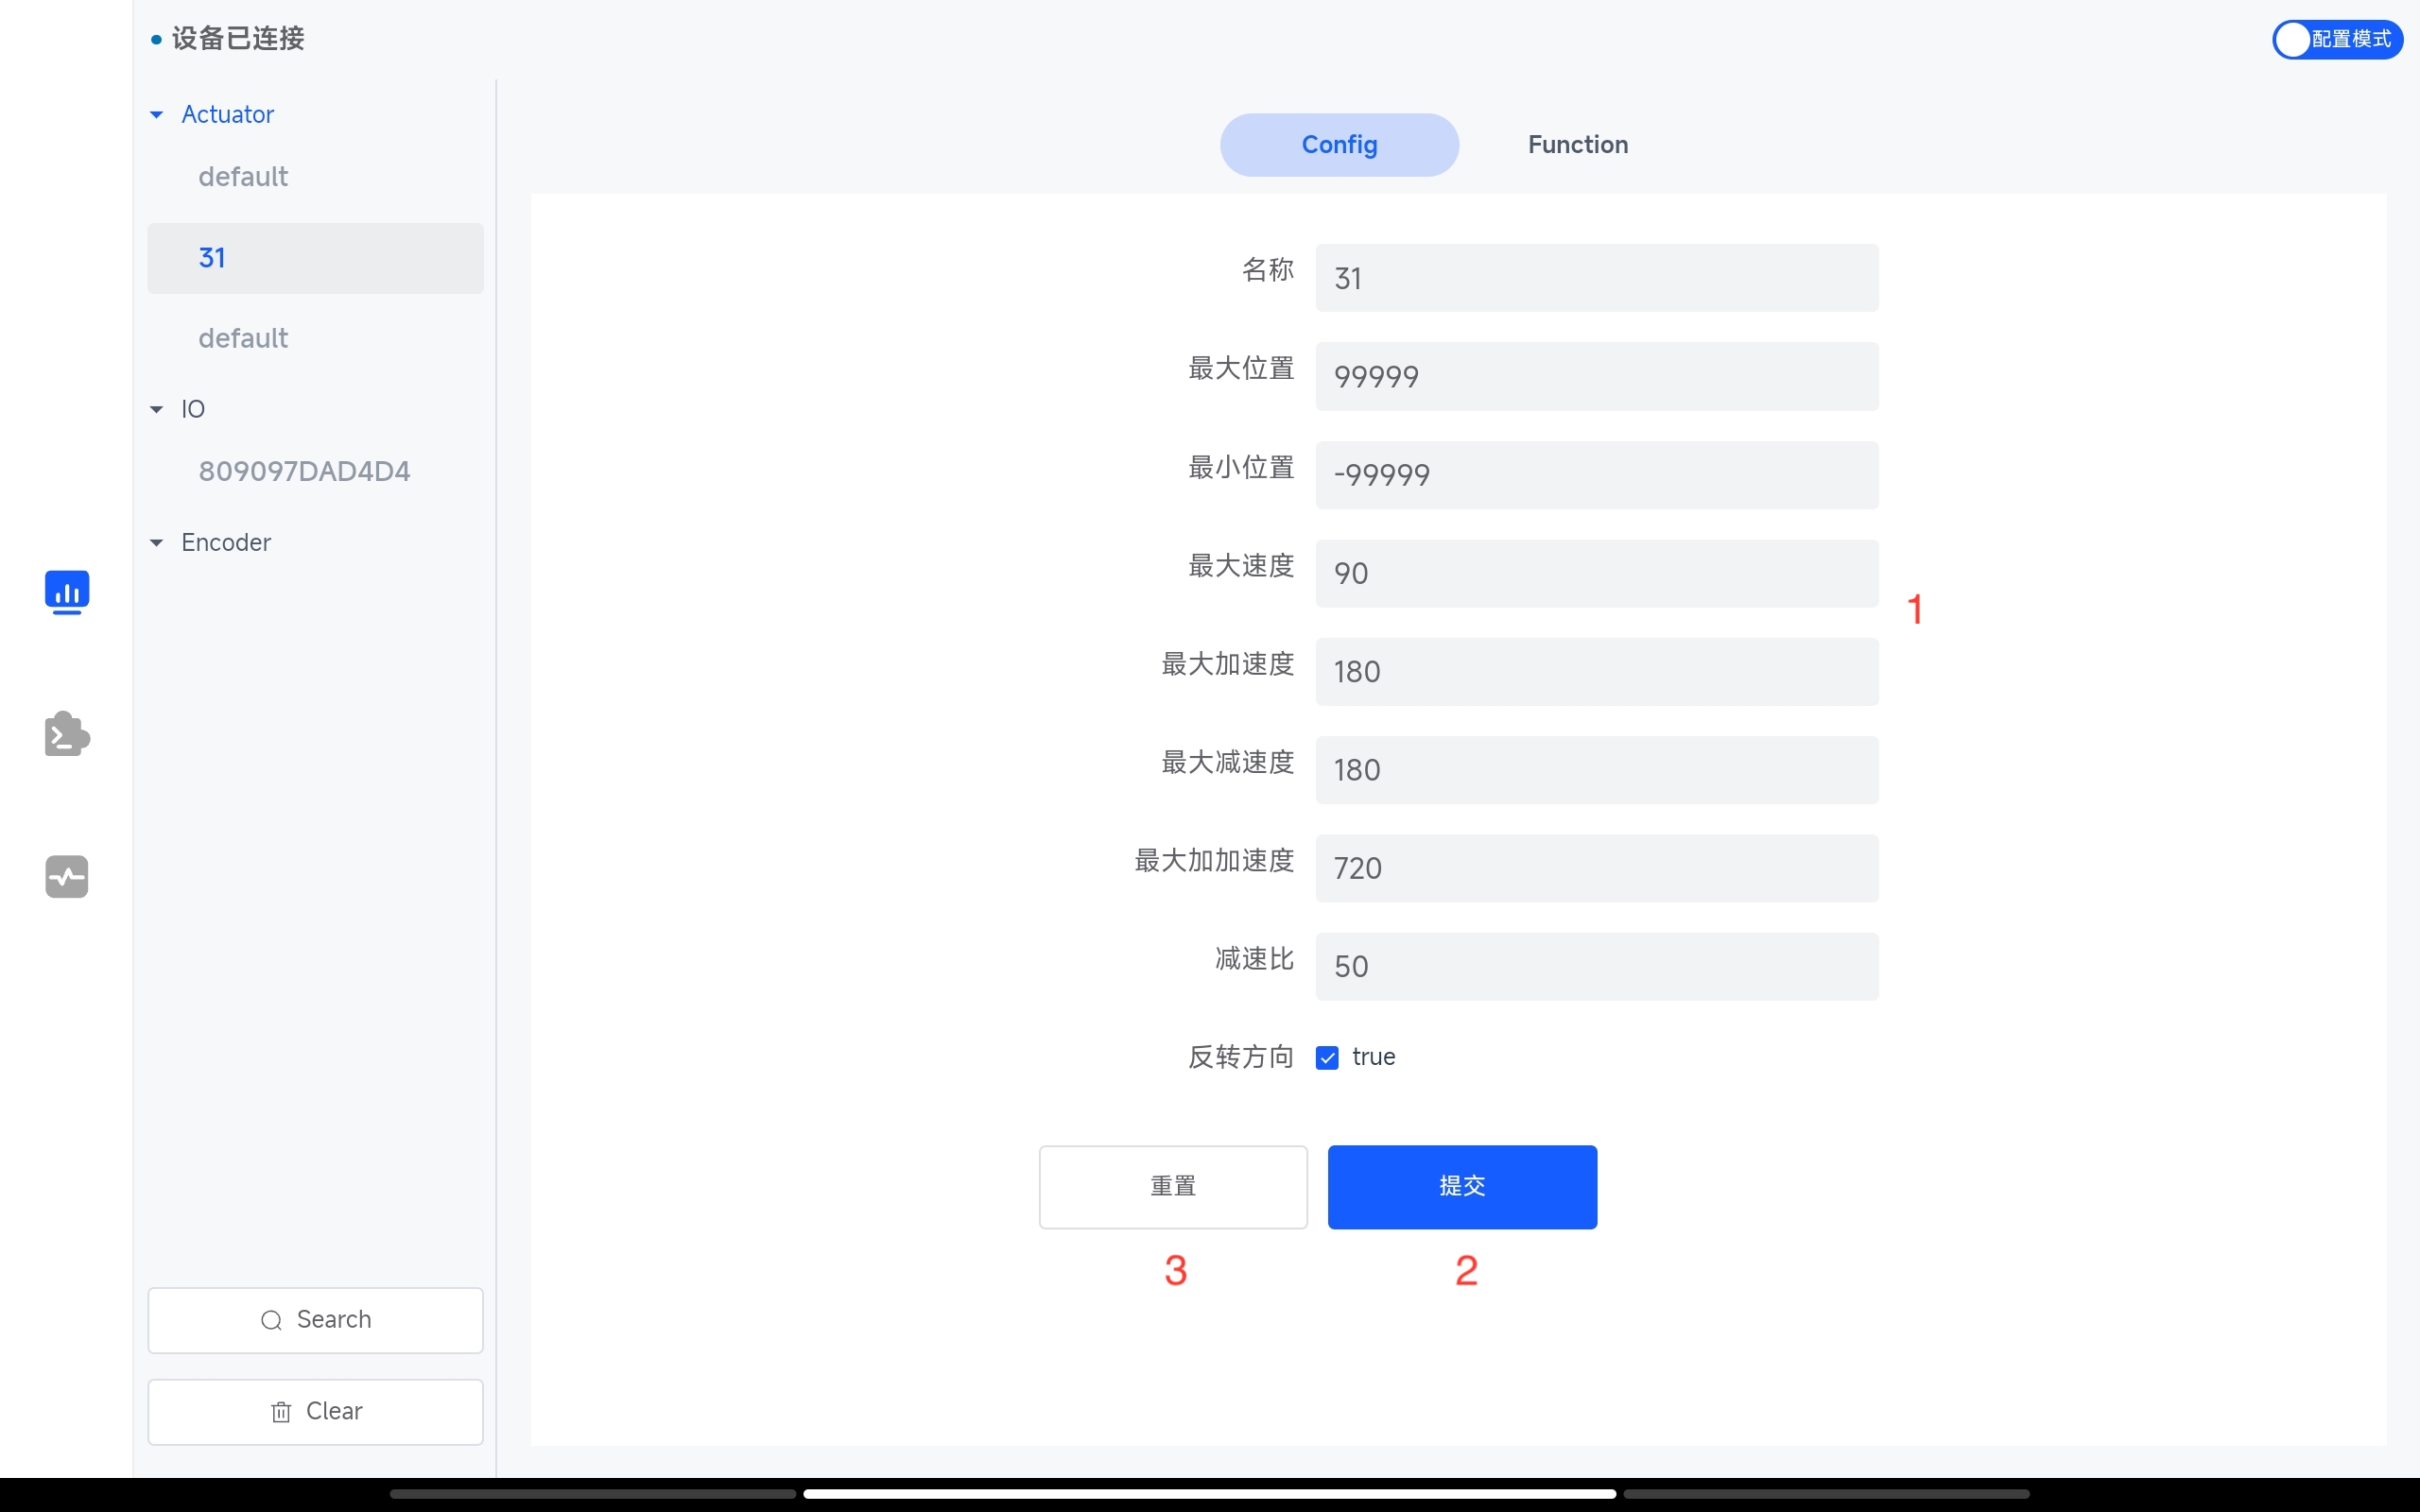
Actuator Configuration Interface
-
Set actuator configuration parameters
-
Submit actuator configuration parameters
-
Reset actuator configuration parameters
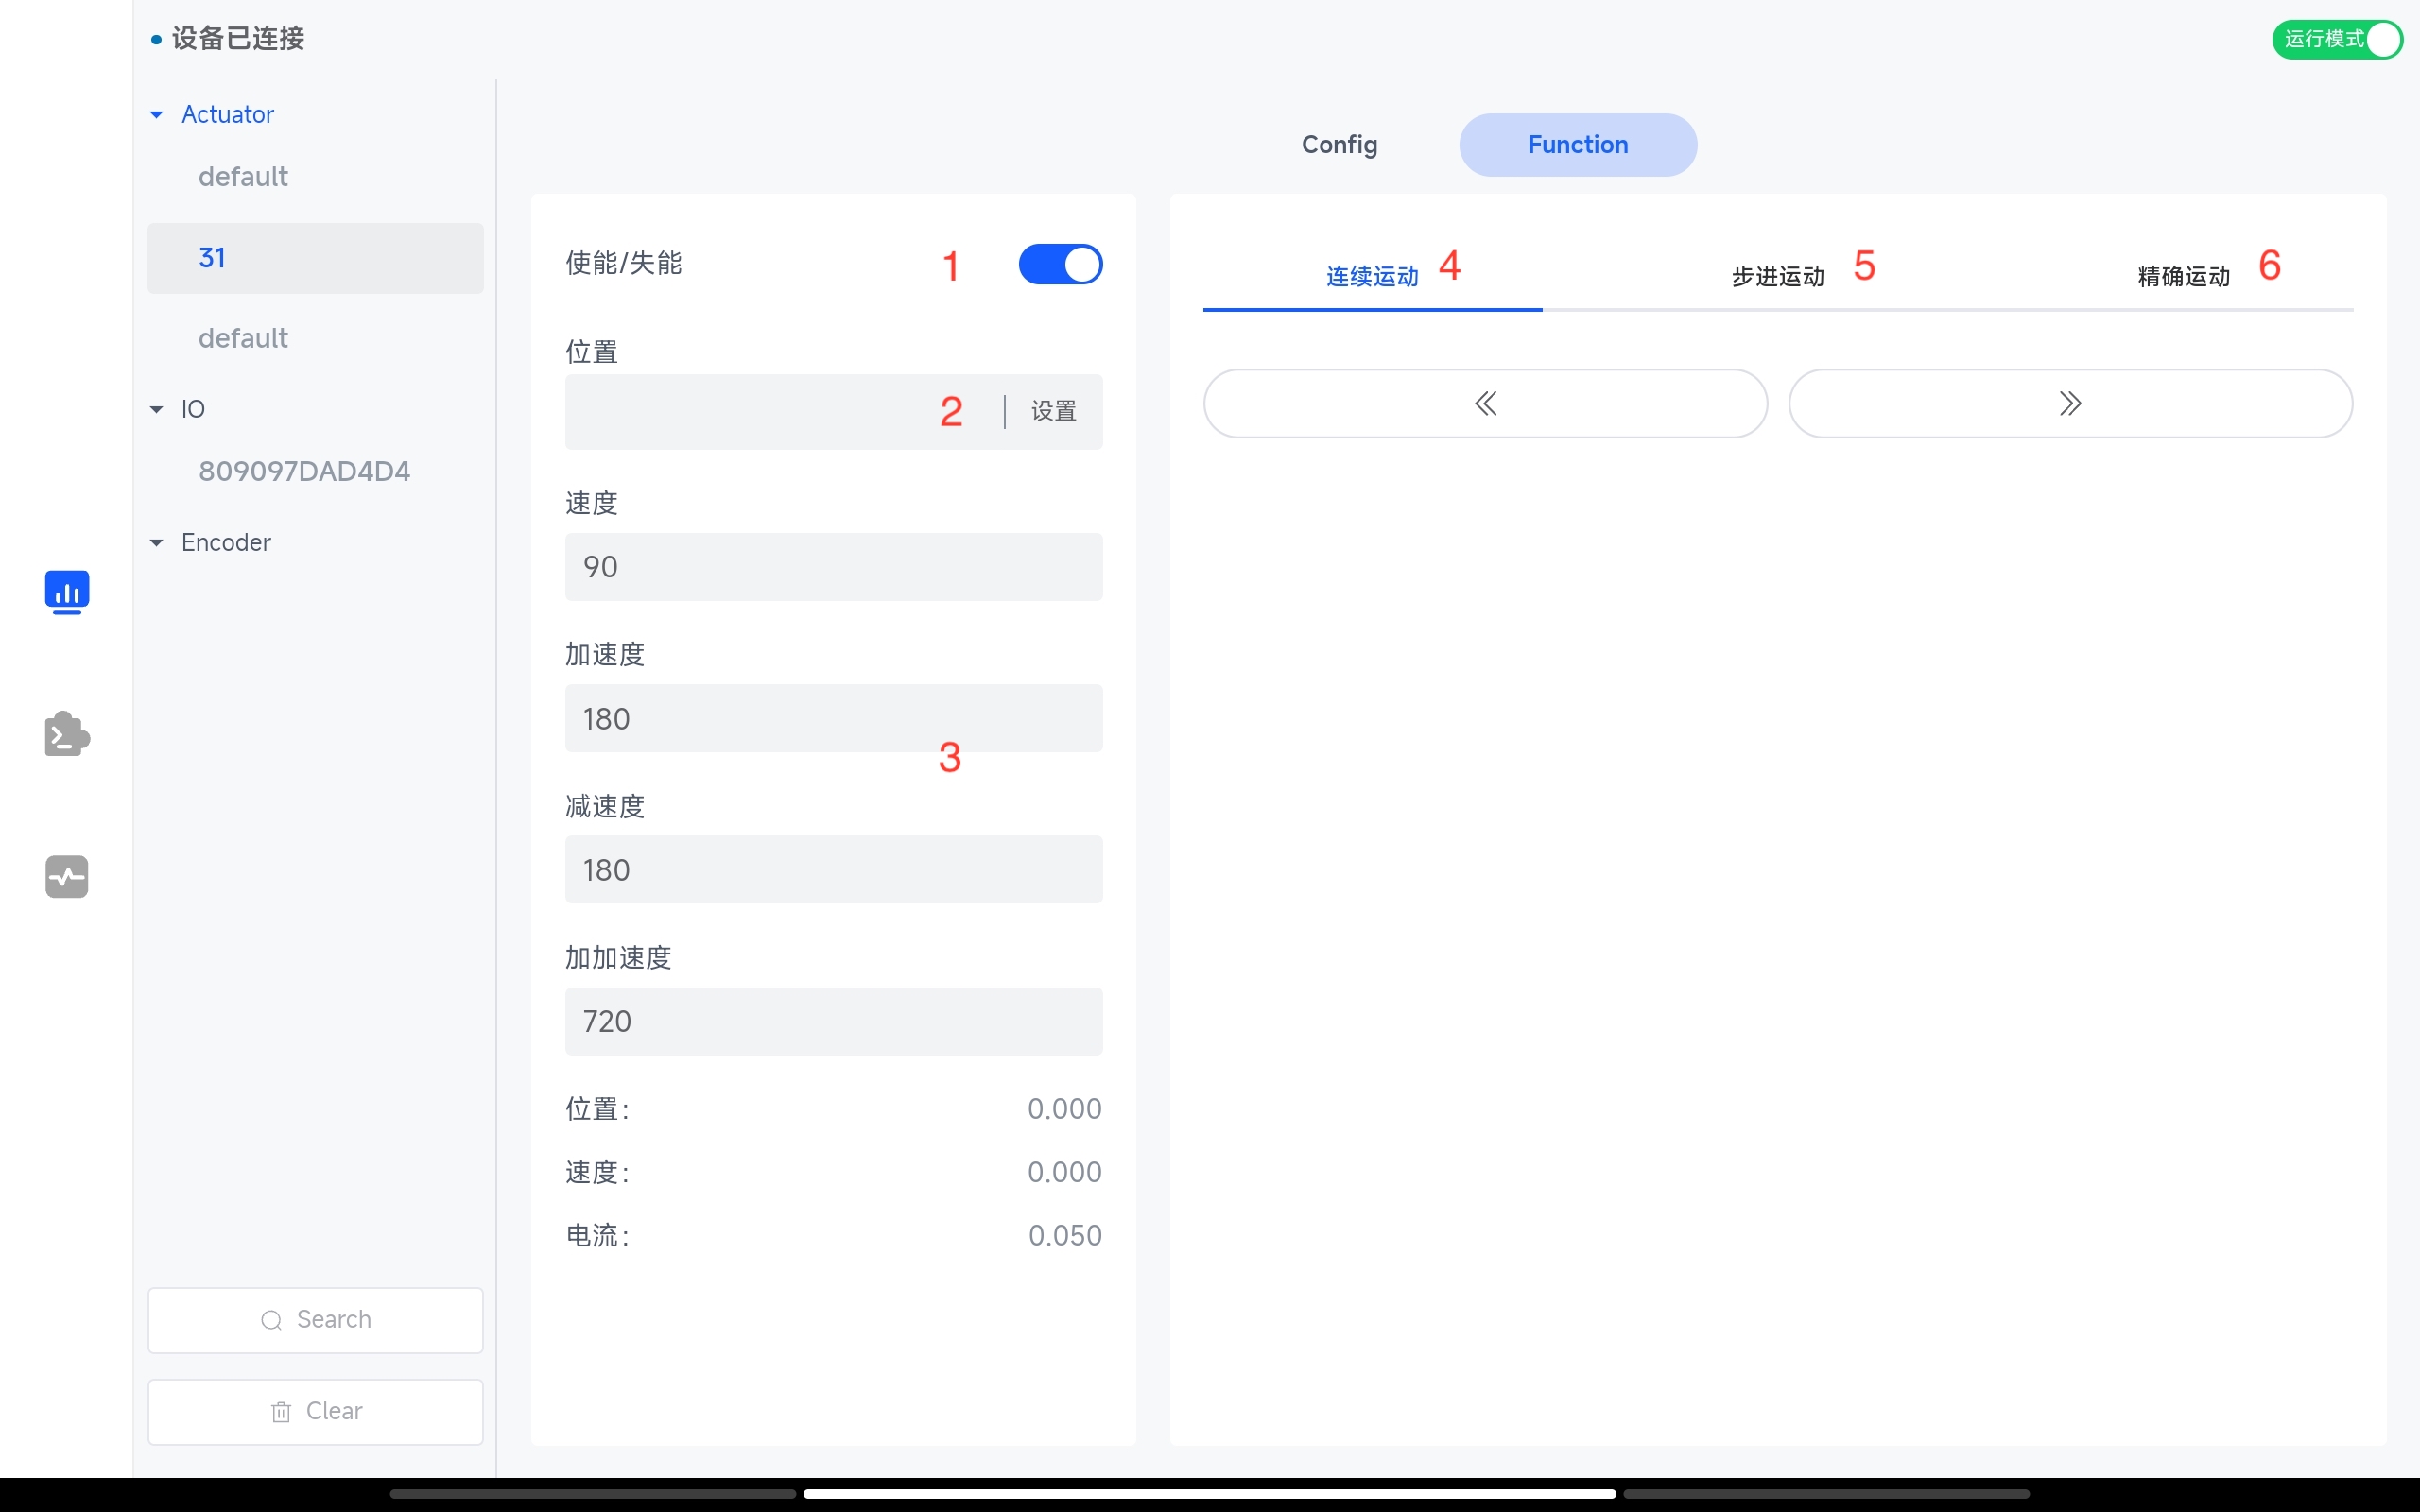
Actuator Function Interface
-
Enable or disable the actuator.
-
Set the current position of the actuator.
-
Set the parameters of the actuator.
-
Continuous movement in the forward and reverse directions.
-
Stepping movement in the forward and reverse directions. The step value can be set.
-
Precise movement. The target value of the actuator can be set.
IO Config Interface
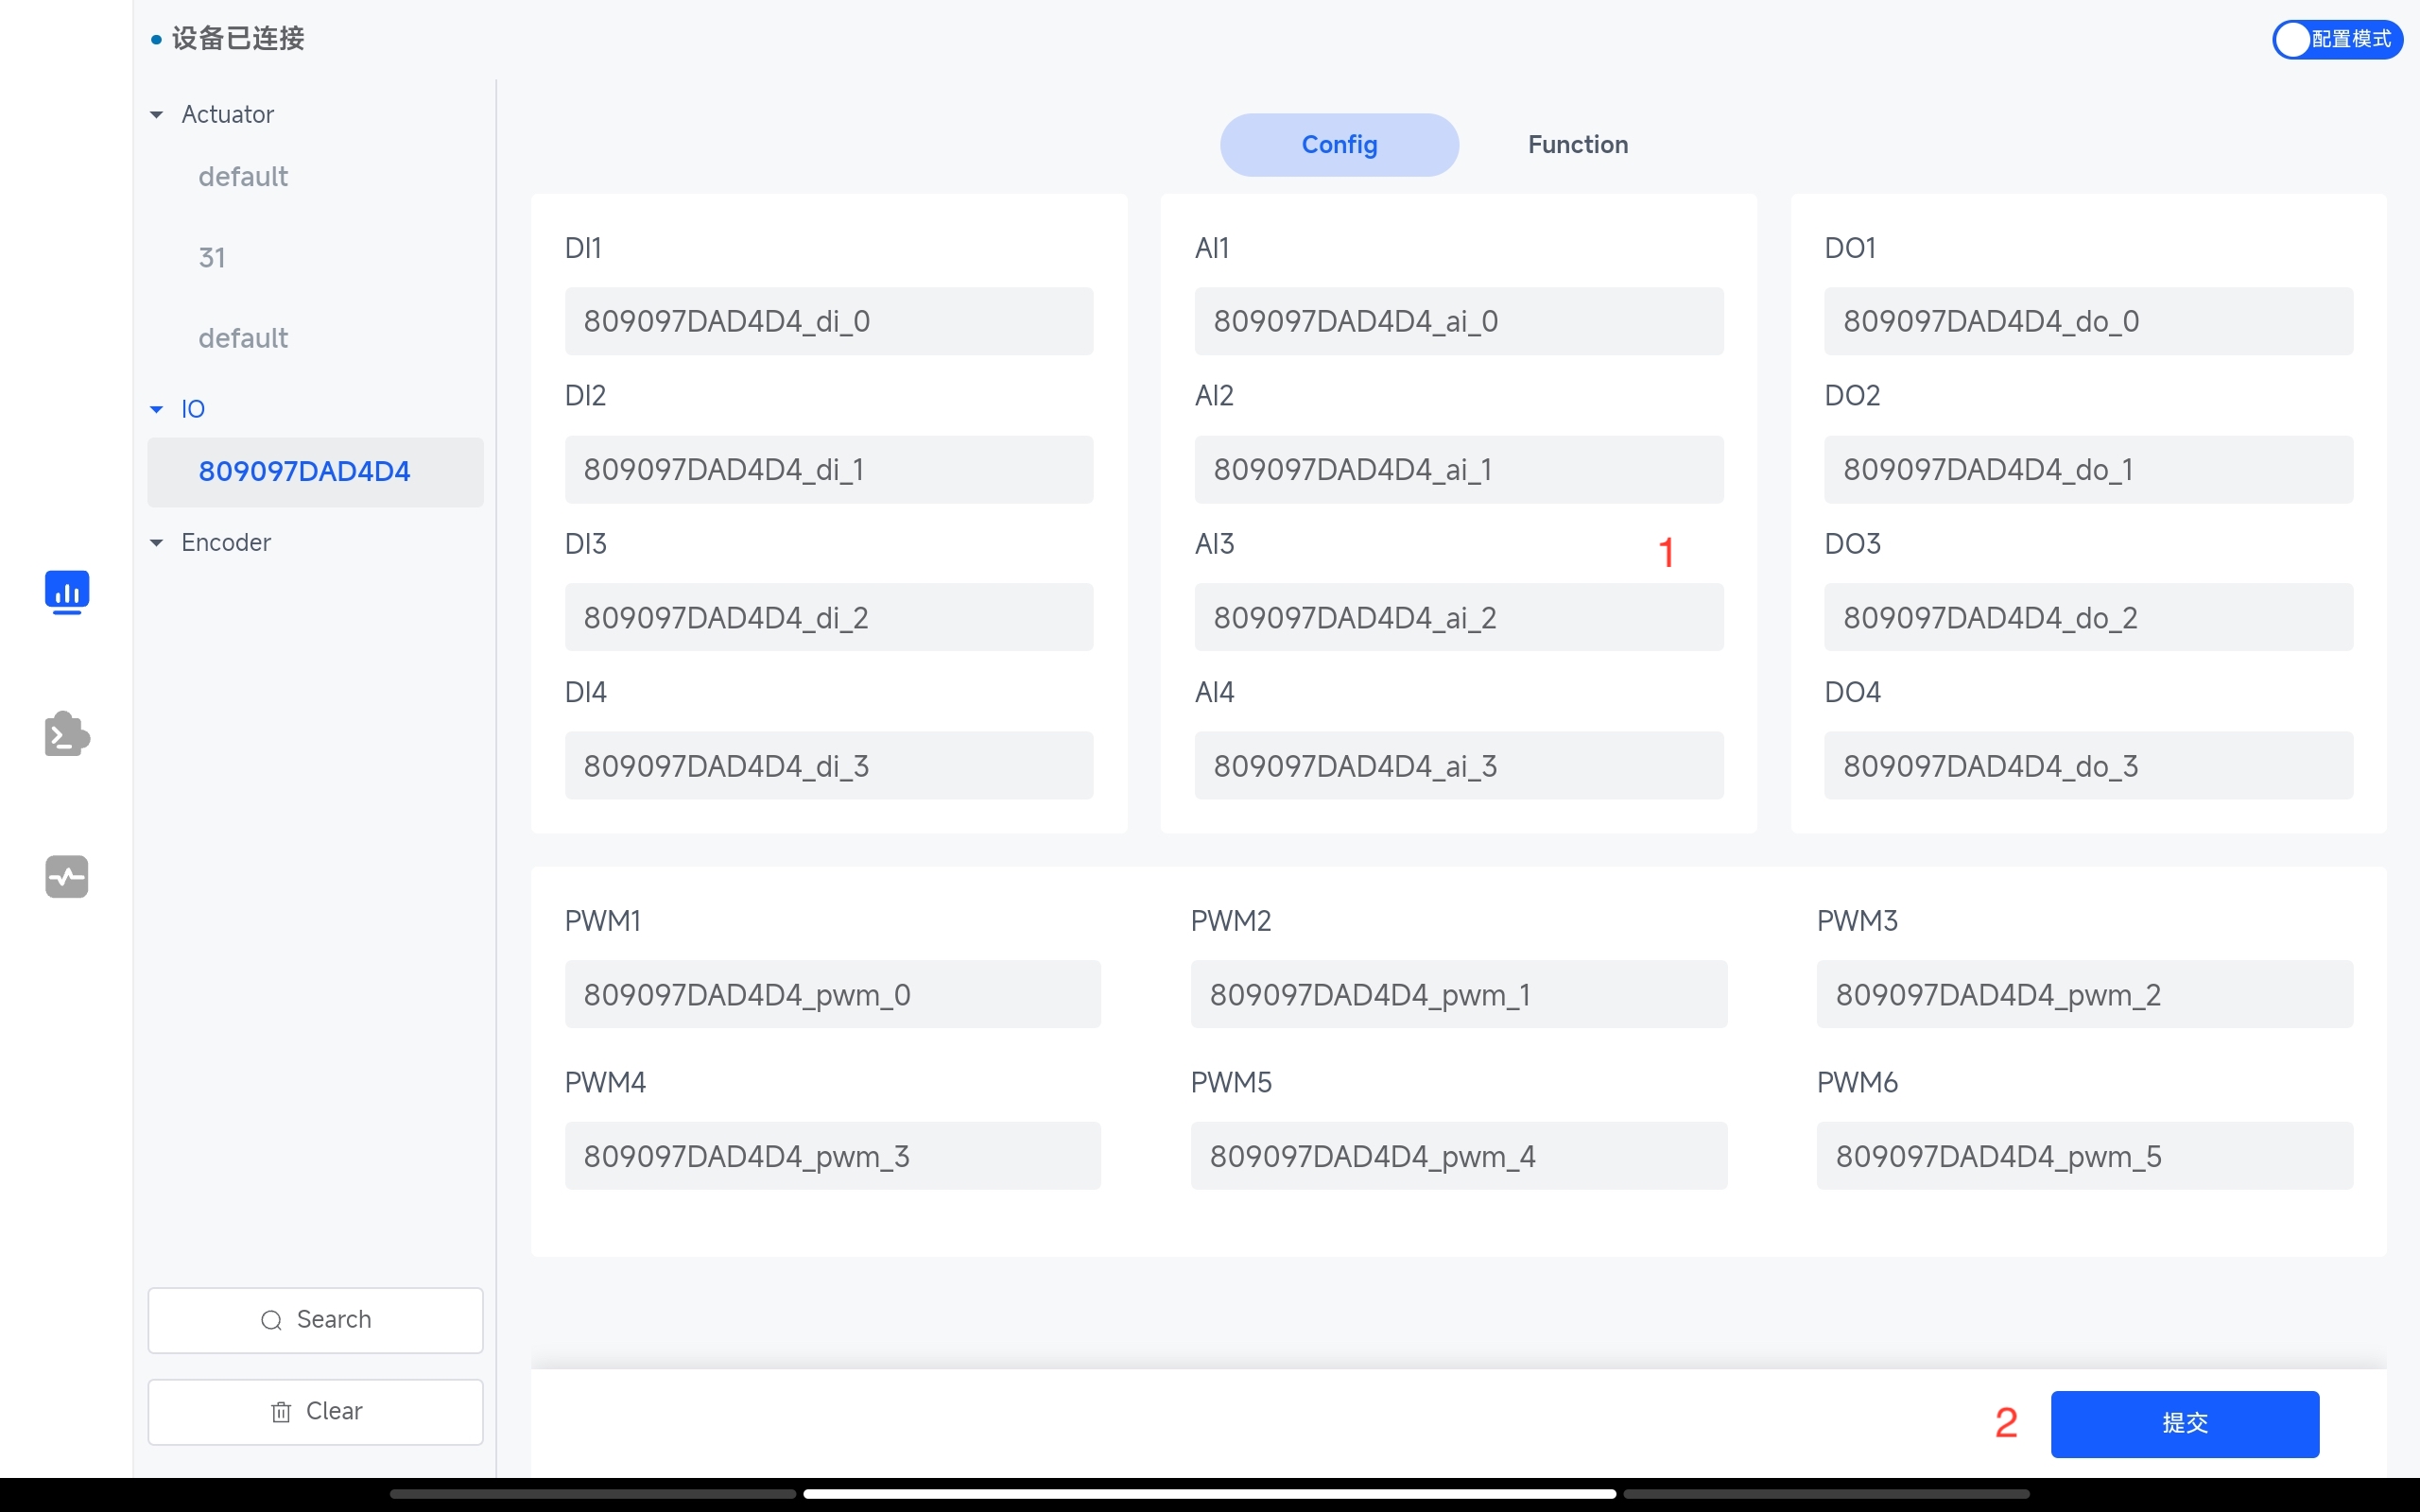
-
Set the name of IO.
-
Submit the new IO name.
IO Function Interaface
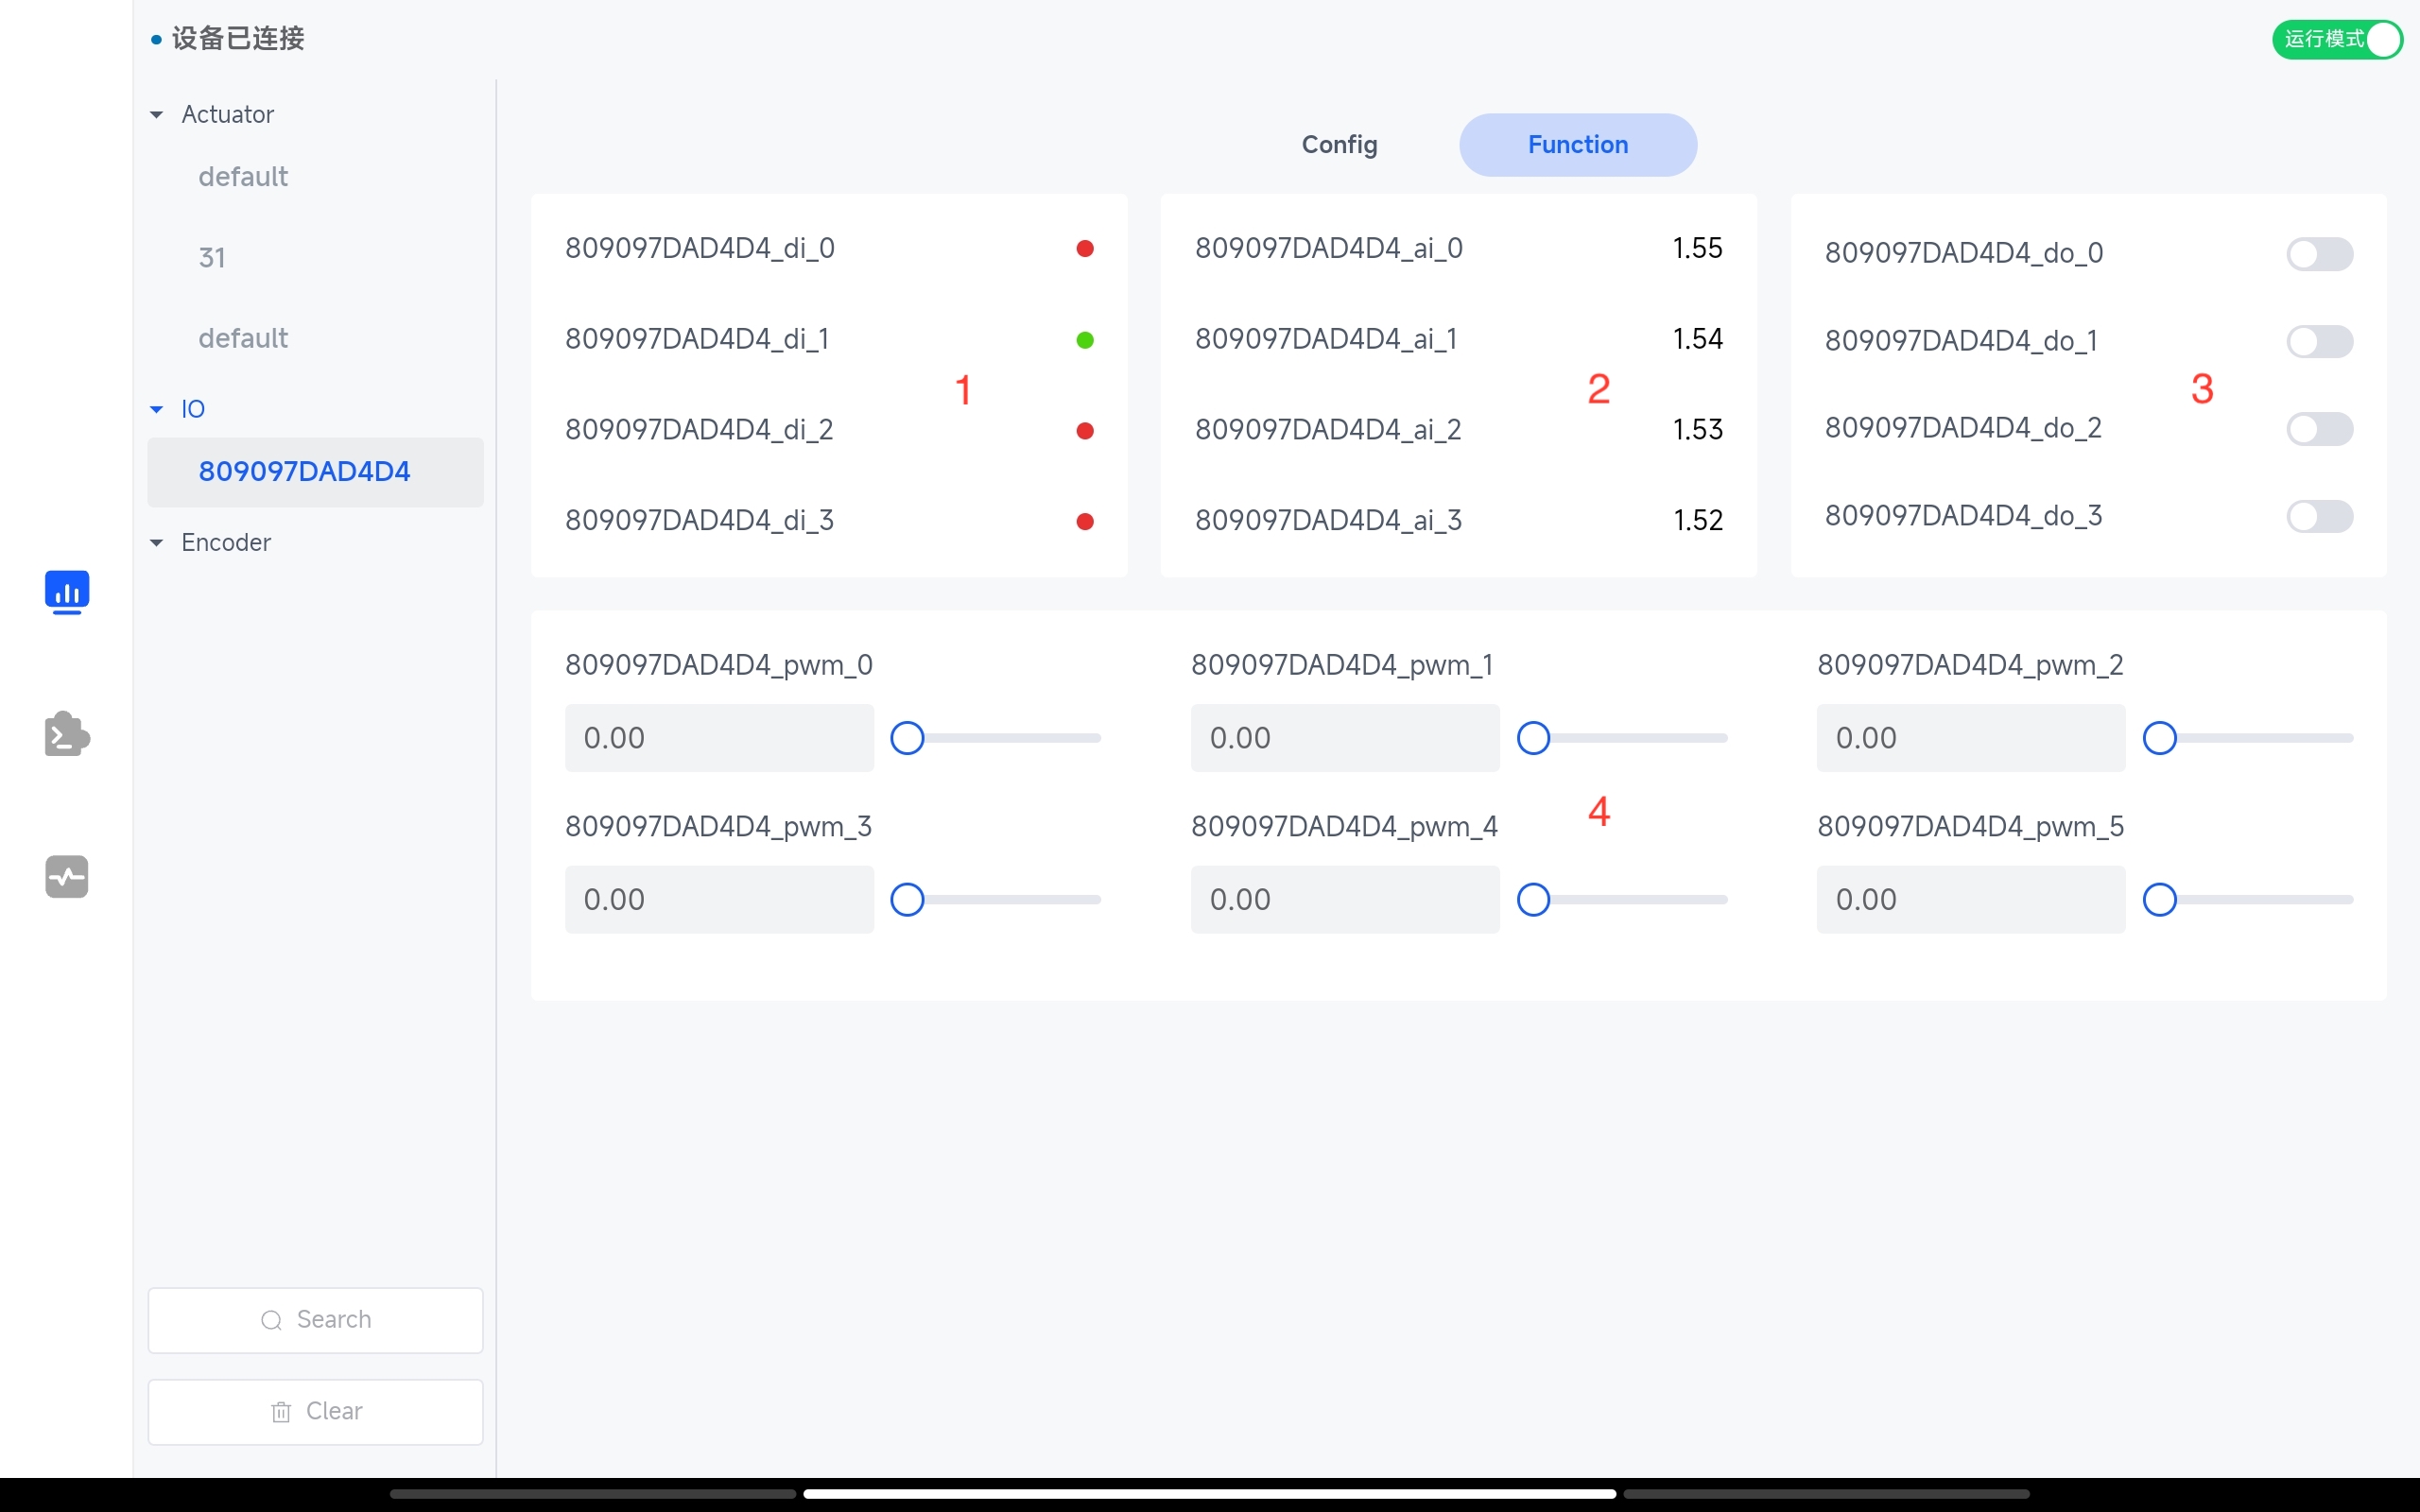
-
Digital input.
-
Analog input.
-
Digital output.
-
Pulse width modulation.
Programming Interface
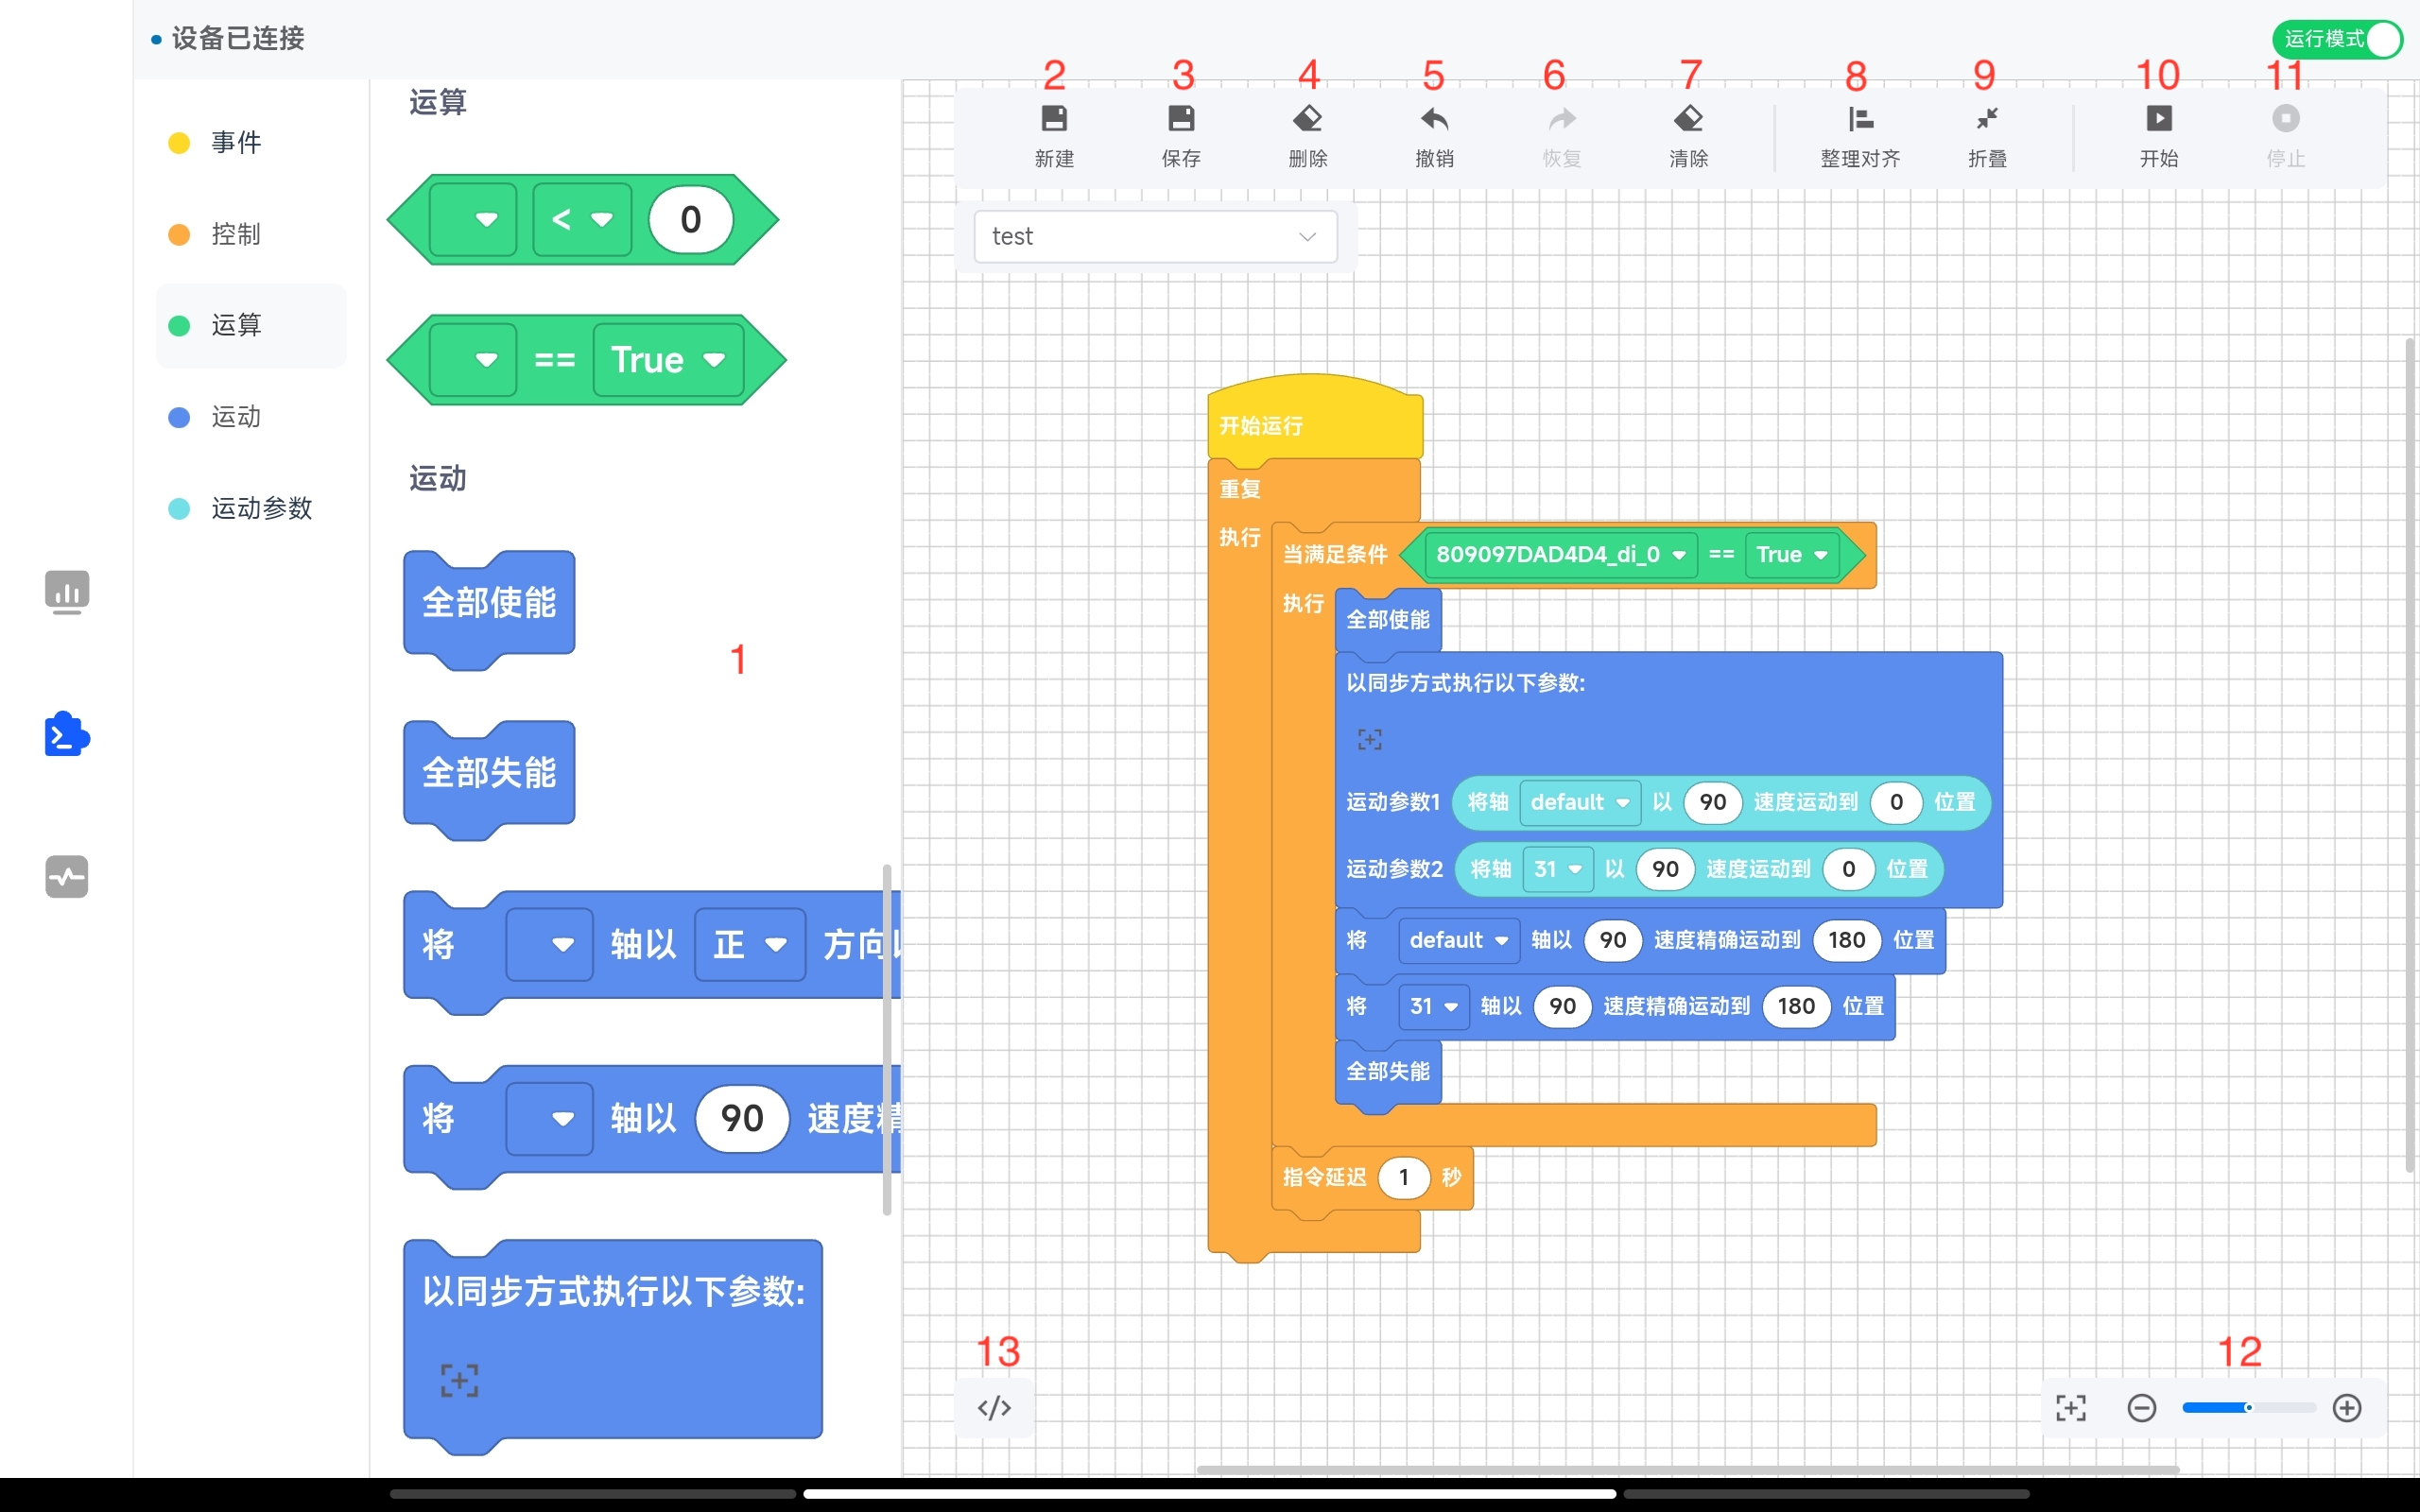
-
Drag area for programming instruction modules.
-
Create a new programming record.
-
Save the programming record.
-
Delete the programming record.
-
Undo operation.
-
Redo operation.
-
Clear the instruction modules in the workspace.
-
Align the instruction modules in the workspace.
-
Fold the instruction modules in the workspace.
-
Run the module instructions in the workspace.
-
Stop running the module instructions in the workspace.
-
Zoom in/out the workspace.
-
View Python code.
Clicking button 13 to view the Python code corresponding to the instruction module dragged into the workspace.
def main():
    while 1:
        while io_state('809097DAD4D4_di_0') == True:
            enable({"req":[{"id":"EC396A5D8634","enable_cmd":1},{"id":"48116B5D8634","enable_cmd":1},{"id":"4C451D519140","enable_cmd":1},{"id":"34D59DEBD724","enable_cmd":1},{"id":"341ED5549434","enable_cmd":1},{"id":"681201519140","enable_cmd":1},{"id":"30DD6A5D8634","enable_cmd":1}]})
            sync_motion({"req":[{"id":"EC396A5D8634","max_vel":90,"target_pos":0},{"id":"48116B5D8634","max_vel":90,"target_pos":0}]})
            move_abs({"req":[{"id":"EC396A5D8634","max_vel":90,"move_abs_cmd":1,"target_pos":180}]})
            move_abs({"req":[{"id":"48116B5D8634","max_vel":90,"move_abs_cmd":1,"target_pos":180}]})
            enable({"req":[{"id":"EC396A5D8634","enable_cmd":2},{"id":"48116B5D8634","enable_cmd":2},{"id":"4C451D519140","enable_cmd":2},{"id":"34D59DEBD724","enable_cmd":2},{"id":"341ED5549434","enable_cmd":2},{"id":"681201519140","enable_cmd":2},{"id":"30DD6A5D8634","enable_cmd":2}]})
        time.sleep(1)