PDS Instruction Manual
PNDbotics Studio (PDS) is a self-developed cross-platform graphical user interface (GUI) tool that can meet the needs of configuring, monitoring, and testing PSA actuators and modules. It is recommended that you use PDS throughout the development stage, especially when you need to plot or record monitoring data.
Before writing a new program, the scope can be used to ensure that all devices are correctly connected and the entire system is operating normally. It is of great significance for viewing feedback information on the real-time system and adjusting gains when developing or debugging new applications.
There are two ways to access PDS. You can download the corresponding software version according to different operating systems, or use the web version interface through a browser.
Instructions for Using the Web Version
Network Connection
Ensure that your computer is on the same network as the RCU or Adam. For specific methods, please refer to the product description of the corresponding product.
Web Access
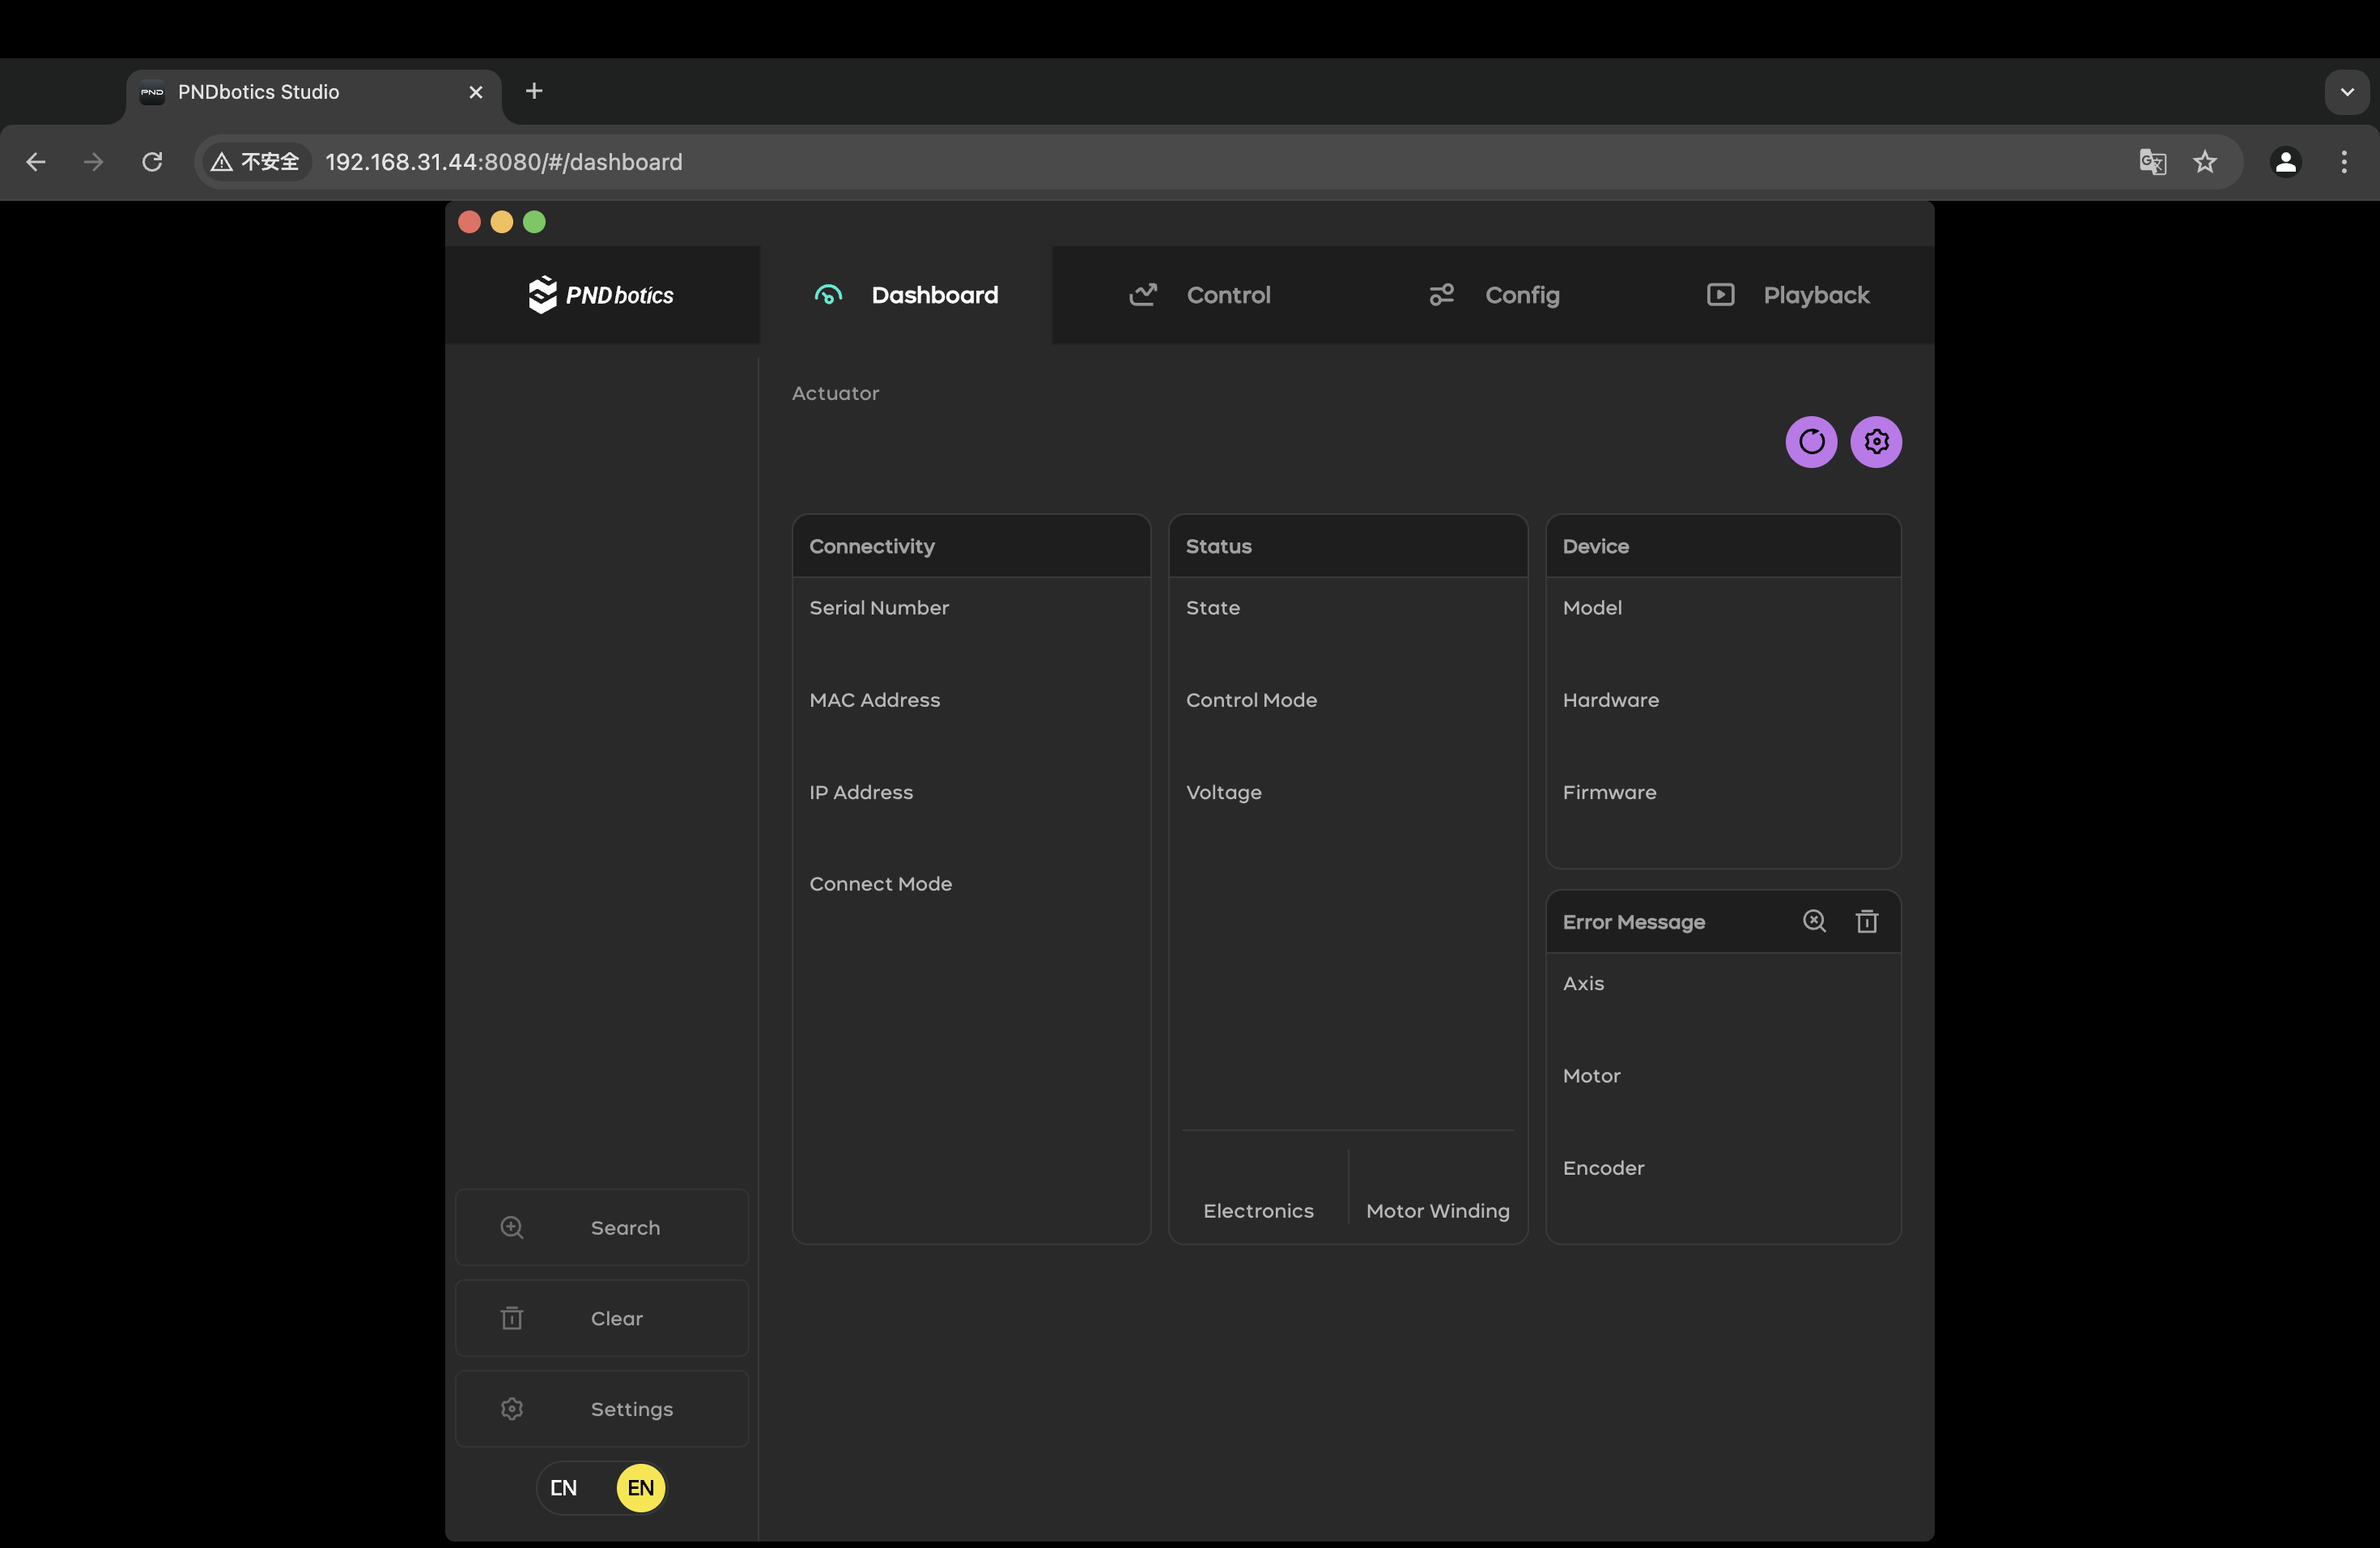
Launch any browser and enter the device IP address in the address bar (for the method of viewing the device IP, please refer to the product description of the product you purchased). The port is 8080. An example is as follows:
After the web version interface is successfully loaded, it will be shown as follows:
Instructions for Using the Client Version
PDS has currently been adapted to Windows, Linux, and Mac operating systems respectively. You can choose the corresponding software version according to your actual needs.
Windows
Linux
Mac
Tip
The Mac version of the PDS software is compatible with Intel processors and Apple M1 chips.
Installation Instructions
Windows (Only supports 64-bit operating systems of win7, win8, win10, and win11)
- Open the download file path and find the PDS software installation package.
- Double-click
PDS-xxx-win32-x64.exe.
Linux x64 Architecture
- Download
PDS-xxx-linux-x86_64.AppImage. - Open the terminal and enter the directory where
PDS-xxx-linux-x86_64.AppImageis located. - Grant execution permissions to the AppImage.
- Run it.
Linux arm 32-bit Architecture
AppImage
- Download
PDS-xxx-linux-armv7l.AppImage. - Open the terminal and enter the directory where
PDS-xxx-linux-armv7l.AppImageis located. - Grant execution permissions to the AppImage.
- Run it.
Linux arm 64-bit Architecture
AppImage
- Download
PDS-xxx-linux-arm64.AppImage. - Open the terminal and enter the directory where
PDS-xxx-linux-arm64.AppImageis located. - Grant execution permissions to the AppImage.
- Run it.
MacOS
- Double-click
PDS-xxx-darwin-x64.dmg/PDS-1.0.4-darwin-arm64.dmg. - Drag PDS to the folder.
- Double-click the icon in the Applications to open it.
Note
When installing an application on a Mac system, if you get a prompt saying "The application is damaged and cannot be opened", you can use the following operations to fix it:
1. Enable "Anywhere"
Open the Terminal and enter the following command:
Check the system settings: System Settings -> Privacy & Security -> Security. Check if the "Anywhere" option has been enabled.
2. Bypass notarization
Open the Terminal and enter the following command:
3. If the above operations still cannot solve the problem, try to turn off the System Integrity Protection (SIP).
Getting Started Guide
- Ensure that all actuators are powered on and connected to the local network.
- Start the application by double-clicking.
Menu list of the PAS series actuators:
- Device List: Displays the list of all devices currently connected to the Actuator, including actuators and control boxes.
- Search: Click this button, and the background will broadcast to the default IP 255.255.255.255 for 3 seconds, and then add the searched actuators to the device list.
- Clear: Clears the device list.
- Settings: Click this button to start the settings broadcast dialog box.
Settings Page:
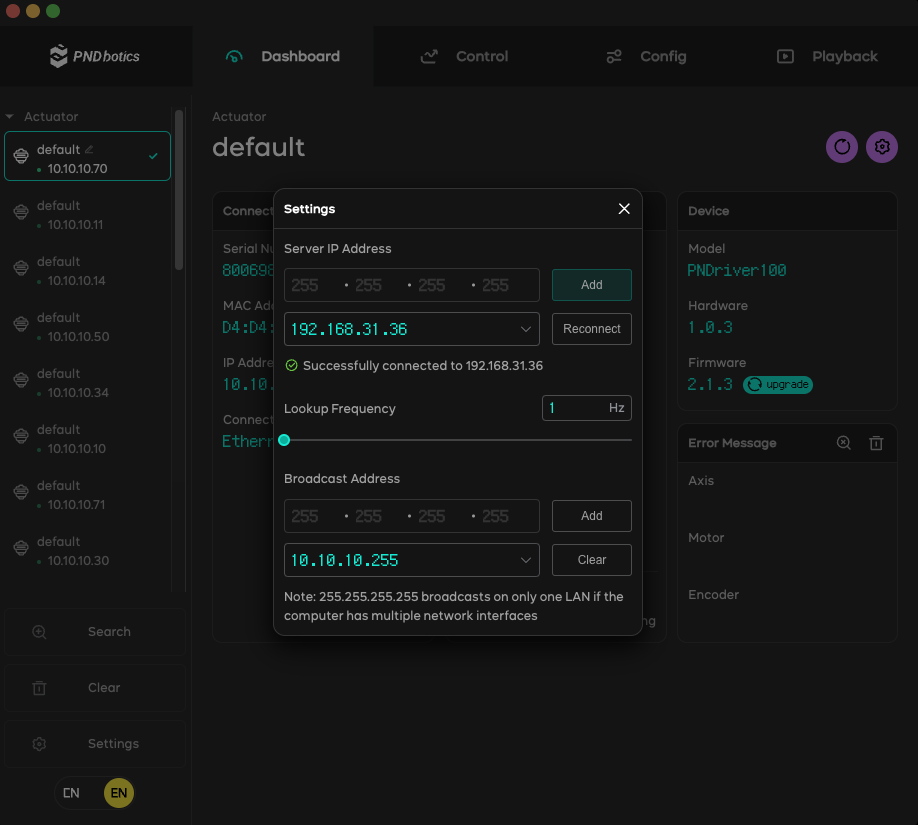
Settings on the Settings Page:
- Server IP Address: A drop-down menu used to select the server address. The "Add" and "Reconnect" buttons on the right can be used to add a server and reconnect to the server respectively.
- Lookup Frequency: The update rate of GUI feedback elements. It is recommended to set it within the range of 1 - 5Hz.
- Brodcast Address: A drop-down menu used to select the broadcast network address. The "Add" and "Clear" buttons on the right can be used to add and delete IPs respectively.
Actuator Status Display
- A green dot indicates that the device is online.
- A red dot indicates that the device is offline.
- Clicking on the device card indicates that the current device is selected.
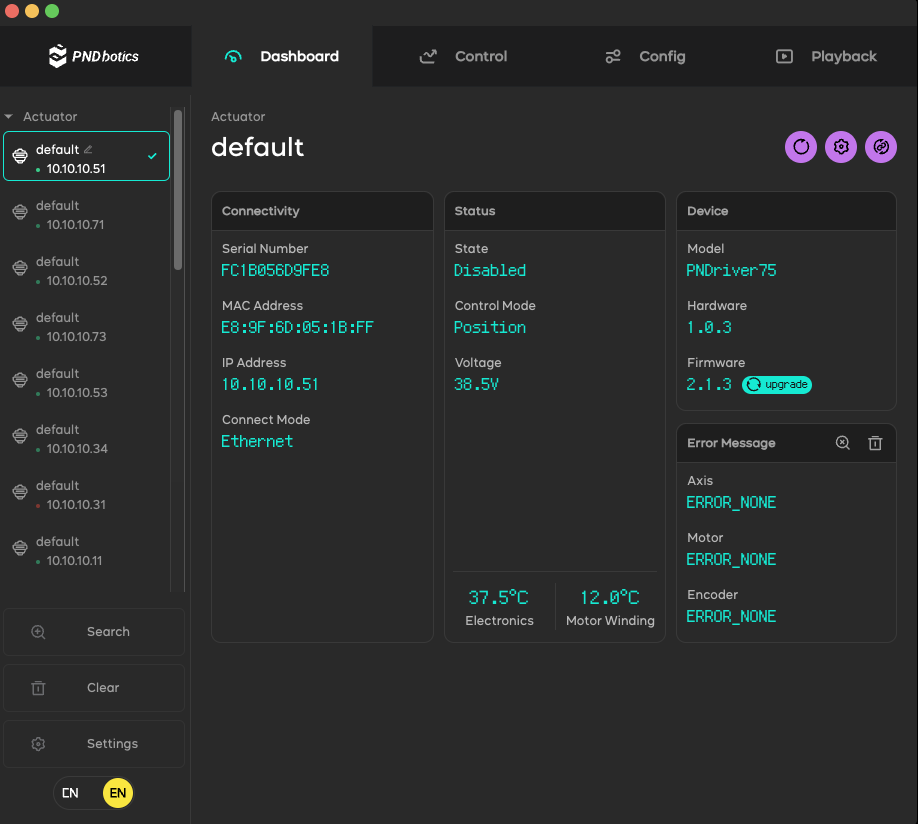
Dashboard Tab
The Dashboard tab can display general information about the actuator.
- Reboot
 : Function to restart the actuator.
 - Network Settings
 : Network configuration function.
 - Reconnect
 : Reconnect to the server and update the real-time data information of the actuator.
 - Connectivity: Network connection display bar
- Serial Number: Displays the actuator serial number.
- MAC Address: MAC address.
- IP Address: IP address.
- Connect Mode: Connection mode (Ethernet, Wifi).
- Status: Status bar
- State: Displays the current enabled state of the actuator (Able, Disabled).
- Control Mode: Control mode (Position, Velocity, Current).
- Voltage: Actuator voltage.
- Device: Device information display bar
- Model: Displays the actuator model number.
- Hardware: Hardware number.
- Firmware: Firmware number.
- upgrade: OTA upgrade.
- Error Message: Error information display bar
- Axis: Displays the actuator error information.
- Motor: Displays the motor error information.
- Encoder: Displays the encoder error information.
Click this![]() button, and when an error occurs in the actuator, the error information of the actuator will be displayed.
button, and when an error occurs in the actuator, the error information of the actuator will be displayed.
Click this![]() button to clear the actuator error and clear the error information on the current actuator's dashboard interface.
button to clear the actuator error and clear the error information on the current actuator's dashboard interface.
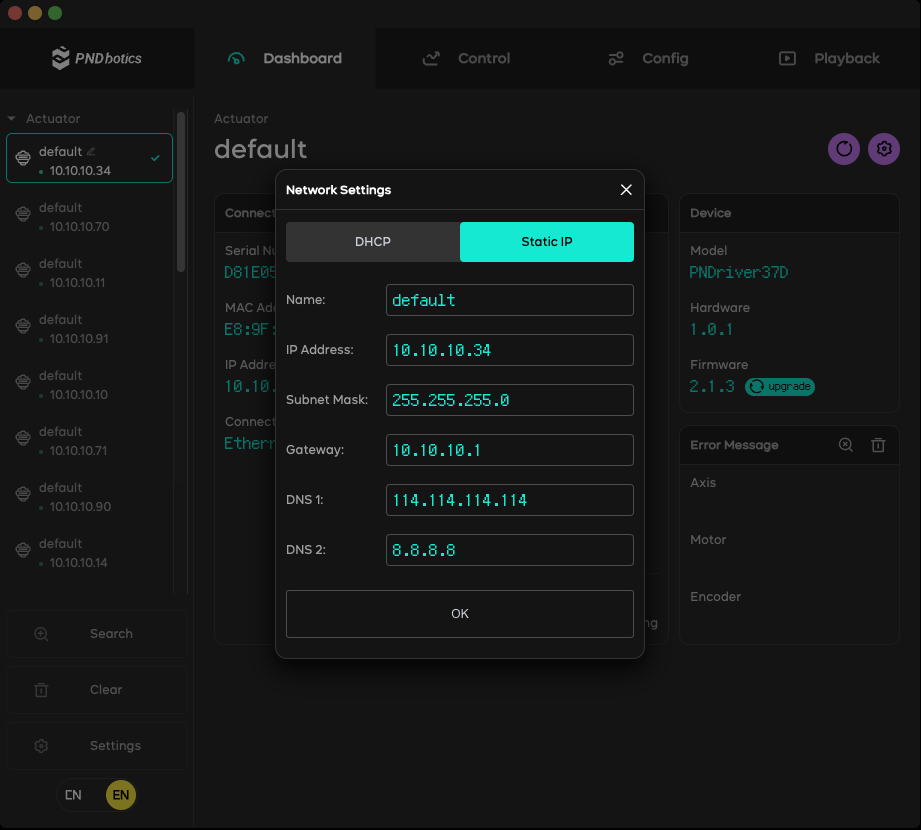
Actuator Network Settings
DHCP: Dynamic IP mode setting, set the actuator name Name, SSID, and Password.
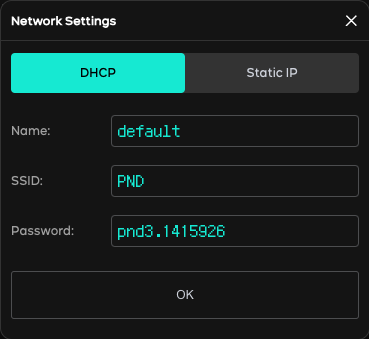
Static IP: Static IP mode setting, set the actuator name Name, IP Adderss: IP address, Subnet Mask: subnet mask, Gateway: gateway, DNS 1 and DNS2: dns_1 and dns_2 addresses.
Control Tab
The control tab can send position, velocity, and current commands to the actuator.
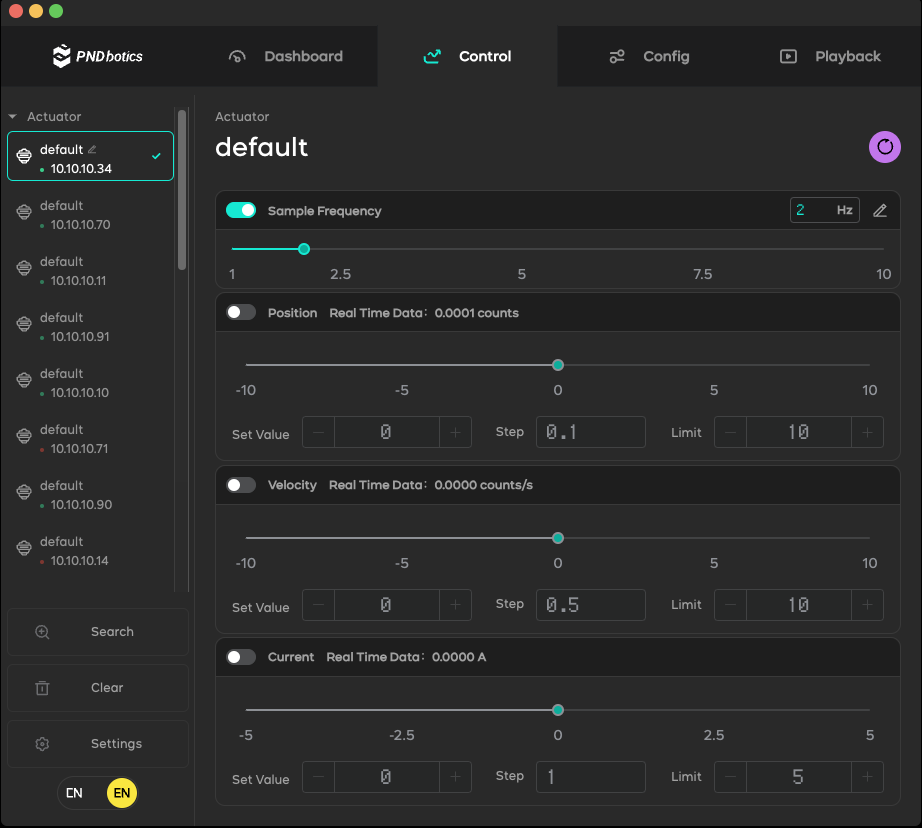
- Sample Frequency: Adjust the frequency of real-time data for Position, Velocity, and Current.
- Position: Can select position mode control for the current actuator.
- Velocity: Can perform velocity mode control on the current actuator.
- Current: Can perform current mode control on the current actuator.
- Click the Reset button in the upper right corner: Reset the parameters.
Configuration Tab
The configuration tab can set actuator parameters.
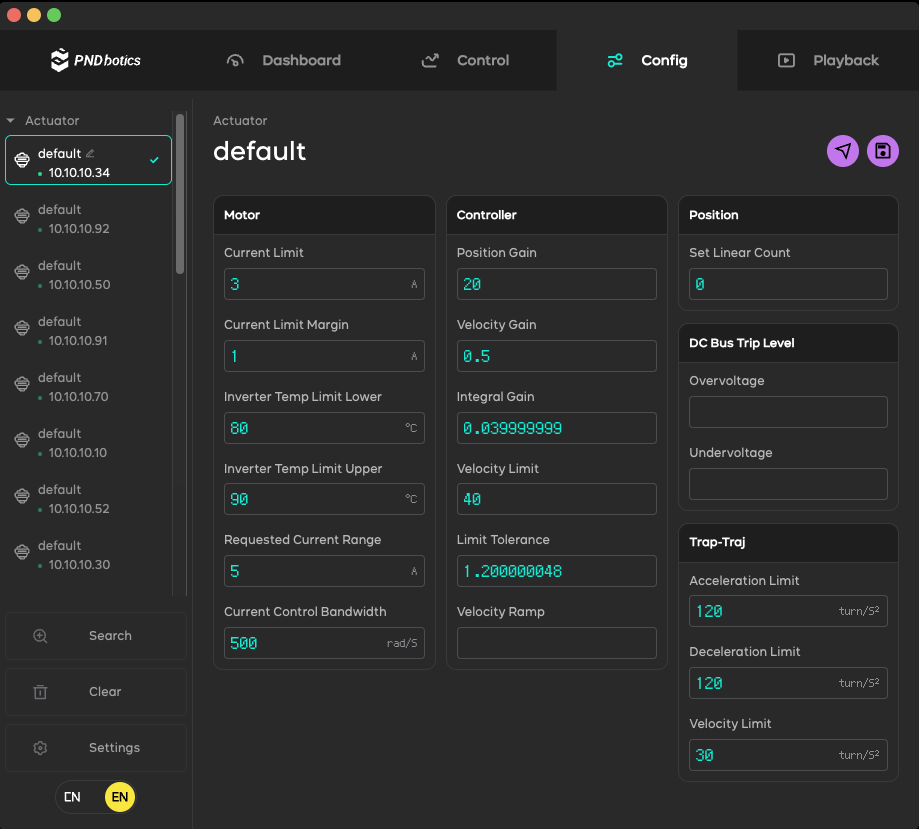
- Motor: Set parameters related to motor control.
- Controller: Set parameters related to controller control.
- Position: Set parameters related to position.
- DC Bus Trip Level: Set parameters related to bus voltage protection.
- Trap-Traj: Set parameters related to trapezoidal cloud top trajectory.
Send: Send the parameter setting commands to send the modified parameters to the actuator (the parameters in the actuator will be lost after a power-off reboot).
Save: Save the parameter setting commands to save the modified parameters to the actuator (the parameters in the actuator will be retained after a power-off reboot).